Clogged gutters cause real damage. Water overflows, rot sets in, and your foundation suffers. The fix is simpler than most people think. Gutter guards block debris before it builds up, saving you hours of cleaning and hundreds in repair costs. They work on almost every home and most types are made for DIY installation.
- Types of Gutter Guards
- 1. Mesh Gutter Guards
- 2. Micro-Mesh Gutter Guards
- 3. Reverse Curve (Surface Tension) Guards
- 4. Foam Gutter Guards
- 5. Brush Gutter Guards
- 6. Screen Gutter Guards
- Tools and Materials Needed
- Preparation Before Installation
- Step 1: Clean the Gutters First
- Step 2: Inspect for Damage
- Step 3: Check Gutter Pitch
- Step 4: Seal Any Leaks
- Step-by-Step Installation Process
- Step 1: Measure and Cut Your Guards
- Step 2: Position the First Panel
- Step 3: Clip or Screw Into Place
- Step 4: Continue Down the Gutter
- Step 5: Handle Downspout Areas
- Step 6: Check Your Work
- Step 7: Test With Water
- How to Install Gutter Guards on Different Gutter Types
- Common Mistakes to Avoid
- Maintenance Tips After Installation
- DIY vs Professional Installation
- Cost of Installing Gutter Guards
- Benefits of Installing Gutter Guards
- Conclusion
- FAQs
So if you want to know how to install gutter guards without hiring someone, you’re in the right place. This guide walks you through every step, from picking the right type to finishing the job safely. No experience needed.
Types of Gutter Guards
Before you buy anything, know what’s out there. Not all gutter guards are equal. The right type depends on your roof, tree coverage, and budget.
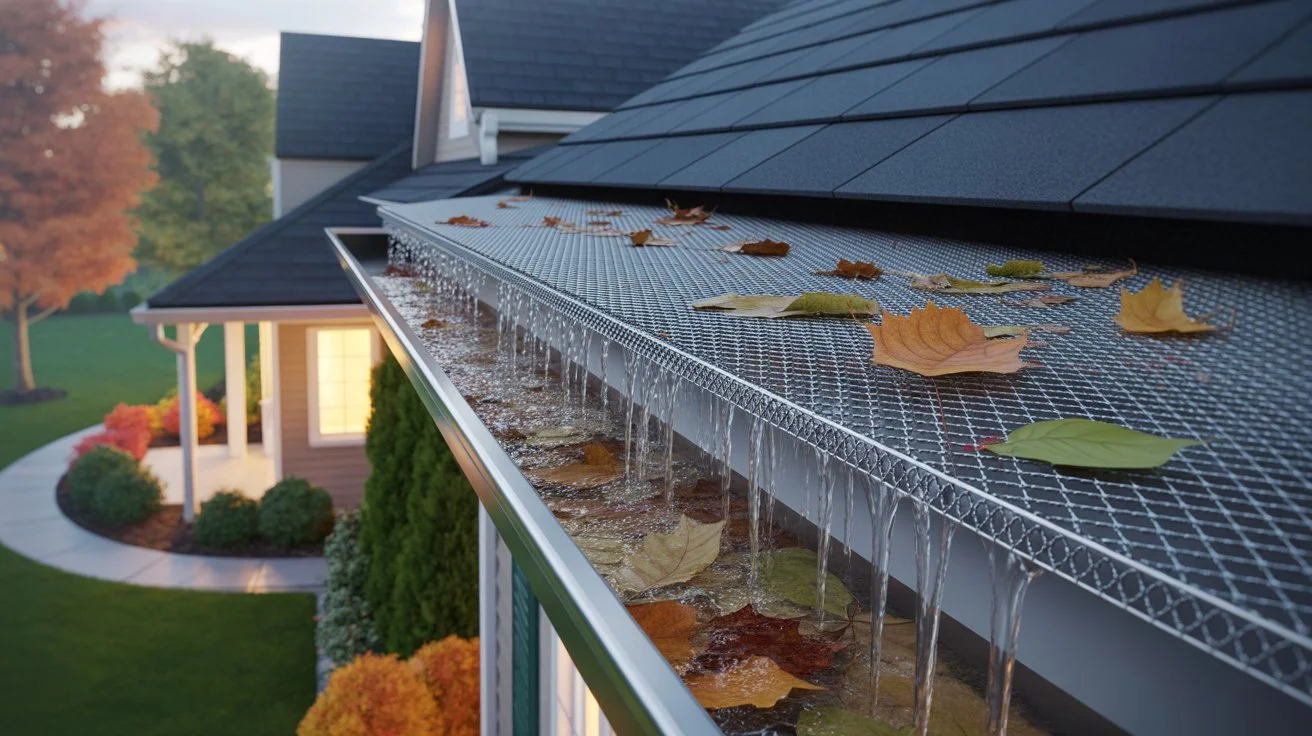
1. Mesh Gutter Guards
These are the most popular. A fine metal mesh sits over your gutter and blocks leaves, pine needles, and shingle grit. Water flows through easily. They work great in areas with heavy tree coverage.
2. Micro-Mesh Gutter Guards
Even finer than standard mesh. These block tiny debris like seed pods and roof sand. They cost more but offer the best performance in most climates.
3. Reverse Curve (Surface Tension) Guards
Water clings to the curved surface and drops into the gutter. Leaves fall off the edge. These are effective but can be tricky to install correctly.
4. Foam Gutter Guards
Foam inserts sit inside the gutter. Water soaks through. Debris sits on top and dries out. Easy to install, but foam can harbor mold and algae over time.
5. Brush Gutter Guards
Cylindrical brushes fit inside gutters. Leaves rest on top and blow away. Simple to put in but require frequent cleaning of the brushes themselves.
6. Screen Gutter Guards
Flat screens that snap over gutters. Very affordable and easy to install. Best for areas with large leaf debris, not pine needles.
Quick Tip: If you have large trees near your roof, go with a micro-mesh. If your area gets mostly large leaves, basic screen guards work fine.
Tools and Materials Needed
You don’t need a lot of gear. Here’s what to gather before you start:
Tools:
- Ladder (extension ladder or step ladder depending on roof height)
- Tape measure
- Tin snips or utility knife
- Work gloves
- Safety glasses
- Drill (for screw-on guard types)
- Garden hose (for testing water flow)
Materials:
- Gutter guards (enough to cover your total gutter length measure first)
- Screws or clips (often included with the guards)
- Caulk or gutter sealant (for any leaky joints found during prep)
- Gutter spikes or hangers (if your gutters need resetting)
How Much to Buy: Measure the total linear footage of all your gutters. Add 10% for cuts and overlap. Most gutter guard panels come in 4-foot sections.
Preparation Before Installation
Skipping prep is the number one reason gutter guard installation fails. Take your time here.
Step 1: Clean the Gutters First
This is non-negotiable. Any debris left inside will clog your new guards from below. Use a gutter scoop or your gloved hands to clear everything out. Flush with a garden hose. Check that water flows freely to the downspout.
Step 2: Inspect for Damage
Look for sagging gutters, rust spots, separated joints, or loose hangers. Fix all of these before installing guards. Guards installed on damaged gutters will fail fast.
Step 3: Check Gutter Pitch
Water needs to slope toward the downspout. The correct pitch is about 1/4 inch of drop for every 10 feet of gutter. Use a level to check. Re-hang any sections that are sagging or pitched the wrong way.
Step 4: Seal Any Leaks
Apply gutter sealant to any joints or seams that drip. Let it cure fully before moving to installation.
Thinking about skipping all this and just having someone do it right?
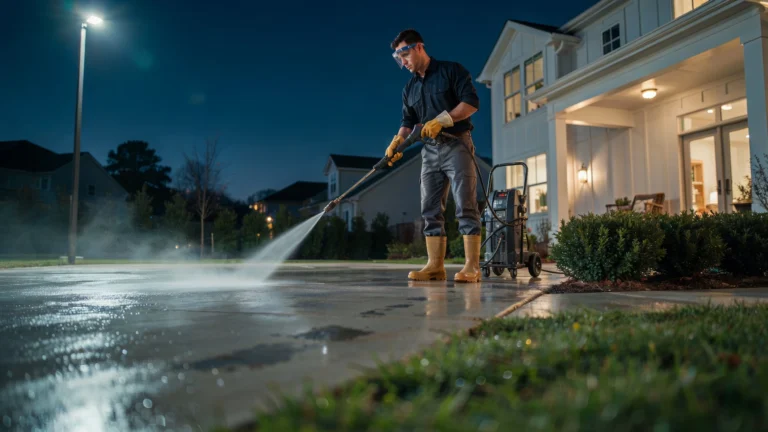
If you’re in Northern California, check out the best gutter guard installers in Tracy, CA at VJ Pressure Washing. They handle cleaning, inspection, and full gutter guard installation in one visit.
Step-by-Step Installation Process
This is the core of how to install gutter guards. Follow each step in order.
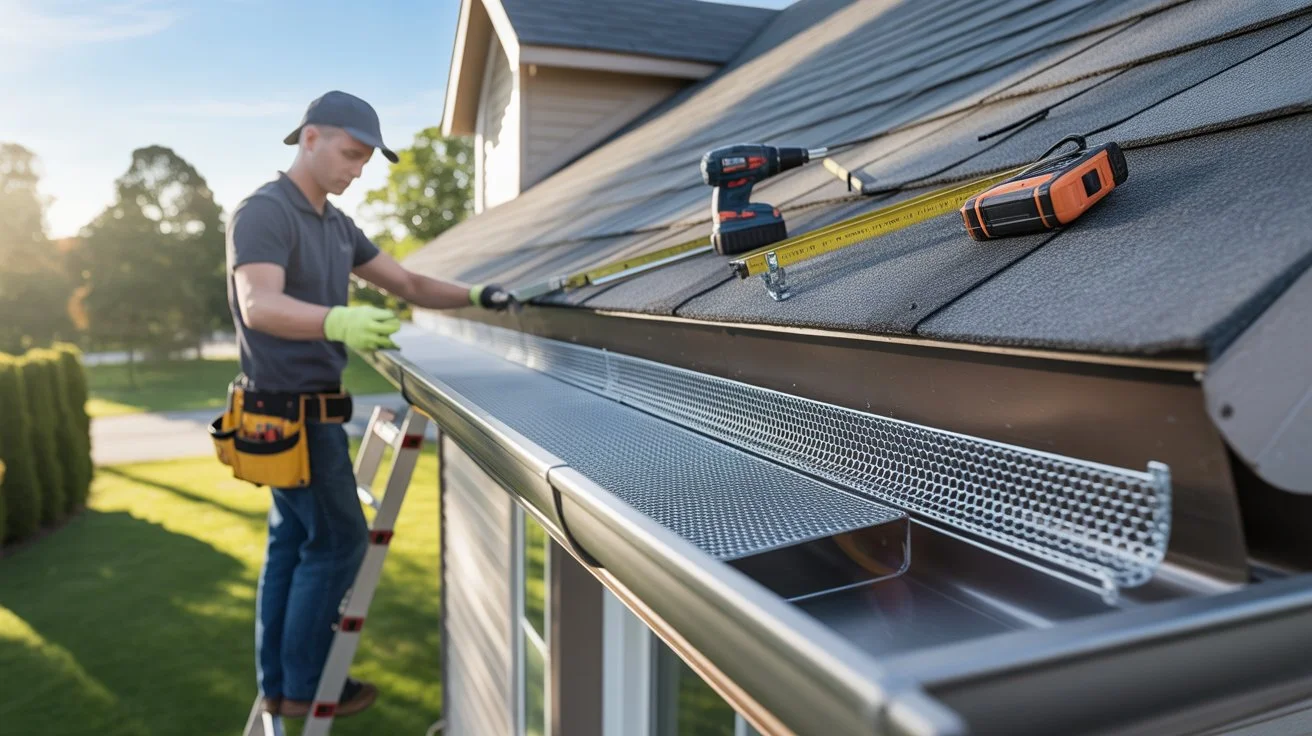
Step 1: Measure and Cut Your Guards
Lay your first gutter guard panel next to the gutter section you’re starting with. Use tin snips or a utility knife to cut it to length. Always wear gloves — cut metal edges are sharp. For corners, miter-cut the panels at 45 degrees so they meet cleanly.
Step 2: Position the First Panel
Slide one edge of the guard under the first row of roof shingles. This tucks the guard in place and creates a solid anchor point. Don’t lift or bend shingles aggressively — just slide under them gently.
Step 3: Clip or Screw Into Place
Most guards clip onto the outer lip of the gutter. Press down firmly until you hear or feel the clip snap. For screw-type guards, pre-drill pilot holes and fasten with the included screws. Don’t overtighten — you can crack plastic guards.
Step 4: Continue Down the Gutter
Work from one end to the other. Overlap each panel slightly — about half an inch — to prevent gaps. Gaps let debris in and defeat the purpose of the guard.
Step 5: Handle Downspout Areas
When you reach a downspout opening, cut your panel to stop just before it. Don’t cover the downspout entry. Water needs a clear path to drain. Some systems include a specific downspout cover — install it per the manufacturer’s instructions.
Step 6: Check Your Work
Walk along the roofline and press on each panel. It should feel solid, not wobbly. Check that no panels are sticking up higher than the roofline — this can cause water to overshoot the gutter in heavy rain.
Step 7: Test With Water
Use a garden hose to run water along the full length of the gutter. Watch for overflow, pooling on top of the guards, or water escaping at joints. Adjust any problem panels immediately.
How to Install Gutter Guards on Different Gutter Types
Not all gutters are the same. Here’s a quick adjustment guide:
K-Style Gutters (most common) These are the gutters with a flat bottom and decorative front face. Most gutter guard systems are designed for K-style. Installation follows the standard steps above.
Half-Round Gutters Common on older homes. They have a rounded U-shape. Half-round gutters need special guards designed for that profile. Standard clip-on guards won’t fit properly.
Box Gutters These are built into the roofline and are less common. Gutter screen installation on box gutters usually requires professional help because of the custom sizing involved.
Common Mistakes to Avoid
Knowing what not to do saves you a second trip up the ladder.
- Installing Over Dirty Gutters This is the biggest mistake. Guards trap debris below them if the gutter isn’t clean first. You’ll end up with a clog inside your gutter and no way to see it.
- Covering Downspouts Always leave downspout entries clear. Blocking them causes backups and roof damage.
- Using the Wrong Guard for Your Tree Coverage Mesh guards won’t stop pine needles. Screen guards won’t stop seed pods. Match the guard type to what falls on your roof.
- Not Overlapping Panels Each panel must slightly overlap the next. Skipping this leaves gaps where debris enters.
- Skipping Safety Precautions Never work on a wet or icy roof. Use a stable ladder. Always have someone nearby when working at height.
- Forcing Guards Under Shingles Slide gently. If a shingle cracks, you have a new leak.
Maintenance Tips After Installation
Gutter guards reduce maintenance they don’t eliminate it. Plan for a check-up twice a year.
Spring Check After pollen and seed season. Brush off anything sitting on top of the guards. Flush with a hose.
Fall Check After the main leaf drop. Remove any leaf piles sitting on top of mesh or screen guards. Check all clips are still secure.
After Storms High winds can shift panels. Inspect after any major storm and re-clip anything that moved.
Signs That Guards Need Attention:
- Water overflowing over the front of the gutter
- Visible debris packed on top of the guards
- Sagging or bent panels
- Water stains on your siding or foundation
Gutter cover installation does most of the heavy lifting. But a 15-minute inspection twice a year keeps the system working for years.
DIY vs Professional Installation
Here’s an honest breakdown to help you decide.
| Factor | DIY | Professional |
| Cost | Lower (materials only) | Higher (labor + materials) |
| Time | Half a day to full day | A few hours |
| Skill needed | Low to moderate | N/A |
| Tools required | Ladder, snips, drill | N/A |
| Risk | Working at height | Minimal (they’re insured) |
| Quality | Depends on effort | Consistent |
When DIY makes sense:
- Single-story home
- You’re comfortable on a ladder
- Your gutters are already in good shape
- You have a free weekend
When to hire a pro:
- Multi-story home or steep roof
- Gutters need repair before installation
- You want a warranty on the work
- You don’t own a tall ladder
For homeowners in Northern California, VJ Pressure Washing offers professional gutter guard installation with full gutter cleaning included. A single visit handles everything so you don’t have to climb a ladder at all.
Cost of Installing Gutter Guards
Costs vary by guard type, gutter length, and labor.
DIY Cost Estimate:
| Guard Type | Cost Per Linear Foot | 150 ft Home (Approx.) |
| Foam inserts | $1 – $2 | $150 – $300 |
| Screen guards | $0.50 – $1.50 | $75 – $225 |
| Mesh guards | $1.50 – $3.50 | $225 – $525 |
| Micro-mesh guards | $2 – $4 | $300 – $600 |
| Reverse curve | $3 – $6 | $450 – $900 |
Professional Installation: Add $1 to $3 per linear foot for labor. Total installed cost for a typical home runs $300 to $1,500+ depending on guard type and complexity.
Is It Worth It? The average homeowner spends $100 to $250 per year on professional gutter cleaning. Gutter guards pay for themselves in 2 to 5 years and prevent expensive water damage that can cost thousands to repair.
Benefits of Installing Gutter Guards
Here’s why gutter guard installation is a smart long-term investment:
- Fewer Cleanings You go from cleaning gutters 3 to 4 times a year down to once or twice sometimes less.
- Prevents Water Damage Overflowing gutters damage fascia boards, soffits, foundations, and landscaping. Guards keep water moving where it should.
- Reduces Pest Nesting Stagnant water and debris attract mosquitoes, birds, and rodents. Covered gutters cut down on nesting opportunities.
- Prevents Ice Dams (in cold climates) Clogged gutters hold water that freezes and backs up under shingles. Guards help water drain before it freezes.
- Extends Gutter Life Debris traps moisture and speeds up rust. Guards keep gutters drier and cleaner, extending their lifespan.
- Peace of Mind You’re not worrying about cleaning gutters every few months or wondering if they’re clogged mid-rainstorm.
Conclusion
Learning how to install gutter guards is one of the best home improvement moves you can make. The process is straightforward when you take it step by step. Clean first. Inspect. Measure carefully. Install with proper overlaps. Test with water.
The right gutter guard installation protects your home for years with minimal upkeep. Whether you go DIY or hire a professional, the investment pays for itself quickly in saved cleaning costs and avoided water damage.
If you’re in the Tracy, CA area and want it done right the first time, VJ Pressure Washing has you covered with professional installation and full gutter cleaning included. Contact us today.
FAQs
Can I install gutter guards myself?
Yes. Most gutter guards are designed for DIY installation. Single-story homes are straightforward. Multi-story homes are better left to professionals for safety reasons.
Do gutter guards work on all gutter types?
Most guards are made for standard K-style gutters. Half-round gutters need specially designed guards. Always check compatibility before buying.
How long does gutter guard installation take?
For an average home, plan 4 to 8 hours for a DIY job. Professionals can do it in 2 to 3 hours.
Do gutter guards eliminate cleaning completely?
No. They reduce it significantly, but you still need to check and clean twice a year. Debris can still sit on top of guards and block water flow.
What is the best type of gutter guard?
Micro-mesh guards perform best overall. They block the widest range of debris and allow water to pass freely. They cost more but outperform cheaper options.
Will gutter guards void my roof warranty?
Some do if they’re screwed into the shingles. Clip-on guards that slide under the first course of shingles generally don’t affect roof warranties. Always read your roof warranty before installing.
How do I know if my gutter guards are working?
Run a hose along your gutters during or after rain. Water should flow into the downspout, not over the front of the gutter. Check twice a year for buildup on top.
Are gutter guards worth the money?
For most homeowners, yes. They save on cleaning costs, prevent damage, and reduce the risk of climbing a ladder multiple times a year.