
How to Clean Roof Shingles the Right Way (Step-by-Step Guide)
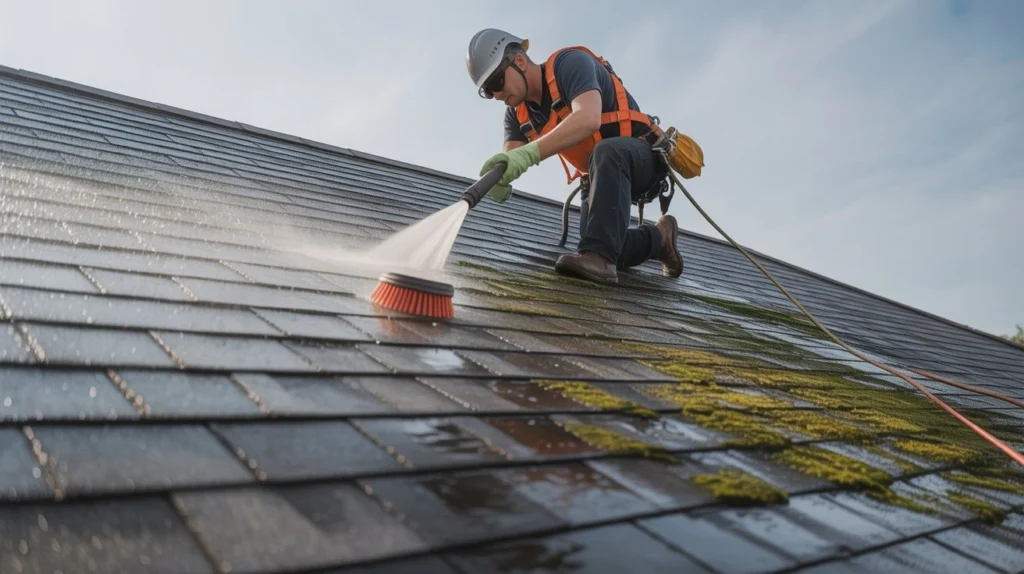
Your roof takes a beating every single day. Rain, wind, heat, and moisture all leave their mark over time. Algae, moss, and black streaks are not just ugly. They actually eat away at shingles and cut your roof’s life short. Cleaning your roof is not optional if you want to protect your home investment. Knowing how to clean roof shingles the right way makes a real difference. Do it wrong and you can crack shingles, void warranties, or cause leaks. Do it right and your roof can look brand new and last years longer. This guide covers everything from tools to techniques, so you get it right the first time. What Are Roof Shingles and Why Do They Get Dirty? Roof shingles are layered panels that protect your home from rain and weather. Most are made from asphalt, though wood, slate, and metal shingles also exist. Asphalt shingles are the most common in the U.S. Over time, shingles collect: Algae (Gloeocapsa magma) — causes those dark black streaks you see on roofs Moss — holds moisture against shingles and causes rot Lichen — bonds tightly to shingles and is hard to remove Dirt and debris — blocks drainage and traps moisture All of these shorten your roof’s lifespan if left untreated. Common Problems Found on Roof Shingles Before you start shingles cleaning, know what you are dealing with. Different stains need different approaches. Black Streaks This is algae growth. It spreads fast in humid climates. It feeds on the limestone filler in asphalt shingles. Green Moss Moss grows thick on shaded, damp areas of your roof. It lifts shingle edges and lets water sneak underneath. Lichen Patches Lichen looks like grey or green crusty patches. It actually bonds into the shingle surface and is the hardest to remove. Granule Loss You may notice bare spots or granules in your gutters. This is a sign the shingles are aging and need gentle cleaning not harsh scrubbing. Mold and Mildew Common in rainy or humid regions. Mold does not just look bad. It can spread to your attic if left unchecked. Tools and Materials Needed for Roof Cleaning Having the right gear saves time and protects your shingles. Here is what you need before starting. Equipment: Garden hose with adjustable nozzle Low-pressure sprayer or pump sprayer Soft-bristle brush (long handled) Ladder with standoff stabilizer Safety harness and rope Non-slip rubber-soled shoes Cleaning Solutions: Oxygen bleach (sodium percarbonate) — roof-safe and eco-friendly Diluted chlorine bleach solution (1 part bleach to 3 parts water) Commercially made roof cleaner (look for “shingle-safe” on the label) Dish soap as a surfactant to help solution spread Protective Gear: Safety goggles Chemical-resistant gloves Old clothes you do not mind staining Avoid wire brushes or metal tools. They scratch and damage shingles badly. Safety Tips Before Cleaning Roof Shingles Roof work is one of the most dangerous DIY jobs. Falls cause serious injuries every year. Do not skip these steps. Check the weather first. Never clean a wet or damp roof. Work on a dry, overcast day. Direct sun causes cleaning solutions to dry too fast. Use a proper ladder. Set it on solid ground. Use a ladder stabilizer so it does not rest on the gutters. Wear a safety harness. Attach it to a roof anchor. One slip can be fatal. This is not optional. Wet down plants below. Cleaning solutions can kill grass and shrubs. Wet them down before you start and rinse them after. Never walk on wet shingles. Wet shingles are extremely slippery. Work from the ladder when possible. Know your limits. Steep roofs, two-story homes, or large roofs are not beginner DIY jobs. If you are unsure, it is smarter to call a pro. If you live in the Tracy, California area, VJ Pressure Washing offers a trusted roof cleaning service Tracy CA that handles all the safety and hard work for you. No risk, no hassle. Step-by-Step Guide on How to Clean Roof Shingles Here is the full process for how to clean roof shingles safely and effectively. Step 1: Inspect the Roof First Walk around your home and look at the roof from the ground. Use binoculars if needed. Spot where the moss, algae, or stains are concentrated. Check for missing, cracked, or curling shingles. Do not clean a structurally damaged roof fix it first. Step 2: Clear Debris Off the Roof Use a leaf blower or soft broom to clear leaves, twigs, and loose debris. Always work from the peak down toward the gutters. Never blow debris under shingles. Step 3: Protect Surrounding Plants and Surfaces Wet down all plants, grass, and garden beds below the roofline. Cover sensitive shrubs with plastic sheeting if they are close to the house. Step 4: Mix Your Cleaning Solution For a basic DIY mix: 1 gallon of water 1 quart of household bleach (5.25% sodium hypochlorite) 1/4 cup of dish soap For an eco-friendly option, use oxygen bleach mixed per package directions. Let it dissolve fully before applying. Step 5: Apply the Solution Use a low-pressure pump sprayer. Start at the bottom of the affected area and spray upward. This prevents the solution from running under shingles. Let it soak for 15 to 20 minutes. Do not let it dry on the shingles. Step 6: Rinse Gently Use a garden hose with a standard nozzle. Rinse from the top down. Use low pressure only. High pressure damages shingles. Let the water carry the dead algae and moss off naturally. Step 7: Repeat If Needed Heavy moss or lichen may need a second treatment. For stubborn lichen, use a soft-bristle brush with light, downward strokes. Never scrub across shingles. That is the full breakdown of how to clean roof shingles safely. Take your time at each step. Soft Washing vs Pressure Washing Roof Shingles This is one of the most debated topics in roof care. Here is the honest answer. Soft Washing Soft washing uses low water pressure (around 100 PSI or less) combined