
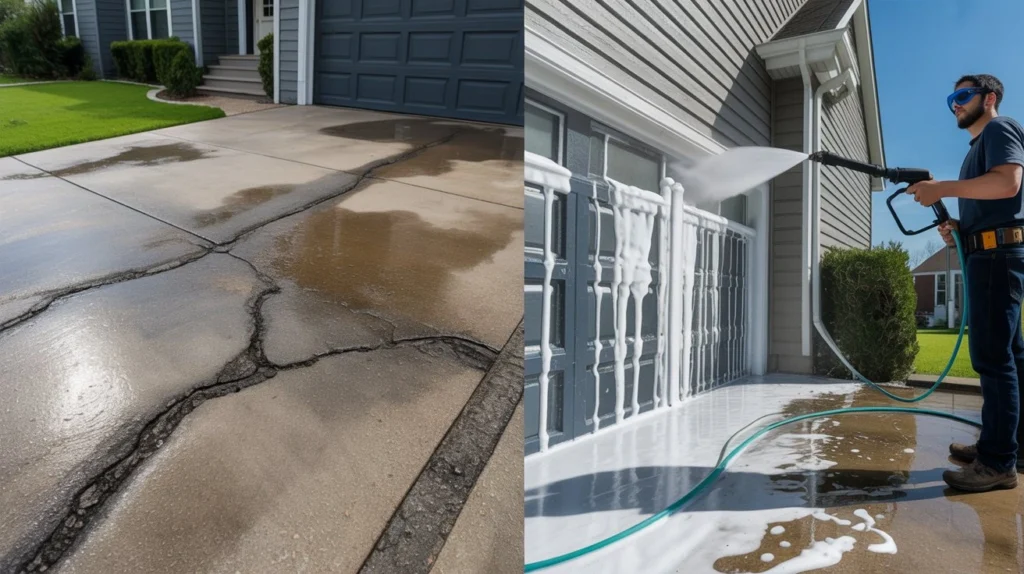
What chemical is used for house washing?
In the pressure washing industry, one of the major questions we get requested each day is, what chemical do you use? There isn`t simply one solution for that query due to the fact there are numerous distinctive chemical compounds used relying on what we’re cleaning, however the major one with the aid of using a long way is sodium hypochlorite. For years this became visible as an extremely taboo situation due to the fact 9 instances out of 10, “bleach” will be the time period used, and even as sodium hypochlorite is the lively element in bleach, don`t anticipate us to spray Clorox for your home. What are detergents? Detergents are regularly used as a synonym for cleaning soap and cleaners however they’re different. A detergent is an artificial combination of chemical compounds particularly formulated for cleaning. This is why you`ll discover many detergents which are designed to clean one material very well, along with laundry detergent for fabrics. Soaps are crafted from natural components like fats and oils, making them suitable for general exterior house soft wash tracy ca. However, they are often less powerful than detergents when tackling tough dirt, mold, and algae. While soaps can be the more eco-friendly choice, this is not always guaranteed. What is sodium hypochlorite? Without getting too technical, sodium hypochlorite is the salt shape of hypochlorite, that’s a strong and risky and consequently fallacious to be used through itself, after being become its salt shape, that’s a brine dissolving and turning the strong right into a liquid for its a couple of applications. Once on this liquid shape, it absorbs into the growth and denatures the proteins in organics, and breaks them down. How to Use Sodium Hypochlorite Safely? It is a sturdy cleaner and stain remover. But at VJ Pressure Washing, we always apply it carefully to protect your home’s surfaces and surrounding areas. 1:The Chemical Process Sodium hypochlorite breaks down natural dependents like mold, algae, and mildew. It kills them with the aid of converting their mobileular structure. That`s why it`s so true at getting rid of these difficult inexperienced and black stains on roofs and siding. It`s an incredible siding purifier. Safe Use in Soft Washing For sensitive surfaces like vinyl siding, painted areas, and roofs, tender washing is best. This approach makes use of low-pressure water with a vulnerable sodium hypochlorite solution. Usually, it`s 1-2% for siding and 3-5% for roofs. The chemical does the difficult work, sitting at the surface to kill the growth. Then, a mild rinse washes it away. This avoids the excessive strain which can harm fragile materials. Please don`t make the solution too sturdy, or it may motivate harm or discoloration. Always moist close by plant life and grass earlier than making use of the answer, and rinse them properly in a while to maintain them safe. Understanding Other Effective and Safe Cleaning Agents Besides sodium hypochlorite, different chemical substances are utilized in pressure washing. Each has its benefits. 1:Oxalic Acid This is specifically for putting off rust and brightening timber. It`s a milder acid than a few commercial cleaners. It could make weathered timber decks and fences appear new again. 2:Citric Acid This is a green option. It works nicely for mineral stains, rust, and a few natural growth. It`s frequently used on concrete. It`s a terrific preference in case you need a much less competitive purifier. 3:Degreasers For oil and grease stains on concrete driveways or storage floors, degreasers are very useful. These chemical substances damage down oil-primarily based total residues. This makes it less complicated to rinse away with pressure washing. The Benefits of Deep Cleaning Your Exterior Surfaces Getting your outside surfaces professionally wiped clean gives many benefits. Better Curb Appeal: A clean outside makes your property or business appearance a lot better. Higher Property Value: A well-saved outside can grow your property`s value. Prevents Damage: Mold and mould can harm surfaces over time. Regular deep cleansing stops this, saving you cash on repairs. Healthier Environment: Getting rid of mildew and mold reduces allergens. This improves the air around your property. Longer-Lasting Surfaces: Removing dust extends the lifestyles of your siding, roof, and concrete. This protects your investment. Pest Control: Dirt and particles can appeal to pests. An easy outside maintains them away and safe. Conclusion Understanding what chemical is used for house washing allows owners to comprehend that expert outside cleansing is predicated closely on specialised detergents and gentle wash solution now no longer simply water pressure. From sodium hypochlorite remedies to expert surfactants, those cleansing marketers assist do away with mould, algae, dirt, and stains accurately and effectively. Need an expert outside cleansing you may trust? Contact VJ Pressure Washing now for secure house washing services, superior gentle washing solution, and professional outside care that continues your property clean and protected FAQs What chemical is used for house washing? This is not something unusual, the chemical used for residence washing is a diluted sodium hypochlorite residence wash solution mixed with detergents and surfactants. Are house washing chemical compounds secure for siding? Yes, expert residence washing chemical compounds are usually secure while carried out efficiently through skilled technicians. What is a soft wash cleansing solution? A soft wash cleansing solution is a low-pressure cleansing aggregate designed to do away with mould, algae, dirt, and mould accurately from sensitive surfaces. What is protected in outside residence cleansing detergent? An exterior house cleansing detergent can also additionally consist of surfactants, cleansing marketers, mould remedies, and stain removers designed for outside surfaces. Why is sodium hypochlorite utilized in house washing? Sodium hypochlorite residence wash solutions are incredibly powerful at killing mold, algae, and micro organisms on outside surfaces.
How Do I Make My Driveway Look New Again? 7 Steps That Actually Work
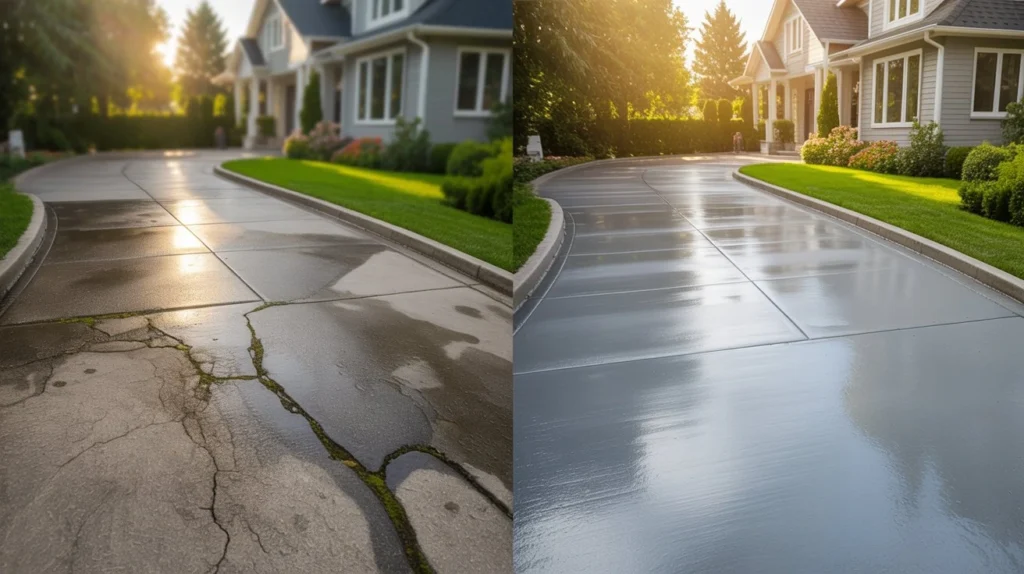
A worn-out driveway makes your whole home look neglected. Cracks, stains, faded color, and years of grime add up fast. The good news? You don’t always need to replace it. Most driveways can be fully restored without a major budget. How do I make my driveway look new again? Start with a deep clean, fix any cracks, then reseal the surface. That three-step process handles 90% of driveway aging. This guide walks you through every step in plain detail so you can get it done right. What Causes a Driveway to Look Old? Before you fix anything, it helps to understand why driveways age. Sun exposure breaks down asphalt binders and fades concrete color. UV rays cause oxidation over time, turning black asphalt gray and giving concrete a chalky look. Water damage is the biggest culprit. Water seeps into tiny surface cracks, freezes in winter, and expands. That expansion widens cracks and creates potholes. Oil and chemical spills soak into porous concrete and asphalt. They leave dark stains and weaken the surface over time. Heavy vehicle traffic compresses and stresses the surface. Combine that with age and weather, and surface crumbling starts. Lack of sealing speeds everything up. An unsealed driveway soaks up damage like a sponge. Knowing the cause helps you pick the right fix. Start with a Thorough Driveway Inspection Don’t skip this step. A quick inspection tells you exactly what you’re dealing with before you spend money on materials. Walk your entire driveway and look for: Hairline cracks — thin surface cracks that haven’t spread yet Wide cracks — anything wider than a quarter inch needs filler Potholes or depressions — soft spots that have caved in Staining — oil, rust, tire marks, or algae growth Surface crumbling — edges or corners breaking off Fading or oxidation — dull, gray, or chalky appearance Take photos as you go. This helps you track progress and decide if you need professional help or can handle it yourself. If you find deep structural damage, sunken sections, or widespread crumbling, a full replacement may be the smarter long-term investment. Clean the Driveway Properly This is the most important step. Everything else depends on it. A dirty surface won’t hold crack filler, sealant, or resurfacer. Cleaning isn’t optional — it’s the foundation. Basic cleaning steps: Sweep off all loose dirt and debris Pre-treat stains with appropriate cleaners (more on that below) Apply a concrete or asphalt degreaser to oily areas Pressure wash the entire surface at 2000–3500 PSI Let it dry completely — at least 24 hours before any treatment Pressure washing alone transforms how a driveway looks. Years of embedded grime, algae, and surface discoloration come off in one pass with the right equipment. If you don’t own a pressure washer, or your driveway is large and heavily soiled, professional help is worth it. VJ Pressure Washing provides driveway washing Tracy CA that gets the surface truly clean before restoration. Their commercial-grade equipment reaches spots a garden hose never will. How to Remove Common Driveway Stains Different stains need different treatments. Using the wrong cleaner wastes your time. Oil and grease stains Apply a commercial concrete degreaser. Let it sit for 20 minutes. Scrub with a stiff brush, then pressure wash. For old, set-in stains, repeat twice. Rust stains Use an oxalic acid-based cleaner. Apply, let dwell for 10–15 minutes, scrub, and rinse. Avoid bleach — it sets rust stains deeper. Tire marks A citrus-based degreaser works well here. Apply, scrub hard, and rinse. Some tire marks need two treatments. Algae, moss, and mildew A bleach-and-water solution (1:3 ratio) kills organic growth fast. Apply, let sit for 15 minutes, scrub, and rinse well. Keep it off grass and plants. Efflorescence (white powder on concrete) This is mineral salt coming to the surface. Use a diluted muriatic acid solution carefully, or a commercial efflorescence remover. Always wear gloves and eye protection. Leaf stains and tannin marks Oxygen bleach (like OxiClean) dissolved in warm water handles these well without harsh chemicals. Clean all stains before sealing. Sealer locks in whatever is under it including stains. Repair Cracks and Surface Damage Once the driveway is clean and dry, fix all cracks before sealing. For hairline cracks (under 1/4 inch) Use a liquid crack filler or concrete caulk. Pour or squeeze it in, smooth it flat, and let it cure per label instructions. These are easy DIY repairs. For wider cracks (1/4 to 1/2 inch) Use a polyurethane or epoxy crack filler. These flex with temperature changes, so they hold longer. Clean the crack out with a wire brush first. For large cracks and potholes Use a vinyl concrete patching compound for concrete. For asphalt, use a cold-patch asphalt repair product. Tamp it down firmly a tamper or even the flat of a shovel works. For crumbling edges Use a concrete resurfacer mixed slightly thicker to rebuild broken corners and edges. Use a form board to hold the material in shape while it cures. Let all repairs cure fully before applying sealant. Rushing this step causes peeling and cracking in the repair. Reseal the Driveway for a Fresh Look Sealing is what gives a driveway that “just paved” look. It also protects the surface for the next 2–5 years. For concrete driveways: Use a penetrating silicate sealer for older concrete. For a glossy finish, use an acrylic concrete sealer. Apply with a roller or sprayer in two thin coats. For asphalt driveways: Use a coal tar or asphalt emulsion sealer. Apply with a squeegee applicator and work in sections. Two thin coats outlast one thick coat every time. Application tips: Work on a dry day above 50°F Avoid direct midday sun if possible — it dries the sealer too fast Start from the highest point and work down toward the street Let the first coat dry 6–8 hours before applying the second Stay off the driveway for 24–48 hours after final coat Sealing is one of the highest-impact steps in driveway restoration. The color
Can Vinegar Really Clean Your Driveway? 5 Proven Methods That Work
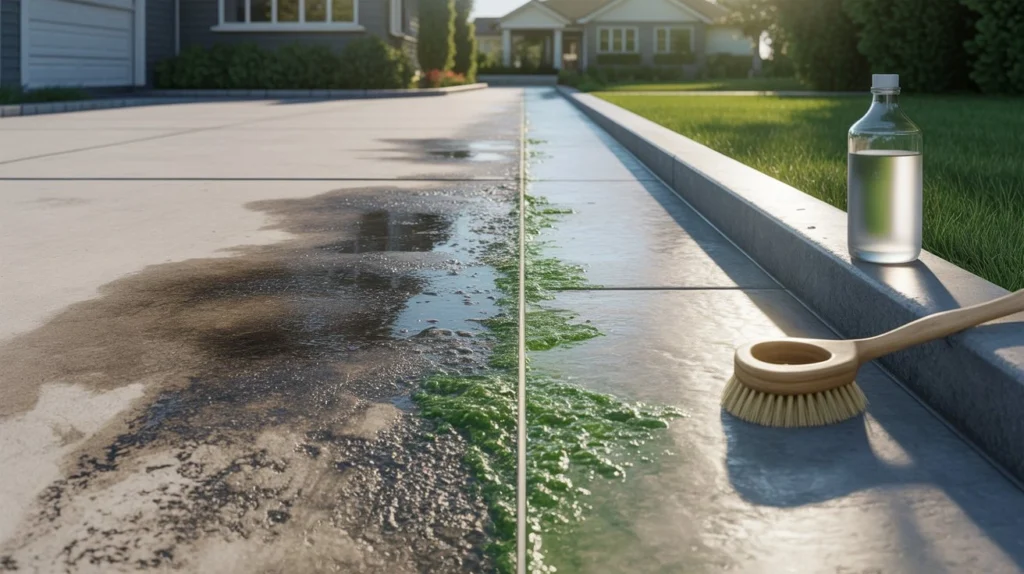
Your driveway puts up with a lot. Oil spills, dirt buildup, moss, and tire marks pile up fast. Most people reach for a commercial cleaner without thinking twice. But there’s a cheaper, greener option sitting in your kitchen cabinet. So, can I use vinegar to clean my driveway? Yes, you can. White distilled vinegar works well on light stains, algae, moss, and general grime. It’s safe, affordable, and chemical-free. That said, it’s not a one-size-fits-all solution. Some surfaces and stains need a different approach. What Makes Vinegar Effective for Driveway Cleaning? Vinegar is a mild acid. Its main active ingredient is acetic acid, which sits around 5% concentration in standard white vinegar. That acidity breaks down mineral deposits, kills moss and algae, and loosens surface grime. Here’s why it actually works: Acetic acid dissolves calcium and lime deposits Low pH kills mold spores and algae on contact No harsh chemicals means no damage to nearby soil or grass Affordable a gallon costs less than $5 Industrial-strength vinegar (20–30% acetic acid) works faster and stronger. But be careful: it can irritate skin and eyes. Use gloves and eye protection if you go that route. Types of Driveway Surfaces You Can Clean with Vinegar Not every surface reacts to vinegar the same way. Before you start, know what your driveway is made of. Concrete Driveways Vinegar works well on concrete. It removes algae, moss, and light oil stains. Avoid soaking the surface repeatedly over months. Heavy, frequent vinegar use can slowly etch concrete over time. Asphalt Driveways Use vinegar carefully here. Asphalt is petroleum-based, and acidic cleaners can break down the binder that holds asphalt together. For asphalt, stick to diluted solutions and short dwell times. Pavers and Brick White vinegar is safe for sealed pavers. Unsealed brick and natural stone like sandstone or limestone — can be damaged by acid. Test a hidden area first. Gravel Driveways No surface to damage here. Vinegar works fine for killing weeds between gravel, but it won’t “clean” loose stone the same way it cleans hard surfaces. What Kind of Stains Can Vinegar Remove? Vinegar handles a solid range of common driveway stains. Here’s a breakdown: Stain Type Vinegar Effective? Notes Moss and algae Yes Kills and loosens growth Mildew and mold Yes Surface-level treatment Hard water stains Yes Acid dissolves mineral buildup Rust stains Partially Helps lighten, may need repeat Light oil stains Partially Works on fresh, small spots Deep oil/grease No Needs a degreaser Tire marks No Requires stronger cleaners Paint stains No Not effective For tougher stains, especially deep oil and grease, you’re better off calling in a professional. VJ Pressure Washing offers reliable driveway washing service Tracy CA for exactly this type of problem. A hot-water pressure wash cuts through years of embedded grease in one session. How to Clean a Driveway with Vinegar Here’s a simple step-by-step process that works for most concrete and paver driveways. What you’ll need: White distilled vinegar or cleaning vinegar (6–10%) Water Spray bottle or garden sprayer Stiff-bristle brush Garden hose or pressure washer Step 1: Sweep First Remove loose dirt, leaves, and debris. Cleaning works better on a clear surface. Step 2: Pre-wet the Area Lightly wet the driveway. This prevents vinegar from absorbing too fast into porous concrete. Step 3: Apply Vinegar Solution Spray the vinegar mixture directly onto the stained area. For heavy moss or algae, apply full-strength cleaning vinegar. Step 4: Let It Sit Allow 15 to 30 minutes of dwell time. Don’t let it dry out. Reapply if needed. Step 5: Scrub Use a stiff brush to agitate the surface. Work in circular motions on stains. Step 6: Rinse Thoroughly Rinse with a strong stream of water. A pressure washer makes this step much more effective. Best Vinegar-to-Water Ratio for Driveway Cleaning The ratio depends on what you’re cleaning. Situation Mix Ratio General cleaning 1 part vinegar : 1 part water Moss or algae Full-strength (no dilution) Light dust or film 1 part vinegar : 3 parts water Hard water stains Full-strength or 2:1 vinegar to water Start with a 1:1 ratio for most jobs. Scale up the vinegar concentration for stubborn buildup. Can Vinegar Kill Weeds in Driveway Cracks? Yes. This is actually one of vinegar’s best uses around the driveway. Acetic acid draws moisture out of plant cells, killing the weed quickly. For cracks and joints between pavers, straight white vinegar works fast. Apply on a sunny day for best results. The heat speeds up the process. Tips for killing weeds with vinegar: Use full-strength white or cleaning vinegar Apply directly to the leaves, not just the crack Reapply every few weeks since vinegar doesn’t kill the root system For deep-rooted weeds, use a 20% horticultural vinegar with care Keep vinegar off grass and plants you want to keep. It doesn’t discriminate. Pros and Cons of Using Vinegar on a Driveway Pros Cheap and easy to find — available at every grocery store Non-toxic — safe around kids and pets after it dries Eco-friendly — biodegradable and won’t contaminate runoff water Multi-use — cleans, kills moss, and removes mineral buildup No special equipment needed Cons Not strong enough for deep oil stains or tire marks Smell — the odor is strong while wet (fades when dry) Can etch certain surfaces — risky on natural stone and unsealed pavers Temporary weed control — doesn’t kill roots Slower than pressure washing for large areas Vinegar vs Commercial Driveway Cleaners Factor Vinegar Commercial Cleaner Cost Very low Moderate to high Effectiveness Moderate High Chemical safety High Varies Environmental impact Low Moderate to high Dwell time needed 15–30 min 5–15 min Best for Moss, algae, light grime Oil, grease, deep stains Commercial degreasers and driveway cleaners outperform vinegar on oil and grease. But for regular maintenance cleaning, vinegar holds its own well. When You Should Avoid Using Vinegar Vinegar isn’t always the right call. Skip it in these situations: Natural stone surfaces Limestone, marble, and sandstone are acid-sensitive. Vinegar will etch