
What Is the Correct Order to Clean Your House?
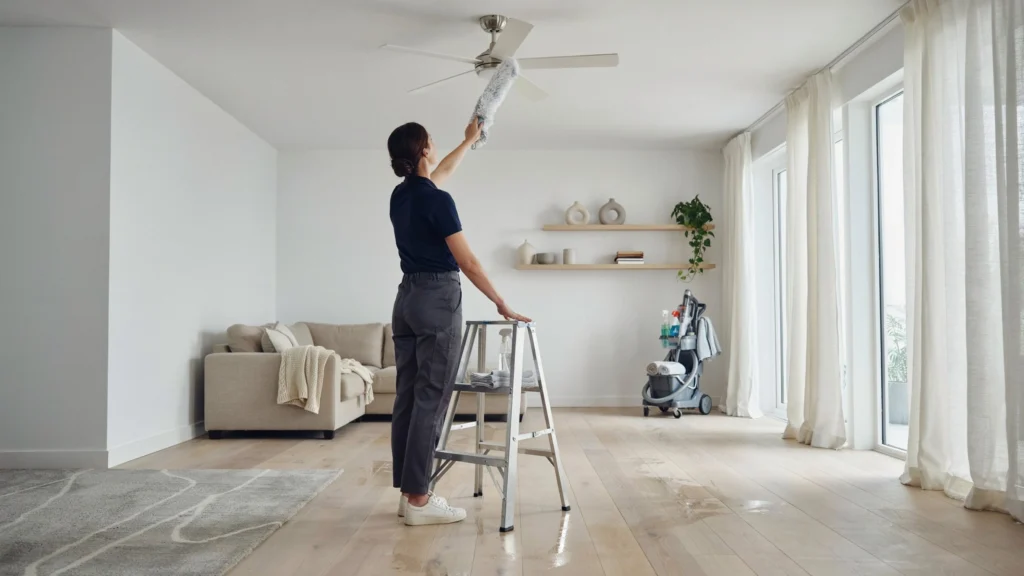
Maintaining a clean house can feel overwhelming if you don’t know where to begin. You may feel that dusting and vacuuming are on the losing side in some areas of your home. That’s why doing the cleaning in the right order is so important. So, what is the right order to clean a house? Observing an order of cleaning is more organized, efficient, and effective! Don’t just wander from one chore on the list to the next like a lost soul, but have a strategy to at least touch each room adequately. A well-defined step-by-step guide for how to clean a house enables you to clean the house without wasting your time and your energy. Why Cleaning Order Matters Cleaning a mess twice because you clean in the wrong order is annoying. Say you vacuum the floors before you dust the furniture, dust will land on the floor you just cleaned. At VJ Pressure Washing, we always recommend cleaning top to bottom and in the right order so every surface stays clean and no effort goes to waste. Cleaning in your home works fastest when you do it from the top down, and you’ll get the best results if you clean from the inside (cleanest area) moving outward (dirtiest area). This method keeps dust and dirt from being distributed, and cleaning is only done once. Best Way to Clean a House Efficiently The most efficient way to clean a house is to clean each room in the house each day and not clean in a random manner. Begin by collecting all your cleaning products for a task, then do the job. The clean-up process is smoother, and the motivation to keep cleaning stays up if you prevent unnecessary breaks to clean or start again after stopping to clean a mess. And if the outside of your home needs attention too, our exterior house washing services Tracy CA are just a call away. Room by Room Cleaning Sequence A good cleaning routine also keeps you on track and makes you more efficient. 1. Gather Cleaning Supplies First But first, get your supplies for the house cleaning in the correct order of steps. Among the standard cleaning products are microfibre cloths, sponges, disinfectants, glass polishes, vacuum cleaners, mops, buckets and refuse sacks. Preparation ensures there is no lag time between cleaning, and it also makes cleaning flow better. 2. Declutter Every Room Collect anything that belongs in another room and bring it back. Remove Chaos: Clear off your counters, tables, floors, and your shelves. While you are decluttering, you are clearing things out to make space, and you can get down and dirty, really clean under and behind things. 3. Start with Dusting Dusting should always precede vacuuming or mopping. While doing a house cleaning step-by-step guide, start dusting ceiling fans, light covers, shelves, furniture, and any other raised surfaces. Dust settles under gravity, so higher areas should be cleaned first. 4. Clean Windows and Mirrors Once dusting is done, go over glass surfaces. Clean windows, mirrors, and glass doors with suitable detergent and dry with a clean cloth. 5. Move to the Kitchen The kitchen is the busiest room in the house. Work from the countertops and appliances down as you wipe off. Clean the cabinet fronts, sink, and backsplash. Clean up by sanitizing your contact surfaces high. 6. Deep Clean Kitchen Appliances Grease, food residue, and bacteria build up in kitchen appliances. A thorough cleaning of the microwave, fridge, oven, and dishwasher regularly will ensure hygiene, enhance performance, and keep the kitchen smelling fresh. 7. Clean the Bathrooms Bathrooms are to be cleaned following the kitchen. As part of a good room-by-room cleaning routine, clean sinks, countertops, mirrors, toilets, showers, and tubs. Let cleaning solutions sit for a short duration prior to scrubbing. This enables easier removal of soap scum and stains. 8. Disinfect High-Touch Areas Bathrooms have a lot of touched surfaces. How to Clean Your Home Efficiently: Disinfect doorknobs, faucet handles, light switches, and bathroom flush handles. Cleaning regularly will also help to reduce the spread of germs in the home. 9. Move to Bedrooms A bedroom after all, is it not the place you sleep? is typically given a more cursory cleaning than a kitchen or bathroom. Working with the house cleaning order by process, make the bed and put away the personal items first. Dust furniture, clean mirrors, and Windex surfaces before vacuuming or mopping, or use a damp cloth before vacuuming or mopping. 10. Wash Bedding Regularly Sheets, pillowcases, blankets, and comforters collect dust, sweat, and allergens over time. Fresh bedding contributes to a cleaner and healthier sleeping environment. 11. Clean Living Areas The living and family rooms are second active spaces in the home. Dust shelves, electronics, furniture, and knickknacks. Fluff cushions, corral clutter, and wipe surfaces to a clean finish. 12. Vacuum All Floors When you are done dusting and wiping surfaces, vacuum the floors. Clean the floor at the end of your work, always, since dust and dirt are falling while working. Vacuum carpets, rugs, and all corners thoroughly. 13. Mop Hard Floors After you vacuum, mop tile, hardwood, laminate, or vinyl floors. Mopping takes off the last layer of dirt and dust on your floors and makes them look fresh and clean. 14. Empty Trash Bins Throw away the garbage when you have finished cleaning the worst part. A good housecleaning is to pass through the house, collecting the contents of all the wastebaskets on each floor in the kitchen and lining them. Garbage out, smell out, clean house. Deep Cleaning Deep cleaning at home can come with a few extra tasks like cleaning behind appliances, washing walls, scrubbing grout, and organizing storage spaces. If you want to have a healthy and beautiful home, you should deep clean regularly. And don’t forget the outside our roof cleaning services Tracy CA keeps your roof free from moss, algae, and dirt all year round. Conclusion So what is the right order to
How Do Professionals Clean Roof Tiles? (7 Proven Steps Experts Follow)
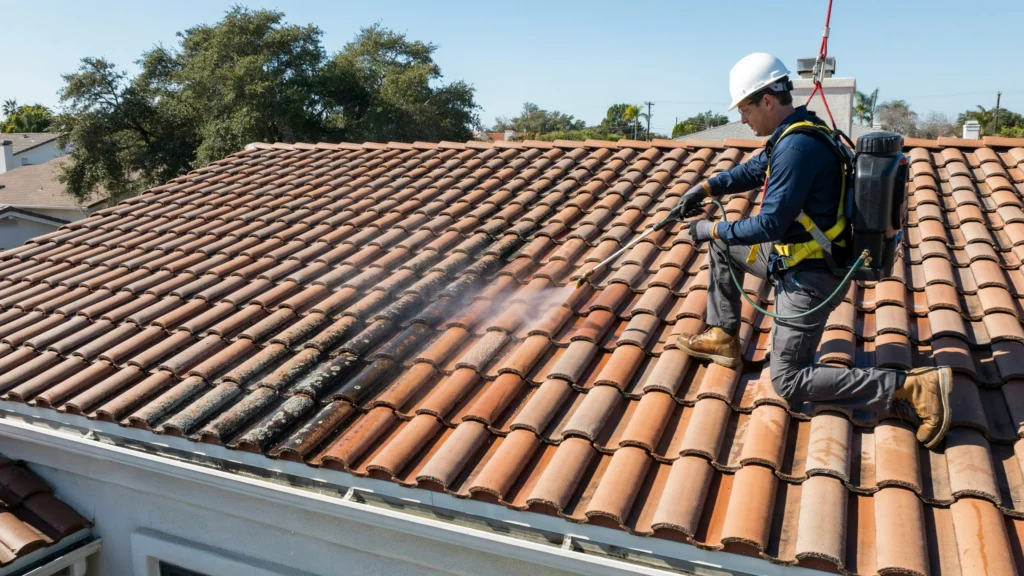
Your roof works hard every single day. Rain, wind, algae, and moss slowly build up on tiles over time. Left alone, that grime can shorten your roof’s life and hurt your home’s value. Cleaning it isn’t just about looks. It’s about protecting a big investment. So how do professionals clean roof tiles? They follow a careful process using the right tools, the right pressure, and the right chemicals without causing damage. This guide breaks it all down for you, step by step. What Causes Roof Tiles to Get Dirty? Before cleaning, it helps to understand what you’re dealing with. Roof tiles face constant exposure to the elements. Several things cause that dark, ugly buildup. Algae and Moss are the most common culprits. Algae thrives in humid, shaded areas and spreads fast. Moss holds moisture against tiles, which can crack them over time. Lichen is trickier. It’s a combination of algae and fungus. It grips tile surfaces tightly and is harder to remove than algae alone. Dirt and debris accumulate from wind, nearby trees, and birds. Leaves rot on the roof and create damp patches that encourage organic growth. Hard Water Stains appear in areas with mineral-rich water. These white or gray streaks are calcium deposits left behind after rain evaporates. Air Pollution leaves a thin film of grime over time. Urban homes deal with this more than rural ones. Understanding the type of dirt matters. Different problems need different solutions. A professional identifies what’s on your roof before starting any work. Why Hire Professionals for Roof Tile Cleaning? You might think a garden hose and some scrubbing will do the job. It won’t not properly, anyway. And doing it wrong can cost you more than hiring someone in the first place. Here’s why professional roof tile cleaning is the smarter choice: Safety First. Roofs are slippery, especially when wet or covered in moss. Professionals use proper harnesses, non-slip boots, and fall protection equipment. Falls from roofs cause serious injuries every year. The Right Equipment. Professionals use commercial-grade tools that you simply can’t rent from a hardware store. They know how much pressure each tile type can handle. No Tile Damage. Too much water pressure cracks tiles, lifts ridge caps, and forces water under the surface. A trained technician knows exactly how to avoid this. Long-Lasting Results. Professionals apply post-treatment biocides that prevent regrowth for years. DIY cleaning usually only removes visible grime without stopping it from coming back. Insurance and Liability. Licensed professionals carry insurance. If anything goes wrong on your property, you’re protected. If you’re in the area and need reliable help, check out our roof cleaning services Tracy CA page. Our team at VJ Pressure Washing handles everything from inspection to final treatment with care and precision. How Professionals Clean Roof Tiles This is the core of what you’re here for. So let’s walk through how professionals clean roof tiles, from the first inspection to the final rinse. Step 1: Roof Inspection Every job starts with a walkthrough. The technician checks for cracked, broken, or loose tiles. They note areas with heavy moss or lichen. They look for damaged flashing and clogged gutters. This matters because cleaning a damaged roof can make problems worse. Cracks let water in. Loose tiles can slide off. A professional won’t start until the roof is safe to work on. Step 2: Protecting the Property Before any water or chemicals touch your roof, the area below is protected. This means: Covering garden beds and plants with tarps Closing windows and doors Moving outdoor furniture away from the work zone Blocking gutters temporarily to control runoff Cleaning solutions can harm plants and stain surfaces. A good crew takes time to prep the site properly. Step 3: Applying Biocidal Treatment On most tile roofs, professionals apply a biocidal cleaning solution first. This is a mix of water and a surfactant-based chemical designed to kill moss, algae, and lichen at the root level. The solution is sprayed evenly across the roof surface and left to dwell. Dwell time depends on how heavy the growth is anywhere from 20 minutes to a few hours. This step does the hard work. The chemical breaks down organic material so it’s easier to remove. Step 4: Soft Washing or Pressure Washing After the treatment dwells, the roof is rinsed. This is where the debate between soft washing and pressure washing comes in (more on that below). Most professionals use low to medium pressure for tile roofs. High pressure can crack tiles, especially older concrete or terracotta ones. The goal is to rinse off the treated grime without putting stress on the surface. The technician works from the ridge (top) downward. This ensures runoff flows naturally with gravity and doesn’t force water under tiles. Step 5: Scrubbing Stubborn Areas For thick moss or lichen that doesn’t rinse away, professionals use long-handled soft bristle brushes. They scrub gently in the direction of the tile’s profile. This loosens material without scratching the surface. Wire brushes are never used. They scratch tile coatings and speed up weathering. Step 6: Gutter Cleaning All that loosened moss and debris ends up in the gutters. A professional job always includes clearing and flushing the gutters after the roof is done. Blocked gutters cause water damage to fascias and foundations. Step 7: Post-Treatment Application This is the step most DIYers skip and it’s the most important one for long-term results. After the roof is clean, a protective biocide or algae inhibitor is applied. This soaks into the tile surface and kills any remaining spores. It also creates a barrier that slows future growth. Quality biocide treatments can keep your roof clean for 2 to 5 years, depending on your local climate and tree coverage. Soft Washing vs. Pressure Washing Roof Tiles These two roof washing techniques are often confused. They’re very different. Soft Washing uses low water pressure (under 500 PSI) combined with a cleaning solution. The chemicals do most of the work. Soft wash roof cleaning