
How to Remove Stains From Pavers | A Practical Cleaning Guide
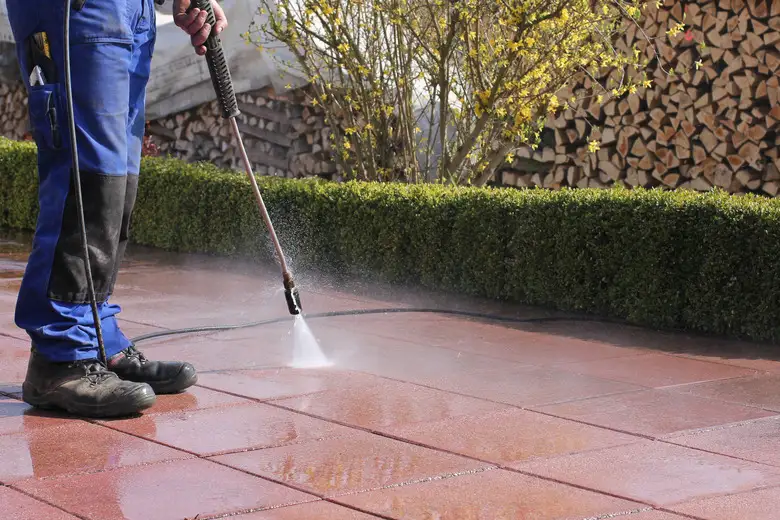
Stained pavers can make an otherwise clean driveway, patio, walkway, or pathway look neglected. Oil spots, rust, algae, dirt, food spills, and other marks can become especially noticeable on lighter-colored pavers. The good news is that many surface stains can be treated with the right cleaning method. The important part is knowing what caused the stain before choosing a cleaner or applying pressure. If you are wondering how to remove stains from pavers, start with a simple approach: identify the stain, remove loose debris, choose a suitable cleaning solution, test it on a small area, and rinse the surface thoroughly. More stubborn stains may require repeated treatment or professional cleaning. Why Do Pavers Get Stained? Pavers are exposed to weather, vehicles, foot traffic, dirt, plants, spills, and moisture. Because many pavers have a textured or slightly porous surface, substances can settle into small spaces and become harder to remove over time. Driveways commonly develop oil and grease marks from vehicles. Patios may collect food and drink spills, while walkways can develop dirt, algae, moss, or organic discoloration. The longer some stains remain on the surface, the more difficult they can become to clean. That does not mean every old stain can be removed completely, but addressing spills and buildup sooner can make maintenance easier. Identify the Type of Paver Stain Before choosing a paver stain remover, look closely at the discoloration. A dark, greasy spot may be oil or automotive fluid. Orange or reddish marks may indicate rust. Green or dark organic growth can point to algae or moss. Brown discoloration around leaves or plants may have an organic cause. This distinction matters because a cleaner that works well on one type of stain may do little for another. It is also important to consider the paver material and whether it has been sealed. If you are unsure what product is safe for the surface, check the paver manufacturer’s care instructions or test the cleaning solution in an inconspicuous location first. How to Remove Stains From Pavers A careful cleaning process can help you deal with many common stains without unnecessarily damaging the surface. 1. Remove Loose Dirt and Debris Start by sweeping the area thoroughly. Remove leaves, loose soil, gravel, and other debris from the pavers and joints. This simple step prevents loose material from getting in the way while you clean and gives you a clearer view of the actual stain. For outdoor surfaces with a significant amount of loose dirt, a soft brush can help remove buildup from textured areas. 2. Identify the Stain Do not immediately cover the entire surface with a strong chemical. Look at the color, texture, and location of the stain. Consider what may have caused it. For example, a stain underneath a parked vehicle may be related to oil or another automotive fluid, while green discoloration in a shaded, damp area may be organic growth. Knowing the likely cause helps you choose a more appropriate treatment. 3. Test Your Cleaning Solution Before treating the entire area, test your chosen cleaner on a small, less noticeable section. Allow the area to respond to the cleaner according to its instructions, then rinse it thoroughly. Check whether the paver’s color, finish, or appearance has changed. This is particularly important with colored, decorative, sealed, or older pavers. 4. Apply the Appropriate Cleaner Apply a suitable cleaning product according to its instructions. Avoid assuming that a stronger concentration will produce better results. For some light stains, a mild cleaning solution and mechanical scrubbing may be enough. More difficult stains may require a product specifically designed for that type of contamination. Use a stiff but appropriate brush to work the cleaner into the stained area without unnecessarily damaging the surface. 5. Scrub the Stain Work the cleaner into the affected area with controlled scrubbing. You do not necessarily need to scrub the entire driveway or patio aggressively. Focus on the stained sections and give the cleaning solution enough time to work as directed. For oil and grease, several treatments may sometimes be necessary because these substances can penetrate porous surfaces. 6. Rinse Thoroughly Once the cleaning process is complete, rinse the area thoroughly. Leaving cleaning chemicals or loosened residue on the pavers can create additional problems. Make sure runoff is handled appropriately and does not flow into areas where it could cause damage. After rinsing, allow the surface to dry so you can accurately judge the result. 7. Repeat if Necessary One treatment does not always remove a stubborn stain completely. If the paver remains discolored after drying, reassess the stain and determine whether another appropriate treatment is safe. Avoid immediately switching to a much stronger chemical simply because the first attempt was unsuccessful. Some stains may have penetrated deeper into porous material and may require professional treatment. How to Clean Different Types of Paver Stains Different stains require different approaches. There is no single cleaning product that is ideal for every situation. Oil and Grease Stains Oil and grease are common problems on driveways. Begin by removing any loose material and absorbing fresh spills as soon as possible. For an existing stain, use a cleaner designed for oil or grease and follow its directions carefully. Scrubbing can help loosen the residue. Older or deeply absorbed oil stains may require more than one treatment. Avoid using a random household chemical simply because it is strong. The wrong product can affect the appearance of certain pavers. Rust Stains Rust can leave orange, brown, or reddish discoloration. Rust removal products are typically designed specifically for this type of stain. However, paver materials and finishes vary, so always check whether the product is suitable for your surface. Test a small area first and follow the manufacturer’s instructions. Dirt and Mud Ordinary dirt and mud are usually easier to address than oil or rust. Sweep away loose debris first, then use water and an appropriate surface cleaner. For larger outdoor areas, controlled pressure washing can help remove embedded dirt that ordinary
How to Clean Driveway Without Pressure Washer | Easy Tips
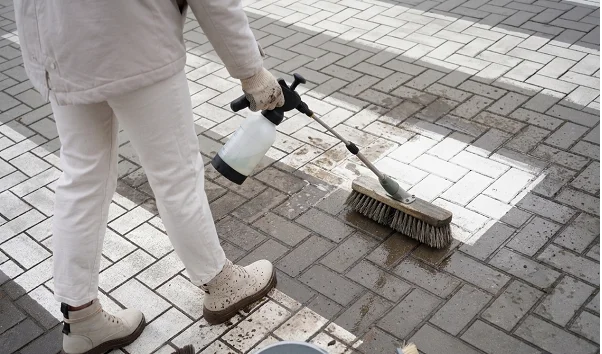
You do not need a pressure washer to clean a dirty driveway. With a garden hose, stiff-bristled brush, bucket, and the right cleaning solution, you can remove loose dirt, surface grime, and many common stains through manual cleaning. The key is not simply adding more soap or scrubbing harder. A better approach is to identify what is making the driveway dirty, choose a cleaner that suits the surface, give it enough time to work, and then scrub and rinse methodically. If you are wondering how to clean driveway without pressure washer, the process below gives you a practical starting point while helping you avoid common mistakes that can damage the surface. What You Need to Clean a Driveway Without a Pressure Washer Before starting, gather your equipment so you can clean the driveway without stopping halfway through the job. You will generally need: A stiff outdoor or deck brush A garden hose with a spray nozzle A bucket Water A suitable driveway or concrete cleaner Protective gloves and eye protection A push broom for removing loose debris For large concrete areas, a long-handled brush can make the work considerably easier because you can scrub while standing rather than working on your hands and knees. The cleaner you choose should depend on the type of dirt or stain you are trying to remove. A mild cleaner may be enough for ordinary dirt, while oil and grease usually need a product designed to break down petroleum-based residue. How to Clean a Driveway Without a Pressure Washer The most effective manual method is to work in manageable sections instead of trying to clean the entire driveway at once. 1. Remove Cars and Other Items Move vehicles, planters, toys, tools, and other objects away from the driveway. This gives you access to the complete surface and prevents cleaning solution from getting onto items that should not be exposed to it. If there are weeds growing through cracks or joints, remove as much loose growth as possible before you begin washing. 2. Sweep the Driveway Thoroughly Start with a dry driveway whenever possible. Use a push broom to remove leaves, gravel, loose dirt, dust, and other debris. Pay particular attention to edges, corners, expansion joints, and areas where dirt tends to collect. This step may seem unnecessary, but it makes the rest of the cleaning process easier. If you immediately soak a dusty driveway, loose dirt can turn into muddy residue and spread across the surface. 3. Identify the Stains Before choosing a cleaning solution, look closely at the driveway. Is the problem mainly: General dirt and grime? Oil or grease? Green algae? Black organic staining? Rust-colored marks? Tire marks? Mud or soil? Different stains respond to different types of cleaners. There is no single household mixture that is ideal for every driveway stain. For example, an oil spot needs a degreasing approach, while organic growth may require a cleaner specifically intended for outdoor biological staining. 4. Pre-Wet the Surface Lightly wet the driveway with your garden hose. Do not flood the entire driveway if you are going to spend a long time applying cleaner. Instead, work in sections so the surface stays manageable and your cleaning solution does not dry before you can scrub it. For a large driveway, dividing the area into several smaller sections can make the process much easier. 5. Apply the Appropriate Cleaner Apply your chosen driveway or concrete cleaner according to the product’s directions. For light dirt, a mild cleaning solution may be sufficient. Heavier stains may require a dedicated concrete cleaner or degreaser. Allow the product to remain on the surface for the amount of time recommended on its label. This gives the cleaner an opportunity to loosen the contamination before you begin scrubbing. Do not automatically assume that leaving a chemical on the driveway longer will produce better results. If the product has specific dwell-time instructions, follow them. 6. Scrub With a Stiff Brush Now comes the part that replaces much of the mechanical action normally provided by a pressure washer. Use a stiff nylon or outdoor cleaning brush and scrub the driveway thoroughly. Concentrate extra effort on stained areas, but avoid unnecessarily aggressive scrubbing that could damage a fragile or deteriorated surface. For large sections, a long-handled deck brush can make the job more practical. Instead of scrubbing randomly, use overlapping passes so you do not leave untouched strips between cleaned areas. 7. Rinse the Driveway After scrubbing, rinse the section thoroughly with a garden hose. Work methodically so dirty water is moved away from areas you have already cleaned. Continue rinsing until visible cleaner and loosened dirt have been removed. If a stain remains after the first pass, do not immediately reach for a stronger chemical. First consider repeating the appropriate cleaning process. Some stains have penetrated the porous surface and may require more than one treatment. How to Clean Concrete Without a Pressure Washer If you have a concrete driveway, you can clean concrete without a pressure washer by combining chemical action with mechanical scrubbing. Concrete is porous, so surface dirt is not always sitting loosely on top. Oil, grime, and organic staining can become trapped in the texture of the surface. This is why simply spraying the driveway with a garden hose may not produce a noticeable improvement. A better approach is: Sweep away loose debris. Identify the type of stain. Apply a suitable concrete cleaner. Allow the cleaner to work according to its instructions. Scrub with a stiff brush. Rinse thoroughly. Repeat the treatment where necessary. The goal is to let the cleaning solution loosen the contamination so that your brush can lift it from the surface. How to Remove Oil and Grease From a Driveway Oil stains can be more difficult than ordinary dirt because the residue can penetrate porous concrete. Start by removing any loose material around the stain. Then apply a concrete-safe degreaser according to its instructions. Allow it to work for the recommended time and scrub the
Can I Clean My Driveway With Bleach | Safely
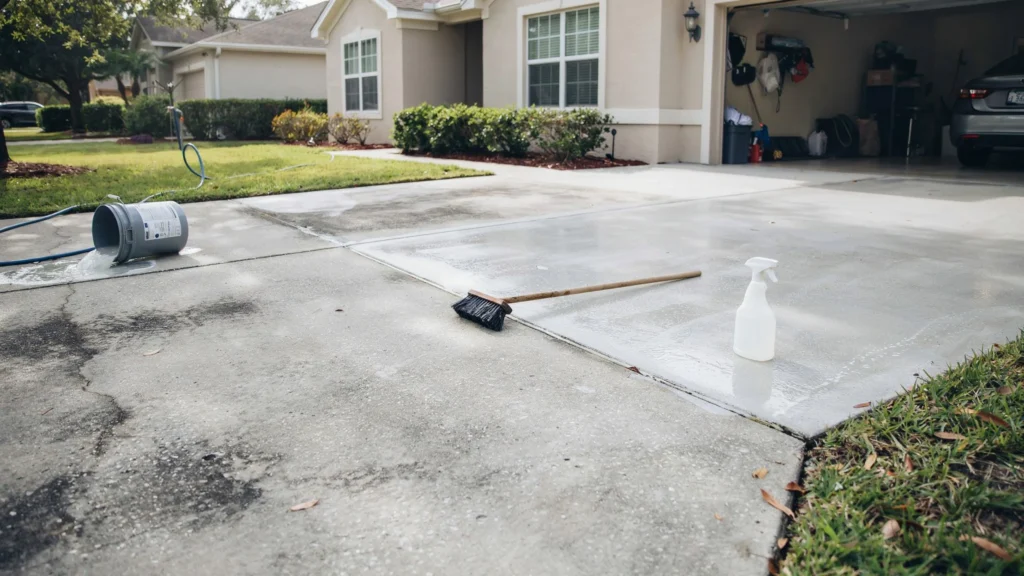
A stained driveway can quickly make the outside of your home look neglected. Algae, mildew, green growth, and dark organic stains are common causes. Bleach can help with these stains, but using it the wrong way can damage nearby plants or affect the driveway surface. The type of driveway also matters, since concrete and asphalt do not respond to cleaners in the same way. Can I Clean My Driveway With Bleach? Yes, you can, especially when dealing with algae, mildew, and other organic growth. Use a proper dilution, test a small area first, protect nearby plants, and rinse the driveway thoroughly after cleaning. Is Bleach Safe for a Concrete Driveway? Bleach can be used on many concrete driveways when it is properly diluted and rinsed away. Household bleach contains sodium hypochlorite, which can kill or remove organic growth. It can also lighten some dark stains. The main concern is not simply whether bleach touches concrete. The bigger issue is using a solution that is too strong or leaving it on the surface too long. Concrete is porous. It can hold dirt, oil, algae, and other material below the surface. Bleach can help with organic stains, but it will not solve every driveway cleaning problem. For example, bleach is useful for green algae or black organic spotting. It is much less useful for deep oil stains. Oil usually needs a cleaner designed to break down grease. Before cleaning the entire driveway, test the diluted solution on a small hidden area. Check the concrete after rinsing and drying. This helps you spot unwanted color changes before treating the full surface. If your driveway has a decorative coating, old sealer, painted areas, or special finishes, check the manufacturer’s cleaning instructions first. What Does Bleach Remove From a Driveway? Bleach is most useful against stains linked to organic growth. These can include: Algae Mildew Moss Some mold growth Organic discoloration Green or dark surface growth Bleach does not work equally well on every stain. Oil, grease, rust, tire marks, and mineral deposits often need different cleaning methods. Trying to solve every driveway stain with bleach can waste time and damage nearby materials. For example, an oil spot may need an oil-cutting cleaner and agitation. Rust may require a rust remover made for concrete. Dirt and loose debris may only need water and surface cleaning. This distinction is important because a driveway can look dirty for several different reasons. Identifying the stain first helps you choose a safer treatment. How to Clean a Driveway With Bleach If the driveway is suitable for bleach cleaning, use a careful process rather than pouring bleach directly onto the concrete. 1. Remove loose dirt first Sweep away leaves, dust, soil, and loose debris. Removing this layer lets the cleaning solution reach the actual stain. 2. Protect nearby areas Move outdoor items away from the driveway. Cover or wet nearby plants before cleaning. Keep pets and children away from the work area. 3. Dilute the bleach Never assume that stronger means better. Read the bleach container and follow its directions for outdoor hard-surface use. Bleach products have different concentrations. A dilution that is suitable for one product may be too strong for another. Use only a labeled dilution. If the product does not give directions for the surface, choose a cleaner designed for driveways instead. 4. Apply the solution evenly Apply the diluted solution across the affected area. Avoid creating large puddles or allowing runoff to reach plants. Work in manageable sections. This gives you better control over contact time and rinsing. 5. Let it work without letting it dry Follow the product’s stated contact time. Do not allow the solution to dry on the driveway. Drying can increase the risk of unwanted discoloration and makes rinsing harder. 6. Scrub when needed A stiff outdoor brush can help loosen stubborn organic growth. Scrubbing is useful when the growth has built up inside the concrete’s surface texture. 7. Rinse very well Use plenty of clean water to remove the cleaning solution. Pay attention to cracks, edges, and low spots where liquid can collect. Do not let dirty bleach water flow into garden beds, storm drains, ponds, or other sensitive areas. 8. Inspect the surface Let the driveway dry before judging the result. Some stains become less visible only after the surface has fully dried. If the stain remains, identify it before applying another chemical treatment. How Much Bleach Should You Use to Clean a Driveway? There is no single bleach-to-water ratio that works for every driveway. The correct amount depends on the bleach concentration, surface type, stain, and product instructions. Household bleach products can contain different amounts of sodium hypochlorite. The CDC notes that common household bleach products may contain about 5.25% to 6.15% sodium hypochlorite. That is why copying a fixed recipe from another website can be risky. For driveway cleaning, use the weakest dilution that the product label allows for the intended surface and stain. Never use concentrated bleach just because a stain looks severe. A stronger solution can increase the chance of discoloration, plant damage, and harm to nearby materials. It also creates more hazardous runoff. If the label does not provide outdoor concrete instructions, use a driveway cleaner made for that job instead. Can You Pressure Wash a Driveway After Using Bleach? Yes, pressure washing can be used after a suitable bleach treatment, but the bleach should be rinsed properly first. Pressure washing helps remove loosened dirt, dead organic growth, and residue. It can also improve the final appearance of concrete. Use the correct pressure and nozzle for the driveway. Holding the wand too close can etch concrete or leave visible cleaning lines. Avoid spraying directly into cracks, damaged joints, electrical fixtures, or areas where water can enter the building. If you plan to pressure wash after applying bleach, control the runoff from the start. Do not wait until dirty water is already moving toward plants or storm drains. A pressure washer also does not replace