
Do Solar Panels Need to Be Cleaned

Solar panels sit on your roof day and night, exposed to dust, bird droppings, pollen, and pollution. Over time, that grime builds up and quietly steals your energy production. Most homeowners never think about cleaning them until they notice their electricity bill creeping back up. So, do solar panels need to be cleaned? Yes, they do. Skipping it can cost you real money each month. This guide breaks down exactly how often to clean them, the safest way to do it, and when it makes sense to call in a pro. Do Solar Panels Really Need Cleaning? Short answer: yes. Solar panels work by letting sunlight hit the photovoltaic cells beneath the glass surface. When dust, dirt, or bird droppings cover that glass, less light gets through. Less light means less energy produced. Studies from UC San Diego found that soiled solar panels can lose between 15% and 25% of their energy output depending on the level of dirt buildup. In dry, dusty regions like California’s Central Valley, that number can be even higher. If you’re a homeowner in the Stockton or Tracy area, panels can get coated with agricultural dust, pollen, and hard water deposits faster than in wetter climates. That’s exactly why local services like professional solar panel cleaning Tracy CA from VJ Pressure Washing exist to restore your panels to peak performance without risking damage from DIY mistakes. So do you have to clean solar panels? Not every week. But ignoring them entirely is a guaranteed way to lose output and money. What Happens If You Don’t Clean Solar Panels? Dirty panels don’t just look bad. They underperform, sometimes by a wide margin. Here’s what builds up on panels over time: Dust and pollen — fine particles that scatter light instead of letting it pass through Bird droppings — highly acidic and can cause permanent micro-etching on glass Hard water deposits — left behind when sprinklers hit panels, creates a calcium film Soot and smog — common in industrial or high-traffic areas Leaves and debris — can cause shading that affects entire panel strings Each of these layers acts like a thin curtain over your solar cells. You might not notice it right away, but your inverter data will show a slow decline in output. In worst-case scenarios, bird droppings left for months can cause hot spots areas where heat builds up unevenly on a panel. Hot spots can permanently degrade cells and shorten your panel’s lifespan. The financial impact is real. If your system produces 10,000 kWh per year and loses 20% to dirt, that’s 2,000 kWh you’re not getting. At even $0.15 per kWh, that’s $300 a year sitting on your rooftop in the form of grime. How Often Should Solar Panels Be Cleaned? Most experts recommend cleaning solar panels at least once or twice a year. But the right frequency depends on where you live and what’s around you. Here’s a simple guide: Environment Recommended Cleaning Frequency Rainy, mild climate Once a year Dry or dusty area 2–3 times a year Near trees or farmland Every 3–4 months Urban/high-pollution area Every 3–6 months Coastal area (salt air) Every 3–6 months If you live in a place with heavy pollen seasons, you’ll want to schedule a cleaning right after peak pollen months. Same goes for wildfire season ash and smoke residue can settle heavily on panels. The best way to know if your panels need cleaning is to monitor your inverter data. Most modern solar systems come with an app that tracks daily output. If production suddenly drops on a sunny day, dirt is often the culprit. Best Time to Clean Solar Panels Timing matters more than most people think. Early morning or late evening is the best time to clean solar panels. Here’s why: Panels are cool cold water on hot glass can cause thermal shock and cracking The sun isn’t directly hitting the surface, so your cleaning solution won’t dry too fast You’ll get better visual clarity to see streaks or spots Avoid cleaning in the middle of a sunny afternoon. Panels can reach temperatures above 65°C (150°F) in direct sunlight. Spraying cold water on a hot panel is a real risk. Also, clean panels after major weather events. A windstorm, heavy dust day, or wildfire event are all good triggers for a cleaning session. Spring and fall are natural cleaning seasons. Spring handles post-winter grime and pollen. Fall prep cleans off summer dust before low-sun winter months, when every bit of efficiency counts. Safe Ways to Clean Solar Panels Cleaning solar panels isn’t complicated, but doing it wrong can cause damage. Here’s the right approach. What You’ll Need Soft-bristle brush or microfiber cloth Squeegee with a long handle Hose with a gentle spray nozzle Bucket with mild soapy water (dish soap works fine) Deionized or distilled water for the final rinse (avoids hard water spots) Step-by-Step Process Turn off your solar system before you start. Check your inverter’s shutdown procedure. Rinse panels with low-pressure water to remove loose dust and debris. Apply soapy water with a soft brush. Work in sections. Scrub gently never use abrasive pads or steel wool. Rinse thoroughly with clean water to remove all soap residue. Squeegee dry to prevent water spots, especially in hard water areas. What to Avoid High-pressure washers — too much pressure can crack cells or damage seals Abrasive cleaners or scouring pads — they scratch the anti-reflective coating Harsh chemical solvents — they degrade the glass coating over time Standing on the panels — they are not designed to bear weight Should you clean solar panels while they’re mounted at a steep roof angle? In many cases, a long-handled brush and hose from the ground can do the job safely without roof access. Can Rain Clean Solar Panels? Rain helps, but it doesn’t do the full job. Light rain can rinse off loose dust and some pollen. But rain alone can’t remove bird droppings, hard water deposits, or thick layers of grime.
How to Remove Graffiti Fast: 7 Proven Methods That Actually Work

Graffiti can show up overnight and turn a clean wall into an eyesore. Whether it’s on your fence, brick wall, or storefront, the longer it sits, the harder it gets. The good news? You don’t always need a professional to fix it. Learning how to remove graffiti the right way saves you time and money. This guide covers every surface, every method, and every mistake to avoid so you can get your property looking clean again. What Is Graffiti and Why It’s Hard to Remove Graffiti is spray paint, markers, or other paint applied to surfaces without permission. It bonds quickly with porous surfaces like brick and concrete. Paint soaks into tiny gaps in the material, making it tough to lift out. The type of paint matters. Aerosol spray paint is oil-based and designed to stick. Permanent markers are alcohol-based. Both resist regular soap and water completely. Surface type also plays a role. Smooth surfaces like glass or metal are easier to clean. Rough or porous surfaces like brick, stone, and concrete hold paint deep inside the material. This is why graffiti removal is not as simple as wiping something down. The age of the graffiti also matters. Fresh graffiti from the past few hours is far easier to remove than paint that has cured for days or weeks. How to Remove Graffiti (Quick Overview) Here’s a simple breakdown of the process: Identify your surface type Choose the right removal method Test on a small hidden area first Apply your cleaner or solvent Scrub or pressure wash Rinse thoroughly Repeat if needed Apply anti-graffiti coating to prevent future vandalism Tools and Materials You’ll Need Before you start, gather your supplies. Having the right tools makes a real difference. For light graffiti: Acetone or nail polish remover Rubbing alcohol Graffiti remover spray (commercial grade) Soft cloths or rags Stiff-bristle brush Bucket of warm water For heavy graffiti: Pressure washer (1,500–3,000 PSI) Chemical graffiti stripper Wire brush (metal surfaces only) Safety gloves and eye protection Respirator mask (for enclosed spaces) Paint thinner or mineral spirits For finishing: Matching paint (for repainting) Anti-graffiti coating or sealant Painter’s tape (if painting over) Always wear gloves and eye protection when working with chemicals. Work in a well-ventilated area. How to Remove Graffiti from Different Surfaces Different surfaces need different approaches. Here’s how to handle the most common ones. Brick and Concrete These are the hardest surfaces to clean because they’re porous. Paint sinks into the material. Method: Apply a commercial graffiti remover or gel-based stripper Let it sit for 10–15 minutes Scrub with a stiff brush Rinse with a pressure washer at 2,000–3,000 PSI Repeat if paint remains For stubborn stains, a hot water pressure washer works better than cold water. If you’re in the Tracy, California area, tracy graffiti removal by VJ Pressure Washing uses professional-grade hot water systems specifically designed for brick and concrete surfaces. Wood Fences and Surfaces Wood is porous but softer than brick. Be careful not to damage the grain. Method: Try mineral spirits or paint thinner first Rub gently with a cloth in the direction of the wood grain If that doesn’t work, use a commercial graffiti remover Rinse with water and let dry Sand lightly if staining remains Repaint or restain the affected area Avoid wire brushes on wood. They’ll scratch and damage the surface. Metal Surfaces (Fences, Garage Doors, Dumpsters) Metal is non-porous, which makes removal easier. Method: Apply acetone, nail polish remover, or graffiti remover Let it sit for 2–3 minutes Wipe with a cloth or soft-bristle brush Rinse with water For stubborn areas, use a light sandpaper (400 grit) then repaint Avoid steel wool on painted metal. It causes rust. Glass and Windows Fresh graffiti on glass comes off easily. Older graffiti takes more work. Method: Apply acetone or rubbing alcohol to a cloth Rub the graffiti in circular motions For thick paint, use a razor blade scraper at a low angle Wipe clean and rinse with glass cleaner Never use abrasive pads on glass. They’ll scratch permanently. Stucco and Painted Walls These surfaces need a gentler approach to avoid damaging the paint underneath. Method: Try warm soapy water first for fresh graffiti Use a graffiti remover spray designed for painted surfaces Apply, wait 5 minutes, then wipe gently If graffiti remains, painting over is often the best option Plastic Surfaces Plastic is tricky because solvents can melt or warp it. Method: Use a product labeled safe for plastics Try baby wipes or rubbing alcohol first for light marks Avoid acetone it melts most plastics Rinse well after cleaning Best Graffiti Removal Methods 1. Chemical Graffiti Removers These are the most effective commercial solutions. Products like Graffiti Safewipes, Taginator, and Motsenbocker’s Lift Off are designed to break down spray paint fast. Best for: Brick, concrete, metal, wood How to use: Spray or apply to the surface Wait the recommended dwell time (usually 5–15 minutes) Scrub with a brush Rinse thoroughly Always read the label. Some products are not safe for certain surfaces. 2. Pressure Washing Pressure washing alone works on fresh graffiti. Combined with a chemical remover, it handles most cases effectively. Best for: Brick, concrete, stone, metal A pressure washer between 2,000 and 3,500 PSI removes most surface-level paint. Use a 25-degree nozzle for a good balance of power and coverage. Hot water pressure washing is even more effective because heat softens the paint. 3. Baking Soda Blasting This is a gentler alternative to pressure washing. It uses fine baking soda particles blasted at high speed to lift paint without damaging the surface underneath. Best for: Brick, stone, historic surfaces It’s used on surfaces where pressure washing could cause damage. It’s also more environmentally friendly than chemical solvents. 4. Dry Ice Blasting A newer method where dry ice pellets are blasted onto the graffiti. The extreme cold causes the paint to crack and flake off. Best for: Delicate surfaces, heritage buildings It leaves no chemical residue and is non-toxic. It’s typically a professional-only
How Much Does Roof Cleaning Cost
A dirty roof is not just ugly. It can cause real damage over time. Moss, algae, and debris trap moisture and break down your shingles faster than you’d expect. Cleaning your roof now can save you thousands later. So, how much does roof cleaning cost in 2026? Most homeowners pay between $300 and $900, with the average sitting around $500 to $600. The final number depends on your roof size, material, cleaning method, and where you live. This guide breaks it all down clearly. Average Roof Cleaning Cost in 2026 Here’s a simple breakdown of what you can expect to pay: Service Type Average Cost Soft wash cleaning $250 – $600 Pressure wash roof cost $150 – $400 Chemical treatment $200 – $500 Full roof cleaning (large home) $600 – $1,200 Most professional companies charge by square foot. The average rate is $0.20 to $0.70 per square foot. For a 1,500 sq ft roof, expect to pay $300 to $1,050. A 3,000 sq ft roof can run $600 to $2,100. Roof washing cost also varies by region. Urban areas and coastal markets tend to charge more. Rural areas are usually cheaper. Factors That Affect Roof Cleaning Costs At VJ Pressure Washing, we understand that no two roofs are the same. Here’s what can push the price up or down. 1. Roof Size Bigger roofs cost more to clean. Simple as that. Most companies use per-square-foot pricing, so a larger surface area means a higher bill. 2. Roof Pitch and Slope Steep roofs are harder and more dangerous to work on. Contractors charge more for steep pitches because it takes longer and requires more safety equipment. 3. Type of Debris or Growth Light dust or dirt costs less to clean. Heavy moss, black algae streaks, or lichen buildup takes more time and product. Expect to pay 20% to 40% more for heavy growth. 4. Location of Your Home Labor costs differ by city and state. In California, New York, or Seattle, prices are higher. In the Midwest or South, rates tend to be lower. 5. Roof Age and Condition An older roof may need gentler methods to avoid damage. This can add cost, especially if the contractor has to hand-scrub certain areas. 6. Accessibility If your roof is hard to reach or surrounded by landscaping, it adds time to the job. Time equals money in any service industry. 7. Season and Demand Prices can spike in spring and early summer. That’s peak season for roof cleaning. Booking in fall or winter may get you a better deal. Roof Cleaning Methods and Their Costs There are three main cleaning methods. Each works better in different situations. Soft Washing Soft washing uses low water pressure combined with a cleaning solution. It kills moss, algae, and mildew at the root without damaging shingles. Best for: Asphalt shingles, tile, cedar shake Average cost: $250 – $600 Why choose it: Safe, thorough, long-lasting results Pressure Washing Pressure wash roof cost tends to be lower, but it’s not always the safest option. High pressure can crack tiles, strip granules from asphalt, or force water under shingles. Best for: Metal roofs, concrete tiles, flat roofs Average cost: $150 – $400 Why choose it: Fast, effective on hard surfaces Chemical Treatment (Biocidal Wash) This method uses a spray-applied chemical solution. It kills biological growth without any water pressure at all. The dirt rinses off over time with rain. Best for: Delicate roofs, homeowners who want minimal disruption Average cost: $200 – $500 Why choose it: No pressure risk, works over weeks A good contractor will recommend the right method for your roof type. If they push only one option regardless of your roof, that’s a red flag. Roof Cleaning Cost by Roof Type Different materials need different care. Here’s what you’ll typically pay by roof type. Asphalt Shingles The most common roof in the U.S. Soft washing is the preferred method. Average roof cleaning cost runs $300 to $600. Metal Roofs Metal can handle pressure washing better than most materials. Average cost is $200 to $500. Rust stains may require extra treatment. Clay or Concrete Tile Tile roofs are fragile under high pressure. Soft washing is best. Average cost falls between $400 and $800. Cedar Shake Cedar needs gentle care. Harsh chemicals can dry it out and crack it. Average cost ranges from $350 to $700. Flat Roofs (TPO, EPDM, etc.) Flat roofs are easier to access but require careful treatment around seams. The average cost is $200 to $500. Slate Roofs Slate is delicate and expensive to repair. Only hire specialists. Average cost starts at $400 and can exceed $1,000. If you’re in the Tracy, CA area, VJ Pressure Washing offers expert professional roof cleaning Tracy CA for all roof types. Their team uses the right method for your specific material to protect your investment. Additional Roof Cleaning Services and Costs Sometimes cleaning is just one part of the job. Here are extra services and what they add to your bill. Add-On Service Estimated Cost Gutter cleaning $100 – $250 Moss treatment/prevention $150 – $300 Algae inhibitor spray $50 – $150 Roof inspection $100 – $300 Fascia and soffit cleaning $75 – $200 Bundling services often saves money. Ask your contractor about package pricing. Signs Your Roof Needs Cleaning You might not check your roof often. Here are signs it’s time to book a clean. Dark streaks or stains — Usually caused by Gloeocapsa magma, a type of algae Green patches — Moss or lichen growth Black spots or blotches — Mold or mildew Debris buildup in valleys — Leaves, twigs, and dirt collecting in low spots Sagging gutters from weight — A sign of long-term debris buildup Water stains on ceilings inside — Can indicate trapped moisture from a dirty roof If you spot any of these, don’t wait. Organic growth spreads fast and can cause permanent shingle damage. Is Roof Cleaning Worth the Cost? Short answer: yes, in most cases. Here’s why roof cleaning pays
How Much Does Window Cleaning Cost: Complete Pricing Guide (2026)
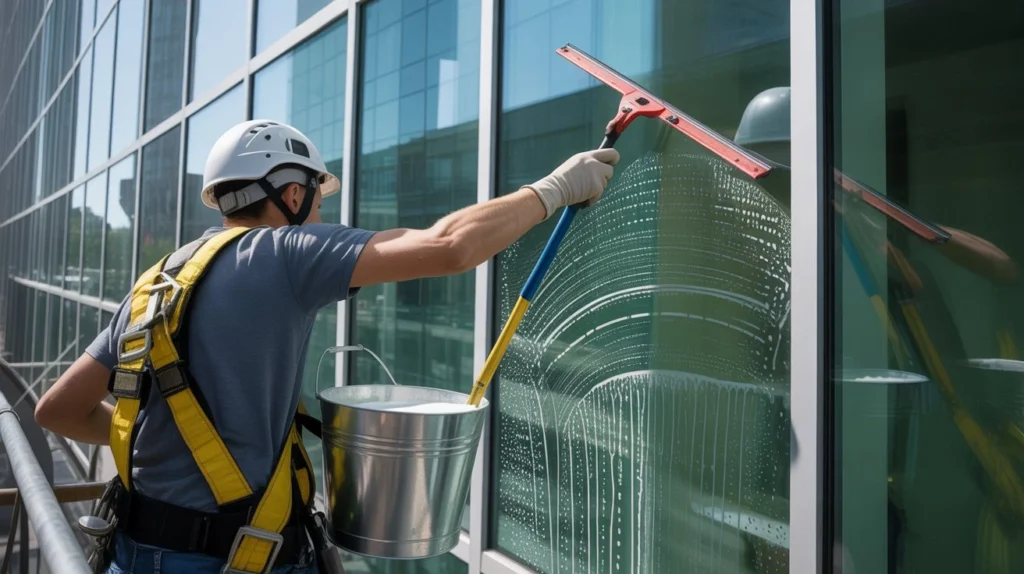
Window cleaning is one of those home services people delay until glass starts looking dull or streaked. Clean windows improve curb appeal, let in more light, and help maintain property value. Still, most homeowners are unsure what they should actually pay. Prices change based on home size, window type, and how dirty the glass is. Labor, height, and tools also matter. In this guide, we break down real costs in simple terms so you can plan better. If you are wondering How Much Does Window Cleaning Cost, the short answer is this: most homeowners pay between $150 and $400 for a standard house, while larger or multi-story properties can go well above $600 depending on complexity. Average Cost of Window Cleaning The average price for window cleaning depends on the type of service and property size. In most regions, professional cleaners charge either per window or per project. For residential homes, the typical rate ranges from $5 to $15 per window for basic cleaning. Full-home packages usually fall between $150 and $400. For commercial buildings, pricing is higher due to scale and safety needs. Small offices may pay $200 to $500 per visit, while large buildings can exceed $1,000. Local providers such as window cleaning service tracy ca often offer bundled packages for better value, especially when combined with exterior washing or gutter cleaning. Companies like VJ Pressure Washing also structure pricing based on window count and access difficulty. Most customers compare window cleaning prices before booking to understand fair market rates. Factors That Affect Window Cleaning Cost Several factors influence final pricing. Two homes with the same number of windows may still pay different amounts. 1. Property size The number of windows plays a major role in pricing. Larger homes with more glass surfaces require more time, effort, and cleaning solution. A small house with fewer windows is quicker to clean, while bigger properties naturally increase labor costs. 2. Window height and access Windows on higher floors or in hard-to-reach areas cost more to clean. Second-story windows, rooftop glass, or tight spaces require ladders, extension tools, or safety equipment. This adds both time and risk, which increases the final price. 3. Window condition Light dust and regular maintenance cleaning are cheaper. However, windows with heavy grime, grease, mold, or post-construction debris need deeper cleaning methods. The more buildup there is, the more time and effort required. 4. Window type Standard sliding windows are the easiest and most affordable to clean. In contrast, skylights, bay windows, and tinted or decorative glass require more care. Their shape and material can slow down the cleaning process, raising the cost. 5. Location Where you live also affects pricing. Urban areas usually have higher labor and service rates compared to rural locations. Travel distance, demand, and local competition all influence the final cost. 6. Service frequency Regular cleaning schedules are more cost-effective. When windows are cleaned often, dirt does not build up heavily. This reduces the time needed per visit and lowers the overall cost compared to one-time deep cleaning services. Understanding these factors helps you use a proper window cleaning pricing guide instead of guessing. Residential Window Cleaning Costs Residential pricing is the most common concern for homeowners. Small homes (up to 10 windows): $100 to $180 Medium homes (10–25 windows): $180 to $350 Large homes (25+ windows): $350 to $700+ Extra services may include: Screen cleaning Frame wiping Track cleaning A professional service like VJ Pressure Washing usually offers package deals to reduce per-window cost. Residential clients often ask How Much Does Window Cleaning Cost when comparing quotes, but final pricing depends on condition and access more than just window count. Commercial Window Cleaning Costs Commercial buildings follow different pricing models. Safety rules, height, and equipment matter more than window count. Small offices: $200 to $500 per visit Mid-size buildings: $500 to $1,200 Large commercial properties: $1,000 to $5,000+ For high-rise structures, pricing increases significantly due to rope access systems, lifts, and insurance. This is often called high rise window cleaning cost, and it can reach $10 to $25 per window depending on difficulty. Many businesses schedule monthly or quarterly cleaning contracts to reduce long-term window cleaning services prices. DIY vs Professional Window Cleaning Costs Some homeowners consider cleaning windows themselves to save money. But cost is not the only factor. DIY Costs Cleaning tools: $30 to $100 Ladder (if needed): $80 to $200 Cleaning solutions: $10 to $30 Total initial cost: $50 to $300 Professional Costs Average visit: $150 to $400 Includes labor, safety gear, and equipment DIY may look cheaper at first. But it requires time, safety risk, and effort. Professional cleaners deliver better results and reduce risk of injury. When comparing both options, most homeowners still return to asking How Much Does Window Cleaning Cost professionally because of convenience and quality. Tips to Save Money on Window Cleaning You can reduce costs without lowering quality. 1. Book regular cleaning Scheduling window cleaning on a regular basis helps prevent heavy dirt buildup. This keeps each visit quicker and reduces labor time, which can also lower overall cost. Clean windows maintained consistently stay in better condition and need less deep scrubbing compared to neglected ones. 2. Bundle services You can save money by combining window cleaning with other services like pressure washing or gutter cleaning. Many companies offer discounted packages when multiple services are booked together, which reduces the total cost compared to separate appointments. 3. Compare local quotes Always get at least 2–3 estimates from different providers before choosing. Prices vary based on experience, equipment, and service quality. Comparing quotes helps you understand fair market rates and choose the best balance between cost and results. 4. Clean seasonal dirt early Dust, pollen, and salt buildup can accumulate quickly depending on the season. If left too long, it becomes harder to remove and may require extra time or stronger cleaning methods. Early cleaning helps prevent stubborn stains and keeps maintenance costs lower. 5. Choose local experts Local companies often offer
How Much Does Gutter Cleaning Cost?
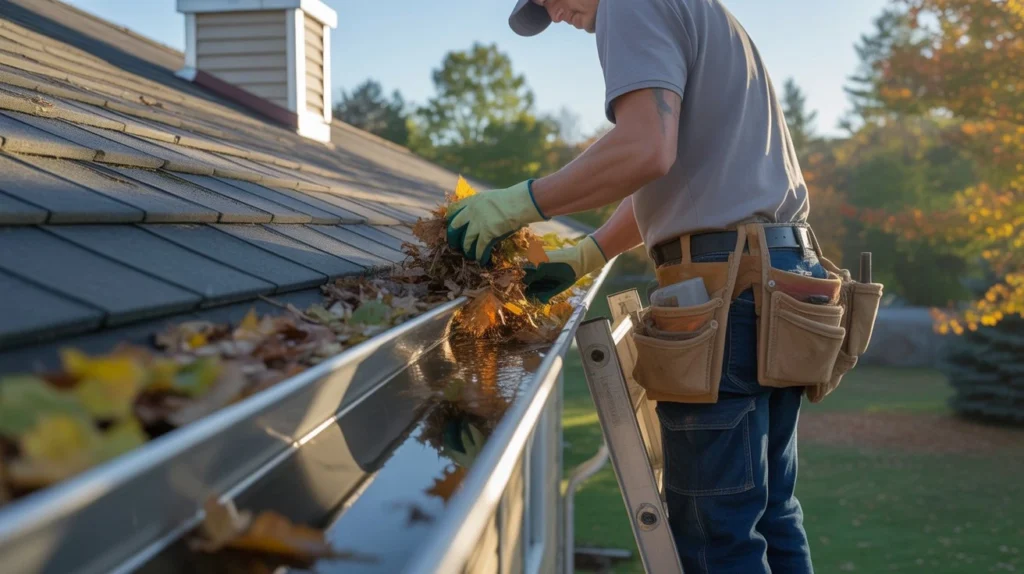
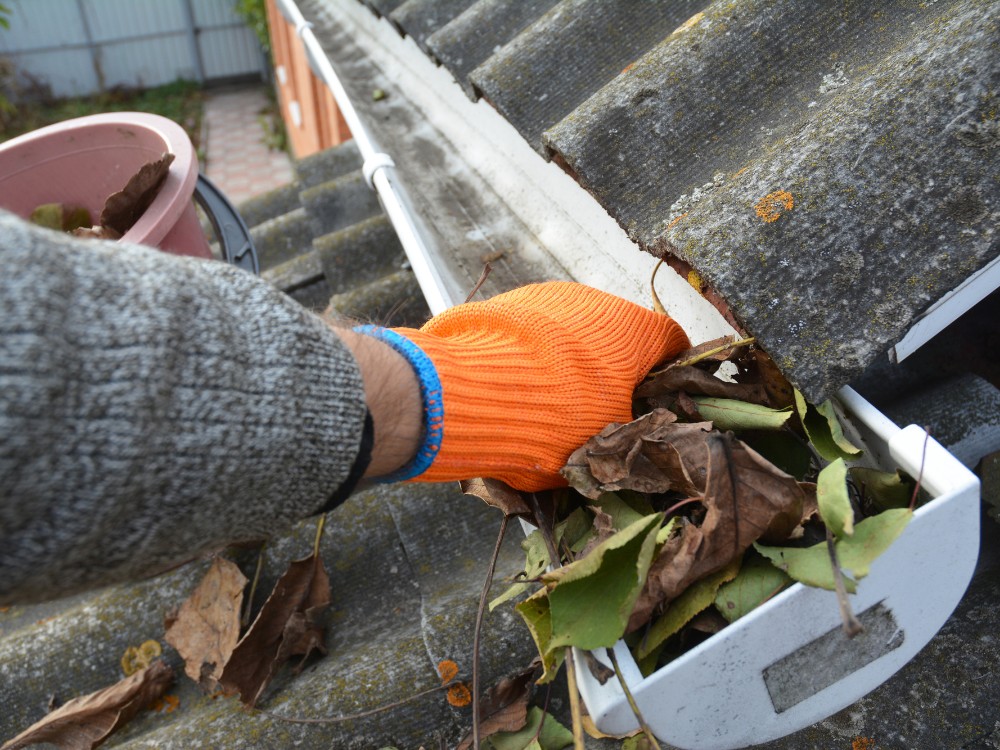
Gutter cleaning looks simple from the outside, but it protects your home in a big way. Clean gutters move rainwater away from your roof, walls, and foundation. When they clog, water damage starts fast and repairs get expensive. Most homeowners only think about gutters when something goes wrong, but regular cleaning avoids that risk. Prices vary based on home size, location, and how dirty the gutters are. Some homes need light cleaning, while others need heavy debris removal and flushing. How Much Does Gutter Cleaning Cost? Most homeowners in 2026 pay between $100 and $400 for a standard job. The final price depends on home height, gutter length, and service type. This guide breaks down real pricing so you know exactly what to expect before hiring a service. Average Cost of Gutter Cleaning The average cost of gutter cleaning in most regions falls between $0.80 to $2.00 per linear foot. For a typical home, that adds up to $120 to $350. Larger homes or homes with difficult access can reach $450 or more. In cities where labor costs are higher, pricing increases slightly. For example, homeowners searching for gutter cleaning tracy ca services often see mid-range pricing due to local demand and seasonal rainfall patterns. At VJ Pressure Washing, pricing is based on roof size, debris level, and safety needs. A small single-story home costs less than a two-story house with heavy buildup. Many companies also offer flat rates instead of per-foot pricing. That helps homeowners avoid surprises after inspection. Cost by Home Size / Stories Home size plays a major role in pricing. The higher the home, the more equipment and safety gear needed. Single-story homes: $100 to $200 Two-story homes: $150 to $350 Three-story homes: $250 to $500+ Tall homes take more time and require ladders or safety harness systems. That increases labor cost and risk. Cost by Pricing Method Gutter cleaning companies use different pricing models. Understanding them helps you compare quotes better. Per Foot Pricing This is the most common model. The gutter cleaning cost per foot ranges from $0.80 to $2.00. It depends on debris level and roof height. Hourly Pricing Some companies charge a gutter cleaning cost per hour, usually between $50 and $100 per worker. This works better for small jobs or partial cleanings. Flat Rate Pricing Flat pricing is common for standard homes. The cost to have gutters cleaned is agreed before work starts. It often ranges from $120 to $300. Flat pricing is preferred by most homeowners because it removes guesswork. Factors That Affect Gutter Cleaning Cost Several conditions change the final price of gutter cleaning. These include: Roof height and slope Length of gutters Amount of debris buildup Presence of trees near the home Accessibility around the house Condition of gutters and downspouts Homes near trees collect leaves faster. That increases cleaning time and cost. If gutters have not been cleaned in years, they may need flushing or manual debris removal. That raises labor time. Additional Services That Increase Cost Basic cleaning covers leaves, dirt, and flushing. But extra services can increase the total bill. Common add-ons include: Downspout unclogging Minor gutter repairs Gutter guard removal and cleaning Roof debris cleanup Mold or stain removal Each add-on can increase the total cost by $20 to $150 depending on complexity. Some homeowners also combine pressure washing with gutter cleaning for better results. Companies like VJ Pressure Washing often bundle services for better value. DIY vs Professional Gutter Cleaning Cost DIY gutter cleaning looks cheaper, but it comes with risk. DIY Cost Ladder rental or purchase Gloves and tools Safety equipment Total: $20 to $100 Professional Cost Full cleaning service Safety equipment included Proper disposal of debris Total: $120 to $400 DIY cleaning can save money, but it increases risk of injury. Falls from ladders are one of the most common home accidents. Professionals complete the job faster and inspect for damage at the same time. How Often Should You Clean Gutters Most homes need gutter cleaning twice a year. Spring: after pollen and storm season Fall: after leaves drop Homes near trees may need cleaning 3 to 4 times a year. Skipping maintenance leads to blockages, water overflow, and roof leaks. Regular cleaning reduces long-term repair costs. A consistent schedule also lowers future cost to have gutters cleaned because buildup stays light and easy to remove. How to Save Money on Gutter Cleaning There are simple ways to reduce gutter cleaning expenses without cutting quality. 1. Clean Regularly Cleaning your gutters on a regular schedule is one of the easiest ways to save money. When debris like leaves, dirt, and small twigs are removed early, they don’t turn into heavy blockages. Light buildup takes less time and effort to clean, which directly lowers the service cost. It also helps prevent overflow issues that can lead to expensive home repairs later. 2. Install Gutter Guards Gutter guards act as a protective cover that blocks large debris from entering your gutters. They significantly reduce leaf buildup and slow down clogging. This means fewer cleanings are needed each year, which lowers long-term maintenance costs. While there is an upfront investment, many homeowners find it pays off over time by reducing how often professional cleaning is required. 3. Bundle Services Bundling services is a smart way to reduce overall home maintenance costs. Many companies offer discounts when you combine gutter cleaning with roof washing, driveway cleaning, or full exterior pressure washing. Instead of booking separate visits, you save on labor charges and service fees. This approach also keeps your entire home exterior clean in one go. 4. Compare Quotes Never settle for the first price you receive. Getting at least two to three estimates helps you understand the real market rate in your area. Some companies include extra services in their pricing, while others charge separately. Comparing quotes ensures you get fair pricing without overpaying for the same level of work. It also helps you find more experienced and reliable providers. 5. Choose Local
How to Pressure Wash a House (Step-by-Step Guide)
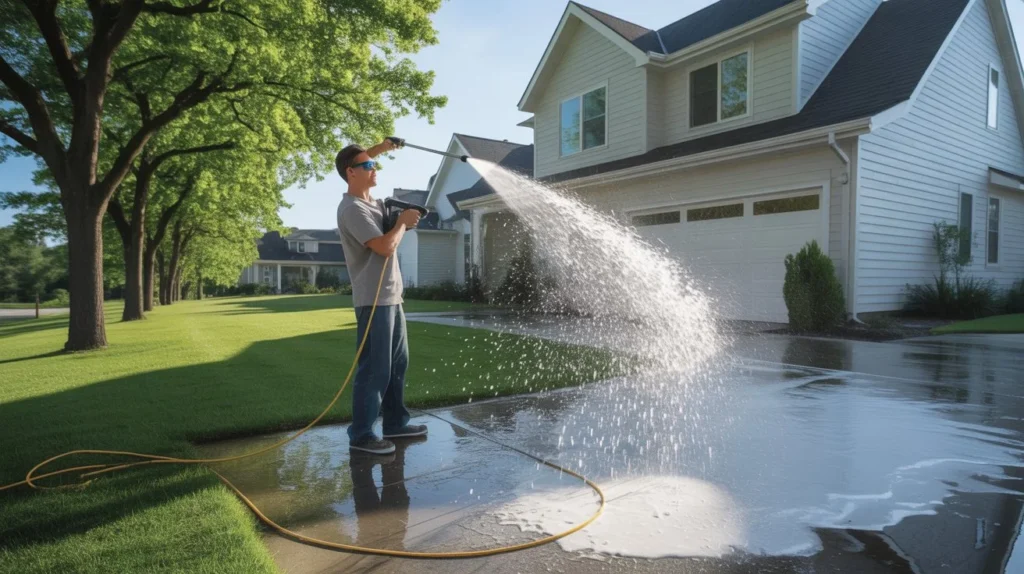
A clean home exterior protects your siding and improves curb appeal. Dirt, mold, algae, and dust build up over time. If left alone, they stain surfaces and slowly damage paint or siding. A proper wash removes these layers and helps your home last longer. If you want to know how to pressure wash a house, the key is simple: use the right pressure, the right cleaner, and the right technique. This guide explains each step so beginners can safely clean their home without causing damage. Why Pressure Washing Your House Matters Exterior walls face rain, dust, and pollution every day. These build up and trap moisture. That leads to mildew, stains, and wood rot. Regular pressure cleaning house surfaces helps prevent these issues. It also prepares walls for painting and keeps the home looking fresh. Benefits include: Removes mold, mildew, and algae Improves curb appeal Protects siding and paint Prepares surfaces before repainting Helps your home look well maintained Many homeowners use power washing house siding once a year to prevent buildup. Tools and Materials Needed Before you start, gather the right tools. Good preparation saves time and prevents mistakes. Basic equipment: Pressure washer (electric or gas) Garden hose with water supply Pressure washer detergent Spray nozzles (25° and 40° are best for siding) Extension wand for higher areas Bucket and brush for stubborn stains Safety gear: Safety glasses Gloves Non-slip shoes Electric machines work well for most homes. Gas units offer stronger pressure for large houses or brick surfaces. Safety Precautions Pressure washers are powerful tools. If used the wrong way, they can damage siding or cause injury. At VJ Pressure Washing, we always stress using the correct pressure, proper equipment, and safe techniques to protect both the home and the person doing the cleaning. Follow these simple rules: 1. Protect yourself Wear protective gloves and safety glasses before you start. A pressure washer sprays water with strong force. Small dirt particles, paint chips, or debris can bounce back toward you. Proper protection helps prevent eye injuries and keeps your hands safe while cleaning. 2. Keep distance Keep the spray nozzle about 2 to 3 feet away from the wall while cleaning. This distance helps control the pressure and prevents damage to siding, paint, or wood surfaces. Standing too close can strip paint or force water behind the siding. 3. Use the right nozzle Use a 25° or 40° spray nozzle when cleaning most types of siding. These nozzles spread the water pressure over a wider area, making the cleaning safer and more controlled. Narrow spray tips focus the pressure into a small stream, which can damage siding, strip paint, or leave marks on the surface. 4. Avoid sensitive areas Avoid spraying water directly at windows, vents, light fixtures, or electrical outlets. High pressure water can force moisture into these areas, which may cause damage or create electrical risks. Always keep the spray slightly angled away from these parts of the house. 5. Watch the ladder If you need to use a ladder, make sure both feet are firmly placed and balanced before you begin spraying. Keep your body steady at all times. Never spray the pressure washer while you are off balance, as the strong water force can cause you to lose stability and fall. Safety comes first when pressure washing your house. Prepare the Area Good prep makes the cleaning process faster and safer. Start by clearing the space around your home. Move patio furniture Remove decorations Park cars away from the wall Trim plants near siding Cover plants with plastic sheets. Cleaning solutions can harm leaves.Seal outdoor outlets and lights with plastic and tape. Also close all windows and doors. If you prefer professional help, many homeowners hire a residential pressure washing service fremont ca like VJ Pressure Washing to handle the prep and cleaning.Preparation also helps when power washing house siding because dirt often collects near plants and corners. Prepare the Pressure Washer Next, set up the machine correctly. Connect the garden hose to the pressure washer. Attach the high-pressure hose to the spray gun. Insert the correct spray nozzle. Turn on the water supply first. Start the pressure washer. Always test the spray on a hidden part of the house first. This helps you check the pressure level. Learning how to pressure wash a house safely starts with a small test area.If the siding looks safe after spraying, you can move forward. Apply Cleaning Solution Most dirt and algae need a cleaning solution to break down stains. Fill the detergent tank with a pressure washer soap designed for siding. Follow these steps: Switch to the low-pressure soap nozzle. Spray the cleaner from bottom to top. Cover one section at a time. Let the solution sit for about 5 to 10 minutes. Do not let the soap dry. If it dries, it can leave streaks.This step is important when power washing house siding because soap loosens grime before rinsing. Wash the House Once the detergent has worked on the surface, you can begin washing the house. Switch to a wider spray nozzle and start rinsing from the top of the wall. Move slowly downward so the dirty water flows away from areas already cleaned. Keep the spray wand moving in smooth horizontal motions. This prevents streaks and uneven marks on the siding. Maintain a steady distance from the wall while spraying. Standing too close can damage siding or strip paint. Work in small sections around the house. This method keeps the cleaning process organized and prevents detergent from drying before rinsing. Using steady motion and controlled pressure is the key when pressure washing your house. Special Tips for Different Siding Types Not all siding handles pressure the same way. Vinyl Siding Vinyl siding is common and fairly easy to clean. Use moderate pressure and keep the nozzle about 2 feet away from the surface. Do not spray upward under the panels because water can get trapped behind them. Wood Siding Wood siding needs extra
Eco-Friendly Pressure Washing: Safe Ways to Clean Your Driveway

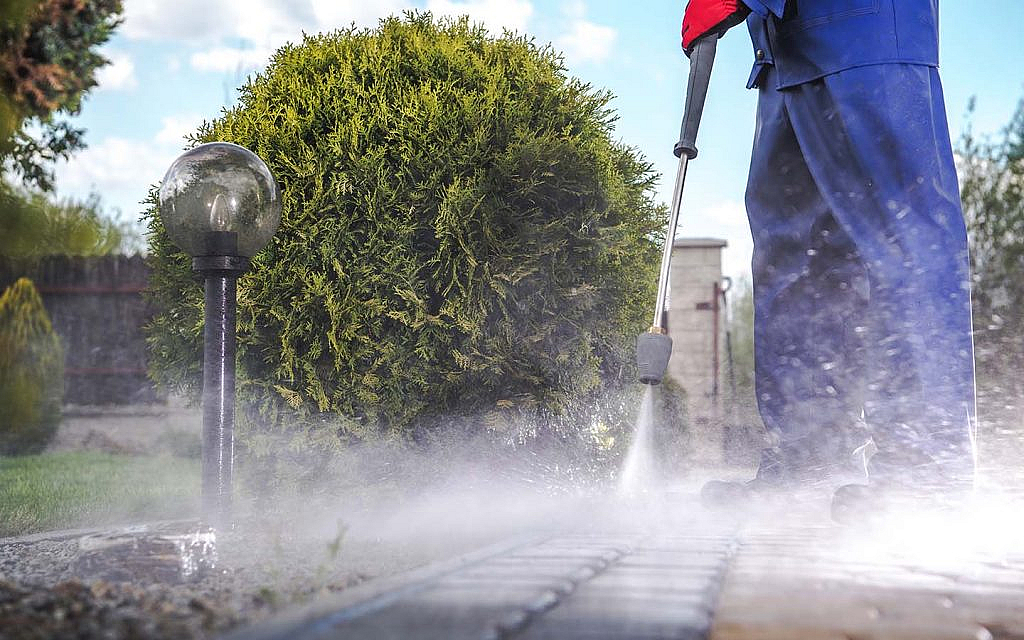
A clean driveway improves curb appeal and keeps your property looking well cared for. Dirt, oil, mold, and tire marks slowly build up on concrete and pavers. Many homeowners use harsh chemicals to remove these stains. That can harm plants, soil, and nearby water systems. A safer approach exists that still delivers strong cleaning results. Eco-Friendly Pressure Washing uses safer methods and biodegradable cleaners to remove stains without harming the environment. It protects your driveway surface, nearby landscaping, and local water systems while still providing deep cleaning. What Is Eco-Friendly Pressure Washing? Eco-Friendly Pressure Washing is a cleaning method that removes dirt, mold, and stains while reducing environmental impact. It relies on controlled water pressure and biodegradable cleaning solutions instead of harsh chemicals. Traditional pressure washing often uses strong detergents that flow into storm drains. These chemicals can affect plants and waterways. Green cleaning methods focus on safer products that break down naturally. Professionals also adjust water pressure based on the surface type. High pressure may damage concrete or decorative pavers. Eco-friendly methods balance pressure and cleaning agents to protect the material. Many homeowners search for sustainable cleaning solutions when hiring a driveway washing service tracy ca. Companies like VJ Pressure Washing use eco-safe products and water-saving equipment. This approach delivers strong results while protecting the local environment. Another part of this process is using an eco friendly pressure washer. These machines control water use and reduce waste while still providing enough power to remove stains. Why Eco-Friendly Driveway Cleaning Matters Protects Local Water Systems When chemicals wash off a driveway, they often enter storm drains. These drains lead to rivers and lakes. Harsh cleaners can pollute water and harm wildlife. Eco-safe cleaning solutions break down naturally. They reduce chemical runoff and keep nearby water cleaner. Protects Plants and Landscaping Strong detergents may damage grass, flowers, and shrubs. Many eco cleaners use plant-based ingredients. These products remove stains without harming nearby plants. Safer for Families and Pets Children and pets often walk or play in the driveway area. Harsh chemicals may leave residue on the surface. Eco cleaners reduce that risk. Preserves the Driveway Surface Very high pressure can crack concrete or loosen pavers. Eco-friendly methods rely on balanced pressure and targeted cleaning solutions. Common Driveway Stains and Green Cleaning Solutions Driveways face daily exposure to dirt, cars, and weather. Each stain type requires the right cleaning approach. Oil and Grease Stains Oil stains from vehicles are common. They soak into porous concrete and create dark patches. A natural eco friendly driveway cleaner often uses citrus or plant-based ingredients. These cleaners break down oil without harsh chemicals. Mold, Mildew, and Algae Moist areas allow mold and algae to grow. This makes the driveway look dirty and can also create slippery surfaces. Eco cleaning solutions remove these organic stains safely. They target the growth without harming nearby landscaping. Dirt and Tire Marks Cars leave rubber marks on the driveway. Dirt from rain and wind builds up over time. An eco friendly pressure washer combined with biodegradable detergent lifts these marks without damaging the surface. Rust and Mineral Stains Metal objects or water with high minerals may cause rust stains. Eco-safe cleaners designed for mineral buildup can remove these spots without harsh acids. Safe Eco-Friendly Pressure Washing Methods Cleaning a driveway safely requires the right methods and tools. Using Biodegradable Cleaning Solutions The most important step is choosing the right detergent. Eco cleaners break down naturally and do not stay in soil or water. These products remove stains while remaining safe for plants and pets. Controlled Water Pressure Concrete is strong but still vulnerable to excessive force. Professionals adjust pressure based on the material. Lower pressure combined with proper cleaning solutions removes stains without damage. Water Efficient Equipment Many modern machines use less water while producing strong cleaning power. A professional eco friendly pressure washer can clean a driveway using far less water than a hose. This helps conserve water while still achieving a deep clean. Soft Washing for Sensitive Areas Some driveways include decorative stone or sealants. These surfaces require a low-pressure method known as soft washing. Soft washing uses eco-safe cleaners and gentle pressure. It removes mold and dirt without harming the surface. Surface Cleaning Tools Flat surface cleaners attach to pressure washers. They clean evenly and reduce water waste. These tools also prevent streaks. Using these tools is part of responsible eco-friendly power washing. Benefits of Professional Eco-Friendly Pressure Washing Many homeowners try DIY driveway cleaning. While it may work for light dirt, professional service offers several advantages. Better Equipment Professional cleaners use commercial equipment designed for large surfaces. This allows deeper cleaning with less water waste. Proper Cleaning Solutions Experts know which eco friendly driveway cleaner works best for each stain type. Using the wrong cleaner may leave stains behind or damage the surface. Surface Protection Professional cleaning protects the driveway material. High pressure used incorrectly can cause cracks or erosion. Experienced technicians adjust pressure and cleaning solutions for safe results. Time and Effort Savings Driveway cleaning can take hours with basic tools. A professional team can complete the job quickly and effectively. Long-Term Maintenance Routine Eco-Friendly Pressure Washing prevents buildup that leads to permanent stains. Regular cleaning helps driveways last longer. Tips to Maintain a Clean Driveway Naturally Regular care keeps a driveway looking fresh between cleanings. Sweep the Driveway Weekly Loose dirt and debris build up quickly. Regular sweeping prevents grime from settling into the surface. Clean Spills Quickly Oil and fuel stains become harder to remove over time. Absorb spills early with baking soda or a natural cleaner. Rinse With Water Occasional rinsing removes dust and pollen. A simple rinse reduces buildup that may later require deeper cleaning. Seal the Driveway Concrete sealants protect the surface from moisture and stains. Sealing also makes future cleaning easier. Schedule Seasonal Cleaning Professional Eco-Friendly Pressure Washing once or twice a year helps maintain the driveway and prevent stubborn stains. Common Mistakes to Avoid Many homeowners accidentally damage
A Step-by-Step Guide to Driveway Washing: From Preparation to Finish
A clean driveway instantly improves your home’s curb appeal and prevents damage from dirt, oil, and moss. Over time, neglecting your driveway can lead to stains, cracks, and slippery surfaces, affecting safety and home value. A Step-by-Step Guide to Driveway Washing shows you how to restore your driveway efficiently. By following the right process, you can remove stubborn stains, protect your driveway material, and maintain a fresh, safe surface for years. This guide is practical, easy to follow, and uses safe, proven methods. Why Driveway Cleaning Matters Driveway cleaning is more than just appearance. Dirt, algae, and moss retain moisture, which can damage concrete, asphalt, or pavers. Oil spills and grime also degrade the surface over time. A clean driveway prevents slips, reduces long-term repairs, and keeps your property looking well-maintained. For reliable results, homeowners often hire tracy ca pressure washing professionals like VJ Pressure Washing. Experts provide proper techniques that ensure thorough cleaning without damaging the surface, saving time and effort while maintaining your driveway’s integrity. Common Driveway Contaminants Understanding what causes stains helps you choose the right cleaning method. Common driveway contaminants include: Oil and Grease Stains: Vehicle leaks leave dark, stubborn spots. Dirt and Mud: Regular traffic tracks soil and dust onto the surface. Algae, Moss, and Mold: Moist or shaded areas promote biological growth. Rust and Mineral Stains: Metal tools, outdoor furniture, or water can leave orange or white marks. Each contaminant requires specific attention for effective removal. Using the wrong method can damage the surface or leave stains behind. Tools and Materials You’ll Need To clean your driveway efficiently, gather the right tools: Pressure washer or hose with nozzle (choose correct PSI for material) Cleaning solutions such as degreasers or mild detergents Stiff brushes or brooms for scrubbing tough stains Safety gear: gloves, goggles, and boots Having the right tools ensures you can perform the cleaning safely while achieving the best results. Step-by-Step Driveway Washing Process Follow these steps to clean your driveway properly. Step 1 – Preparation Remove vehicles, furniture, and debris. Protect nearby plants and surfaces to avoid accidental damage from cleaning solutions or high-pressure water. Step 2 – Apply Cleaning Solution Select a solution appropriate for your stains. Oil and grease require degreasers, while algae and moss can be treated with eco-friendly cleaners. Allow the solution to sit for the recommended time to break down contaminants. Step 3 – Scrubbing Use a stiff brush or broom on stubborn spots. Focus on stains and moss patches. Scrubbing helps lift grime that water alone cannot remove. Step 4 – Pressure Washing Set your pressure washer to a safe level for your surface. Concrete can withstand higher PSI, while asphalt needs gentler pressure. Work in sections, maintaining consistent movement to avoid uneven cleaning. This is the best way to pressure wash driveway surfaces safely. Step 5 – Rinsing and Finishing Touches Rinse thoroughly to remove cleaning solution and loosened debris. Inspect for any remaining stains and repeat scrubbing or washing if needed. Allow the driveway to dry completely before use. DIY vs Professional Driveway Washing DIY cleaning saves money, but it carries risks. Incorrect pressure, harsh chemicals, or improper technique can damage the driveway or cause injury. DIY methods are best for small areas or light stains. Hiring professional driveway cleaning services like VJ Pressure Washing ensures safe, efficient results. Experts use specialized tools, proper cleaning solutions, and proven methods to remove tough stains without damaging your driveway. For large driveways or stubborn stains, professional service is usually the smarter choice. Maintenance Tips to Keep Your Driveway Clean Regular maintenance prolongs your driveway’s life and reduces cleaning frequency. Sweep debris weekly and remove stains promptly. Seal concrete or asphalt surfaces annually to prevent water and oil penetration. Trim overhanging branches to limit leaves and moss buildup. Monitoring your driveway periodically allows early action, preventing major cleaning efforts later. Safety Tips for Driveway Cleaning Driveway washing involves risks that should not be ignored. Wear gloves, goggles, and non-slip shoes. Keep children and pets away from the area. Follow cleaning product instructions carefully and avoid excessive pressure that can damage the surface. Proper safety ensures a clean driveway without accidents. Cost of Driveway Washing Costs vary based on size, material, and the level of staining. DIY cleaning mainly costs for tools and cleaning solutions. Professional service rates depend on driveway area, difficulty, and required chemicals. While hiring experts is costlier upfront, it saves time, ensures thorough cleaning, and reduces the risk of damage, making it a smart long-term investment. Conclusion A Step-by-Step Guide to Driveway Washing helps homeowners restore and maintain their driveways effectively. Whether you opt for DIY cleaning or hire VJ Pressure Washing for professional service, the key is proper technique, the right tools, and regular upkeep. A clean driveway not only boosts curb appeal but also extends the lifespan of your surface, prevents damage, and enhances safety. For reliable results, contact us today to schedule your driveway washing service and experience a cleaner, safer driveway. FAQs How often should I wash my driveway?Most driveways benefit from cleaning once or twice a year, or when stains appear. Can I use household cleaners for washing the driveway?Mild detergents work for light dirt, but tough stains need degreasers or professional solutions. What is the best way to pressure wash the driveway?Use a pressure washer with the right PSI for your surface, move in sections, and maintain a safe distance. Is professional driveway washing worth it?Yes. Professionals remove stubborn stains safely and ensure your driveway lasts longer. Can I prevent algae or moss growth?Trim trees, sweep regularly, and consider eco-friendly solutions to reduce growth over time.
11 Key Benefits of Gutter Cleaning: Why It’s Essential for Your Home
Gutters guide rainwater away from your home and protect key structural parts from damage. When they get clogged, water spills over and creates avoidable issues that grow over time. Regular cleaning keeps water moving and reduces risks that affect your roof, walls, and foundation. Understanding the Benefits of Gutter Cleaning helps homeowners make better maintenance decisions. Clean gutters prevent costly repairs and keep your home safe during heavy rain. They also support proper drainage, reduce stress on materials, and maintain the overall health of your property. 1. Prevents Water Damage to Your Home One of the most important Benefits of Gutter Cleaning is stopping water damage before it starts. When gutters fill with leaves and debris, water has nowhere to go. It spills over and runs down exterior walls. This overflow can damage siding, paint, and even interior ceilings. Over time, moisture weakens building materials and leads to repairs that could have been avoided with routine cleaning. 2. Protects Your Roof Clogged gutters trap water near the roof edge. This creates standing moisture that seeps under shingles. Once water enters the roof layers, leaks begin to form. Regular cleaning supports proper drainage and reduces strain on roofing materials. Many homeowners who invest in roof and gutter cleaning services notice fewer leaks and longer roof life. This is one of the core rain gutter cleaning benefits that protects your biggest home asset. 3. Avoids Foundation Problems Water that overflows from clogged gutters collects near the base of your home. Over time, this weakens the soil and puts pressure on the foundation. Cracks may form, and structural shifts can occur. In some regions, local services like gutter cleaning tracy ca help homeowners manage this risk before it leads to serious damage. Reliable maintenance from providers such as VJ Pressure Washing ensures water flows away from the foundation. This is one of the most critical Benefits of Gutter Cleaning for long-term stability. 4. Prevents Basement Flooding When water pools near the foundation, it often finds its way into basements. Even small leaks can lead to damp walls and standing water. Basement flooding can damage furniture, stored items, and electrical systems. Clean gutters reduce this risk by directing water away from the home. This also supports better indoor air quality and reduces repair costs. 5. Reduces Mold and Mildew Growth Moisture buildup creates the perfect environment for mold and mildew. These fungi grow on damp surfaces such as walls, ceilings, and insulation. One of the key Benefits of Gutter Cleaning is limiting excess moisture around your home. Clean gutters prevent water from sitting in unwanted areas. This reduces mold growth and protects both the structure and the health of occupants. 6. Keeps Pests Away Blocked gutters often become a home for pests. Insects, birds, and rodents use debris as nesting material. Standing water also attracts mosquitoes. Regular cleaning removes these breeding areas. This lowers the chance of infestations and keeps your roofline clear. It is one of the practical gutter maintenance tips that many homeowners overlook. 7. Extends Gutter Lifespan Debris buildup adds weight and stress to gutter systems. Over time, this can cause sagging, cracks, and rust. Clean gutters last longer because they remain free from constant moisture and blockage. Routine maintenance reduces the need for early replacement. This is a long-term financial benefit and another strong reason to understand the full Benefits of Gutter Cleaning. 8. Improves Rainwater Flow Efficiency Gutters are designed to carry rainwater away quickly. When clogged, the flow slows or stops completely. Efficient water movement prevents overflow and keeps drainage systems working as intended. Among all rain gutter cleaning benefits, proper flow is one of the most important for handling heavy rainfall without damage. 9. Protects Landscaping and Yard Overflowing gutters can wash away soil and damage plants. Strong water streams erode garden beds and disturb mulch. Clean gutters help maintain controlled water flow through downspouts. This protects lawns, flowers, and decorative landscaping. Homeowners who value curb appeal often include gutter cleaning as part of regular exterior care. 10. Prevents Ice Dams in Winter In colder climates, clogged gutters freeze easily. This leads to ice buildup that blocks water flow. Ice dams form when melting snow refreezes at the roof edge. Water then backs up under shingles and causes leaks. Clean gutters reduce this risk and help snowmelt drain properly. This seasonal issue highlights another important reason behind the Benefits of Gutter Cleaning for year-round protection. 11. Saves Money on Repairs Small maintenance tasks prevent large expenses later. Cleaning gutters is far less costly than repairing water damage, roof leaks, or foundation cracks. Ignoring clogged gutters problems often leads to emergency repairs that require time and money. Regular cleaning reduces these risks and keeps your home in good condition. Additional Insight: Why Regular Maintenance Matters Routine care is more effective than occasional fixes. Following simple gutter maintenance tips like seasonal cleaning, debris removal, and inspection helps avoid buildup. Professional roof and gutter cleaning services provide deeper cleaning and safety for hard-to-reach areas. They also spot early signs of damage before it worsens. Understanding the full Benefits of Gutter Cleaning allows homeowners to treat it as essential upkeep rather than an optional task. DIY vs Professional Gutter Cleaning DIY cleaning works for small homes with easy access. It involves ladders, gloves, and manual removal of debris. However, it comes with safety risks. Falls and improper cleaning can cause injury or missed blockages. Professional services such as VJ Pressure Washing use proper tools and techniques. They ensure complete cleaning, safe access, and proper inspection. For multi-story homes or heavy buildup, hiring experts is often the better choice. How Often Should You Clean Your Gutters? Most homes need gutter cleaning twice a year. Spring and fall are ideal times. Homes near trees may need more frequent cleaning due to falling leaves and debris. Areas with heavy rain or storms also require closer attention. Regular checks help maintain all the Benefits of Gutter Cleaning without letting debris accumulate. Conclusion Gutter cleaning
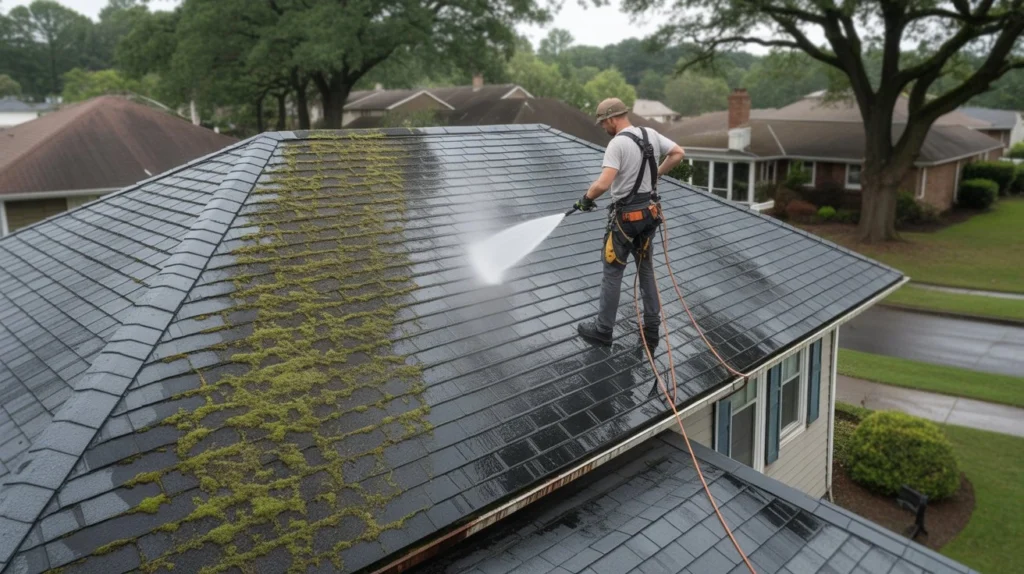
The Best Roof Cleaning Methods
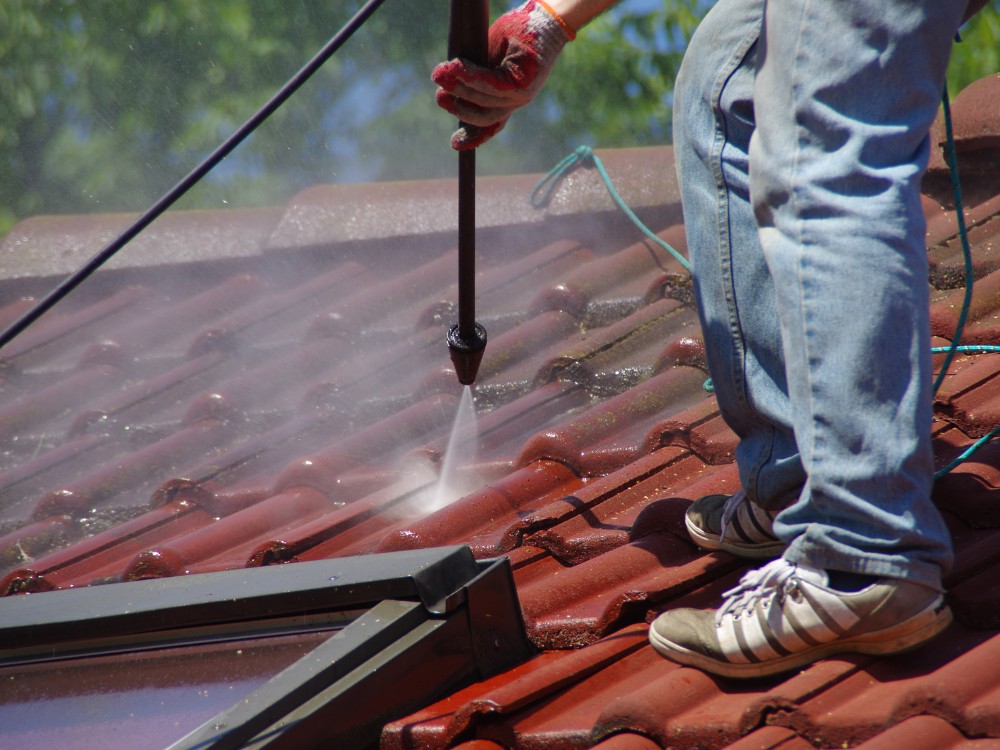
A dirty roof is more than just an eyesore. It can trap moisture, damage shingles, and shorten the life of your home. Algae, moss, and debris slowly break down roofing materials if left untreated. Cleaning your roof the right way protects your investment and keeps your home looking fresh. If you want safe and long-lasting results, understanding The Best Roof Cleaning Methods is key. The right method depends on your roof type, condition, and environment. Why Regular Roof Cleaning Matters Your roof takes constant exposure from sun, rain, and wind. Over time, dirt and organic growth build up and cause damage. Regular cleaning helps you: Extend the life of your roof Prevent costly repairs Improve curb appeal Maintain property value Moss and algae trap moisture. This leads to rot and weak shingles. A clean roof drains water properly and stays strong longer. Common Types of Roof Contaminants Algae Black streaks on roofs come from algae. It feeds on moisture and spreads fast, especially in humid areas. Over time, it can cover large sections of the roof and make it look old and dirty. Algae also reduces your roof’s ability to reflect sunlight, which can increase indoor heat. Moss Moss grows in damp and shaded areas. It holds water like a sponge and keeps the roof surface wet for long periods. This constant moisture can lift shingles and let water seep underneath. If not removed early, moss can cause serious structural damage. Lichen Lichen is tougher than moss and harder to remove. It forms a strong bond with the roof surface and spreads slowly over time. Lichen can create small pits in shingles, weakening them and making your roof more prone to cracks and leaks. Dirt and Debris Leaves, dust, and branches collect on roofs over time. This buildup blocks proper water drainage and can clog gutters. When debris stays on the roof for too long, it traps moisture and creates the perfect place for algae and moss to grow. Mold and Mildew Mold and mildew grow in wet and shaded areas of the roof. They can spread quickly if ignored and may damage roofing materials. In some cases, they can also affect air quality inside your home, especially if moisture seeps into the attic. The Best Roof Cleaning Methods Choosing the right method depends on your roof type and condition. Let’s break down The Best Roof Cleaning Methods used by professionals. Soft Washing Soft washing is the safest and most effective method for most roofs. It uses low-pressure water mixed with cleaning solutions. Kills algae, mold, and bacteria Prevents regrowth Safe for shingles and tiles This method works best for asphalt shingles and delicate surfaces. Many homeowners prefer it when comparing soft washing vs pressure washing roof options. If you are looking for expert-level results, companies like VJ Pressure Washing use this method for long-lasting cleaning. Pressure Washing Pressure washing uses high-pressure water to remove dirt and stains. Works well on metal or concrete roofs Removes heavy buildup quickly But it comes with risks. Too much pressure can damage shingles or remove protective layers. That is why this method should only be used when suitable. Chemical Cleaning This method uses cleaning solutions to break down algae and stains. Effective for deep cleaning Reaches hidden areas The key is using the right mixture. Harsh chemicals can harm your roof or plants. Professionals balance strength and safety. Manual Cleaning Manual cleaning involves brushing or scraping debris. Ideal for small areas Useful for removing moss It requires time and care. It is often combined with other roof cleaning techniques for better results. Roof Cleaning Tracy Services If you want reliable results without risk, consider roof cleaning tracy solutions offered by experts. They combine modern tools with proven methods to protect your roof while delivering a deep clean. DIY vs Professional Roof Cleaning Many homeowners ask if they should clean their roof themselves. DIY Cleaning DIY can save money, but it has limits. Risk of injury from heights Lack of proper tools Possible roof damage You also need to know how to clean a roof safely before starting. Professional Roof Cleaning Services Hiring professional roof cleaning services offers clear benefits: Proper equipment and experience Safe and effective methods Long-lasting results Professionals understand roof types and choose the right method. This reduces risk and improves results. Safety Tips for Roof Cleaning Roof cleaning involves real risks. Safety should always come first. Here are simple tips to follow: Use a stable ladder Wear non-slip shoes Avoid working in wet conditions Use safety harnesses if needed Protect plants and surroundings Learning how to clean a roof safely can prevent accidents and costly mistakes. How Often Should You Clean Your Roof? Cleaning frequency depends on your environment. Every 1–2 years in humid areas Every 2–3 years in dry climates More often if trees are nearby If you notice black streaks or moss, it is time to act. Regular cleaning keeps problems small and manageable. Choosing the Right Roof Cleaning Method Not all roofs are the same. Choosing the wrong method can cause damage. Consider these factors: Roof Material Asphalt shingles need gentle cleaning. Metal roofs can handle more pressure. Level of Dirt Light dirt may only need soft washing. Heavy buildup may need deeper cleaning. Budget DIY is cheaper upfront, but mistakes can cost more later. Long-Term Care Some methods last longer than others. Soft washing often provides extended results. Understanding soft washing vs pressure washing roof options helps you make the best choice. Eco-Friendly Roof Cleaning Options Many homeowners now prefer eco-friendly cleaning methods. These options reduce harm to the environment: Biodegradable cleaning solutions Low-water cleaning systems Plant-safe chemicals Eco-friendly methods are safe for your home, family, and surroundings. They also align with modern home care practices. Common Mistakes to Avoid Avoiding mistakes can save you time and money. Here are common errors: Using too much pressure Ignoring safety precautions Using harsh chemicals Skipping regular cleaning Choosing the wrong method These mistakes can damage your roof