
How to Clean Windows: A Complete Step-by-Step Guide
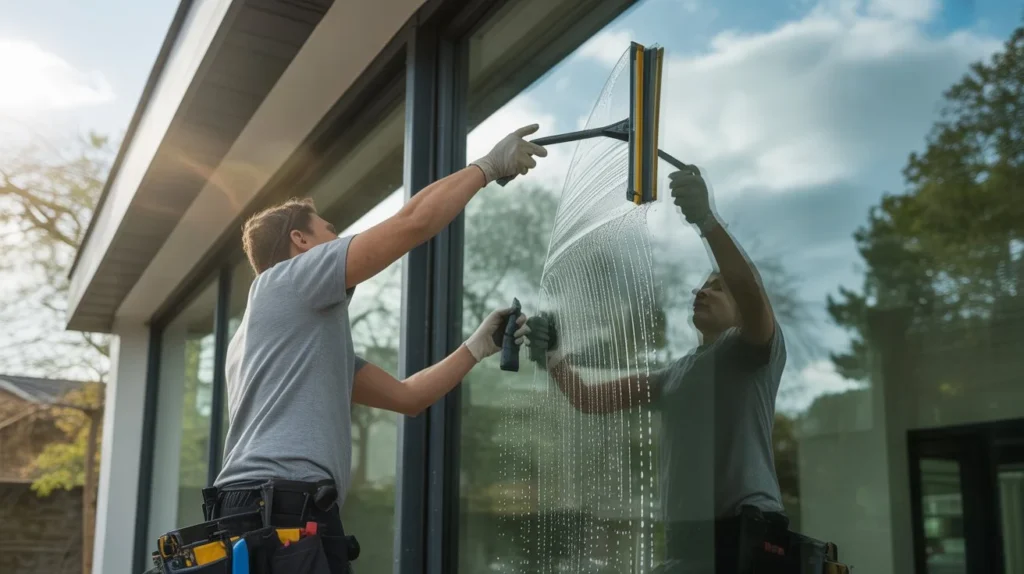
Dirty windows do more than look bad. They block natural light, leave mineral deposits that etch glass over time, and make even a clean home feel dull. Most people wipe them down and still end up with streaks. The problem is usually technique, not effort. Knowing how to clean windows the right way saves you time and gives you results that actually last. This guide covers every step, from the right tools to streak-free technique, so you get crystal-clear glass every single time. Why Clean Windows Regularly? Most homeowners clean windows once a year if at all. That is not enough. Dirt, pollen, hard water, and pollution build up on glass over time. Left too long, mineral deposits from sprinklers or rain can etch into the surface permanently. At that point, no amount of cleaning fixes it. Regular cleaning also protects your window frames and seals. Dirt that sits in frame corners traps moisture, which leads to rot on wood frames and mold on rubber seals. Beyond protection, clean windows make a real difference in how your home feels. More light comes through, rooms look bigger, and the view outside is actually enjoyable. Tools and Supplies You’ll Need Using the wrong tools is the number one reason people end up with streaks. Skip the paper towels and old rags. What you need: A good squeegee (10 to 14 inches for standard windows) A scrubber sleeve or applicator wand Two buckets (one for solution, one for rinsing) Dish soap or a dedicated window cleaning solution Microfiber cloths or a lint-free chamois A soft-bristle brush for frames and tracks A spray bottle for spot cleaning A ladder for upper-floor windows Rubber gloves Optional but helpful: A window cleaning extension pole for high windows A water-fed pole system for exterior second-story glass A detail brush for corners and edges Avoid newspapers. It used to work when ink was oil-based. Modern newspaper ink smears on glass. Preparing Your Windows for Cleaning Jumping straight to scrubbing is a mistake. A little prep makes the whole job faster and cleaner. At VJ Pressure Washing, we always start with a full prep check before touching the glass. It is a small step that makes a big difference in the final result. Remove dust and loose debris first. Use a dry microfiber cloth or a soft brush to wipe down the glass, frame, and surrounding wall. Wet cleaning over dry dust turns it into mud. Check the weather. The best way to clean windows is on a cloudy day. Direct sunlight dries your cleaning solution before you can squeegee it off, leaving streaks baked into the glass. Protect your floors and sills. Lay an old towel on the sill and floor below the interior windows. Cleaning solution drips, and it leaves marks on wood or tile if left to dry. Remove window screens. Take screens out before cleaning the glass. Clean them separately. Screens left in place block your squeegee path and trap dirty water against the glass. Step-by-Step Guide to Cleaning Windows This is the core of how to clean windows properly. Follow each step in order. Step 1: Mix Your Cleaning Solution Fill a bucket with warm water. Add a few drops of dish soap. That is it. You do not need expensive cleaners for most windows. For heavy grease or hard water stains, add a small amount of white vinegar to the mix. Step 2: Wet the Glass Dip your scrubber sleeve into the solution. Wring it out slightly so it is wet but not dripping. Apply it to the entire glass surface using horizontal strokes. Work from top to bottom. For exterior windows with heavy buildup, let the solution sit for 30 seconds before scrubbing. This softens the grime and makes it easier to remove. Step 3: Scrub Stubborn Spots Use a non-scratch scrubbing pad for any stuck-on debris, bird droppings, or sap. A razor blade scraper held at a 45-degree angle works well on paint specks or hard water deposits. Always keep the glass wet when using a scraper to avoid scratching. Step 4: Squeegee from Top to Bottom Start at the top corner of the glass. Pull the squeegee across in a single smooth stroke. Wipe the blade with a clean cloth after each pass. Overlap each stroke slightly to avoid leaving lines. For tall windows, do horizontal passes across the top half, then finish the bottom with vertical strokes. This is the technique professional window cleaning crews use to avoid drips on already-clean sections. Step 5: Wipe the Edges Use a dry microfiber cloth to wipe any water left along the edges and corners of the glass. This is where streaks usually form. A clean, dry edge is the difference between good and perfect results. Step 6: Buff if Needed If you spot a streak after the glass dries, buff it out with a dry microfiber cloth using small circular motions. Do not re-wet the glass. Dry buffing removes light streaks without starting over. How to Clean Window Screens Screens collect dust, pollen, and pollution faster than the glass itself. Cleaning them separately gives you much better results. Remove the screen from the window frame. Most screens lift out or have small tabs you press to release them. Rinse with a garden hose on a low setting. High pressure pushes dirt through the mesh rather than washing it off. Scrub gently with a soft brush dipped in warm soapy water. Work in small circles across the entire screen. Pay attention to the frame edges where dirt collects most. Rinse again until the water runs clear. Shake off excess water and stand the screen upright to air dry completely before reinstalling. Never reinstall a wet screen. Moisture trapped between the screen and glass causes water spots. For large homes with many screens or screens that have not been cleaned in years, professional window cleaning in Tracy, CA from VJ Pressure Washing gets the job done faster and more thoroughly than DIY,
Do Gutter Guards Need to Be Cleaned?
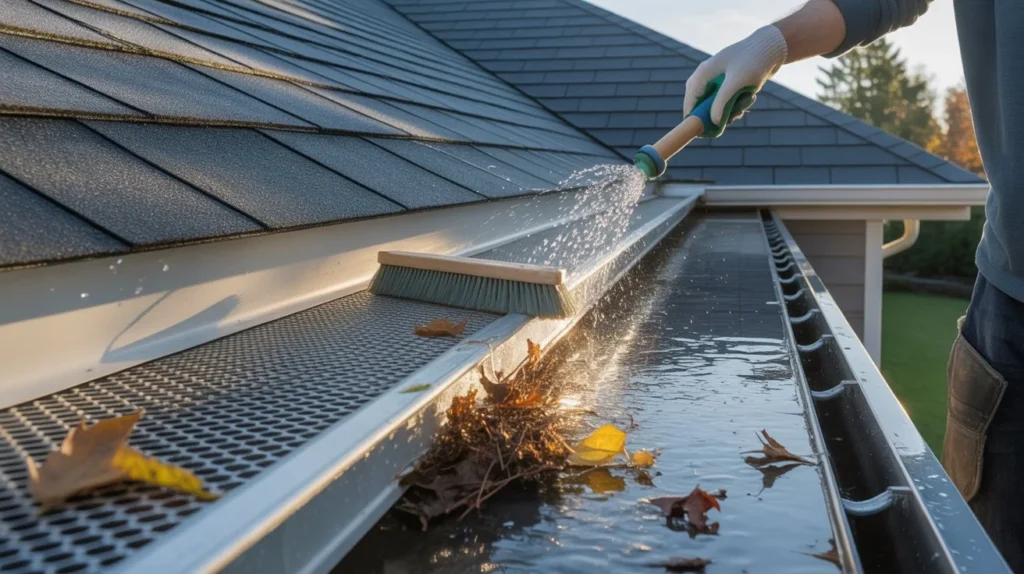
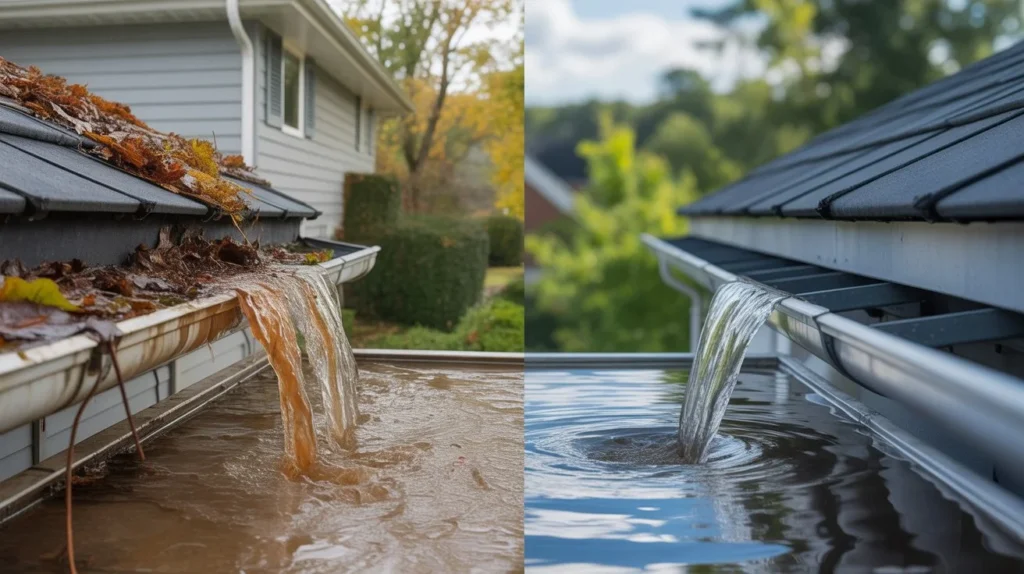
Gutter guards save time. But they don’t save you from all maintenance. Many homeowners install them and never look up again. That’s a costly mistake that leads to water damage, pest problems, and clogged downspouts. So, do gutter guards need to be cleaned? Yes, they do. Just less often than open gutters. Debris still builds up on top and around them over time. This guide covers exactly when, why, and how to keep them working right. What Are Gutter Guards? Gutter guards are covers or inserts that sit over or inside your gutters. Their job is simple: block leaves and debris from getting in while letting water flow through. They come in many forms. Some use fine mesh. Others use foam, brush bristles, or solid covers with a curved edge. Each type works differently and has its own maintenance needs. Most homeowners install them to reduce how often they need to climb a ladder. And they do help. But they’re not a “set it and forget it” solution. Why Gutter Guards Still Need Cleaning Here’s the truth most gutter guard companies don’t advertise: debris still collects. Leaves land on top of mesh guards. Small seeds get lodged in foam inserts. Pine needles slide through openings. Shingle grit washes into fine-mesh systems. Algae and mold grow in moist spots. Over time, this buildup slows water flow. Water starts sitting on top of guards instead of draining through. That means overflow, fascia damage, and foundation issues. The guards do their job, but they still need help doing it. How Often Should Gutter Guards Be Cleaned? Most homes need gutter guard maintenance once or twice a year. A spring check and a fall clean are the standard. If you have heavy tree cover, especially pine trees, you may need three visits per year. Here’s a simple guide: Low tree cover: Once a year Moderate tree cover: Twice a year Heavy tree cover or pine trees: 2 to 3 times a year If you live in Tracy, CA, and want a local team to handle it, VJ Pressure Washing offers professional gutter cleaning service Tracy CA residents trust. Regular maintenance visits keep your system running clean without the guesswork. Skipping a year might seem fine. But two or three skipped years? That’s when real damage starts. Signs Your Gutter Guards Need Cleaning You don’t always need a schedule. Your gutters will tell you when something’s wrong. Watch for these signs: Water overflows during rain. If water pours over the sides instead of draining down the spout, that’s a blockage. Plants growing in gutters. Seeds and dirt collect in moist debris. If you see weeds or moss, your gutters need attention. Sagging gutters. Standing water and heavy debris put stress on gutter hangers. Sag means weight buildup. Stains on fascia boards. Dark streaks on the wood behind your gutters signal overflow and moisture damage. Pest activity near the roofline. Birds, squirrels, and insects nest in clogged gutters. If you see activity up there, debris has gathered. Mold or mildew near the foundation. Overflowing water that pools at the base of your home leads to mold growth below. Any one of these signals means it’s time to inspect your gutter guards. Different Types of Gutter Guards and Their Cleaning Needs Not all gutter guards clean the same way. The type you have shapes how much work you’ll do. Micro-Mesh Guards These are among the best at blocking debris. Fine holes let water in but keep most particles out. Still, fine dust and shingle grit can clog the mesh. Clean with a soft brush and garden hose once or twice a year. Foam Inserts Foam fills the gutter channel and lets water seep through. Seeds and dirt get stuck in the foam fast. These need the most frequent cleaning. In heavy debris areas, check them every few months. Brush Guards Bristles catch large leaves but trap smaller debris deep in the fibers. Over time, they become dense with buildup. Pull them out annually and rinse well. Screen Guards Basic metal or plastic screens block large leaves. Wind blows lighter debris off. These are easier to clean. A rinse from the hose usually does the job. Reverse Curve (Surface Tension) Guards Water clings to the curved surface and drops into the gutter. Large debris falls off. But small stuff like seeds can sneak in. Check these once a year and clear any openings. Solid Covers These keep almost everything out. But they depend on slope and angle. Snow, ice, and heavy rain can overwhelm them. Inspect after winter storms. What Happens If You Never Clean Gutter Guards? Ignoring gutter guard maintenance leads to a chain of problems. It starts slow and gets expensive fast. Step 1: Debris builds up. Leaves, dirt, and seeds pile on top of or inside the guards. Step 2: Water backs up. Blocked guards can’t drain properly. Water sits and eventually overflows. Step 3: Fascia and soffit rot. Constant moisture damages the wood trim behind and below your roof edge. Step 4: Foundation damage. Water that pours off the side of your home pools at the base. Over years, this weakens your foundation. Step 5: Pest and mold problems. Standing water and wet debris create the perfect habitat for mosquitoes, rodents, and mold. Step 6: Gutter collapse. The combined weight of wet debris and standing water can pull gutters away from your home entirely. A simple cleaning twice a year prevents all of this. Can You Clean Gutter Guards Yourself? Yes. Many homeowners handle this on their own. Here’s what you need: A stable ladder Work gloves A garden hose with a spray nozzle A soft bristle brush A gutter scoop (optional) Step-by-step process: Set your ladder on solid ground. Have someone hold it if possible. Remove any visible debris from the top of guards by hand. For removable guards, take them out and rinse them on the ground. Use a brush to scrub off algae or stuck-on grime. Flush the gutter channel
How to Clean a Dumpster?
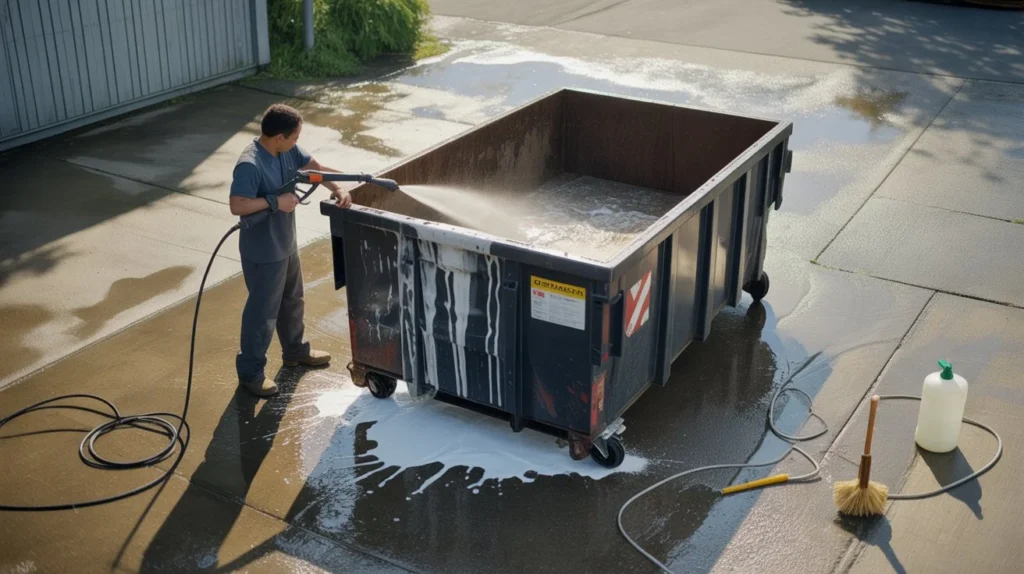
A dirty dumpster is more than an eyesore. It breeds bacteria, attracts pests, and spreads foul odors fast. Whether it’s at your home, business, or rental property, a neglected dumpster becomes a real hygiene problem. Most people ignore it until the smell becomes unbearable or flies start swarming. Knowing how to clean a dumpster properly is the difference between a quick fix and a lasting solution. This guide gives you a clear, step-by-step method using supplies you likely already have, so you can get the job done safely and effectively. Why Dumpsters Get Dirty So Fast Dumpsters take daily abuse. Food waste, liquids, and household trash all mix together in a confined metal space. Heat speeds up bacterial growth. Moisture creates the perfect breeding ground for mold and mildew. Here’s why the buildup happens so fast: Leaking bags leave residue on the bottom and walls Food scraps rot quickly and release gases and liquid Heat in summer months accelerates decomposition Infrequent emptying lets waste sit and bake in the sun Animal access spreads garbage and adds more bacteria A metal dumpster holds heat. That trapped heat turns minor spills into major odor and grime problems within days. Signs Your Dumpster Needs Cleaning Your nose is usually the first alert. But there are other clear signs too. Look for these: A strong, persistent smell even when the dumpster is empty Visible sludge, black residue, or buildup on the interior walls Flies, maggots, or rodents around or inside the dumpster Staining or discoloration on the ground underneath it Mold growth on the walls or lid If you spot any of these, don’t wait. The longer you leave it, the harder it gets to clean. Pro tip from VJ Pressure Washing: If the pad or concrete area around your dumpster is stained and smells as bad as the bin itself, you may need more than a basic rinse. Check out our dumpster pad cleaning companies service page to see how professional cleaning handles the full area, not just the container. Tools and Supplies You’ll Need You don’t need commercial equipment for a basic clean. Here’s what works: For DIY cleaning: Garden hose with a strong spray nozzle (or pressure washer) Long-handled scrub brush Heavy-duty rubber gloves Safety goggles Old clothes you don’t mind ruining Rubber boots Two buckets Drop cloth or tarp (to collect runoff) Cleaning agents: Situation Recommended Cleaner General dirt and grime Dish soap + warm water Grease and oil buildup Degreaser or enzyme cleaner Mold and mildew Diluted bleach solution (1:10 ratio) Heavy odor Baking soda + white vinegar Bacteria and sanitizing Quaternary ammonium disinfectant Avoid mixing bleach with ammonia-based cleaners. It creates toxic fumes. Safety Tips Before Cleaning a Dumpster Dumpster cleaning is a dirty job. Safety first, always. Wear gloves, goggles, and rubber boots every time Never lean into a dumpster without checking for sharp objects first Work in a well-ventilated area Avoid inhaling fumes from cleaning solutions Keep children and pets away during the process Never pour contaminated rinse water directly into a storm drain Where should the wastewater go? This is important. Dirty rinse water from dumpster cleaning contains bacteria, grease, and chemicals. It should go into a sanitary sewer drain, not onto the street or into a garden. If you’re unsure, your local municipality can advise on proper disposal. How to Clean a Dumpster Step by Step This method works for both residential and commercial bins. Follow it in order for the best results. Step 1: Empty the Dumpster Completely Never clean a dumpster that still has trash in it. Schedule your cleaning for the day after a scheduled pickup when the bin is fully empty. Step 2: Remove Loose Debris Scrape out any loose material from the bottom. Use a long-handled scraper or shovel. Bag and dispose of this separately. Step 3: Pre-Rinse with Water Use a garden hose or pressure washer to rinse the interior from top to bottom. This removes loose grime and softens caked-on residue. Hot water works better than cold if you have access to it. Step 4: Apply Your Cleaning Solution Spray or pour your chosen cleaner inside the bin. Use a degreaser for oily buildup or dish soap for general cleaning. Let it sit for 5 to 10 minutes to break down grime. Step 5: Scrub Thoroughly Use a long-handled brush to scrub all interior surfaces: walls, bottom, and the inside of the lid. Pay extra attention to corners where sludge collects. For heavy buildup, a pressure washer with a rotating nozzle makes this step much faster and more effective. Step 6: Rinse Again, Completely Rinse out all soap and loosened grime. Make sure no cleaning solution residue remains. Leftover soap attracts dirt and can cause foam buildup with the next batch of rain or moisture. Step 7: Disinfect and Deodorize Spray the interior with a disinfectant. Let it sit for at least 5 minutes. Then sprinkle baking soda along the bottom before closing the lid. This absorbs future odors between cleanings. Step 8: Clean the Exterior and Lid Don’t stop at the inside. Wipe down the outside walls, the lid, and any handles. Grime on the exterior attracts pests too. Step 9: Allow It to Air Dry Leave the lid open for 30 to 60 minutes to let the interior dry. Closing a wet dumpster traps moisture and encourages mold growth. Best Cleaning Solutions for Dumpsters Not every cleaner is equal. Here’s what actually works for cleaning dumpsters in different conditions. Enzyme-based cleaners are the gold standard. They break down organic waste at a biological level, eliminating odor at the source rather than just masking it. Great for food waste buildup. Degreasers handle oily residue from food scraps, restaurant waste, or automotive use. Apply and let it sit before scrubbing. Diluted bleach (one part bleach to ten parts water) kills mold, mildew, and bacteria. Use it as a final disinfecting rinse. Don’t use it on rubber seals. White vinegar is a safe, natural option for light
How to Clean Roof Shingles the Right Way (Step-by-Step Guide)
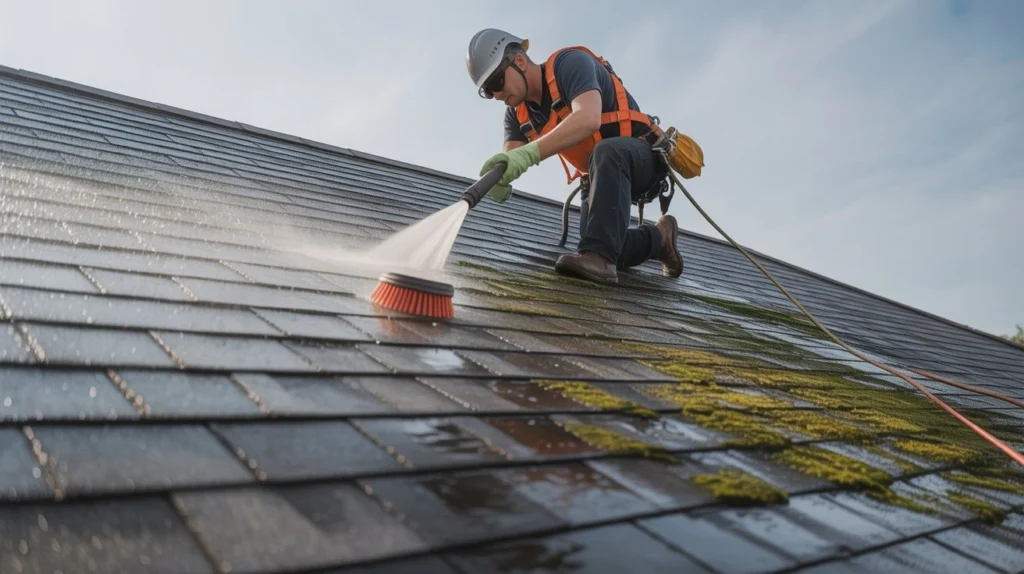
Your roof takes a beating every single day. Rain, wind, heat, and moisture all leave their mark over time. Algae, moss, and black streaks are not just ugly. They actually eat away at shingles and cut your roof’s life short. Cleaning your roof is not optional if you want to protect your home investment. Knowing how to clean roof shingles the right way makes a real difference. Do it wrong and you can crack shingles, void warranties, or cause leaks. Do it right and your roof can look brand new and last years longer. This guide covers everything from tools to techniques, so you get it right the first time. What Are Roof Shingles and Why Do They Get Dirty? Roof shingles are layered panels that protect your home from rain and weather. Most are made from asphalt, though wood, slate, and metal shingles also exist. Asphalt shingles are the most common in the U.S. Over time, shingles collect: Algae (Gloeocapsa magma) — causes those dark black streaks you see on roofs Moss — holds moisture against shingles and causes rot Lichen — bonds tightly to shingles and is hard to remove Dirt and debris — blocks drainage and traps moisture All of these shorten your roof’s lifespan if left untreated. Common Problems Found on Roof Shingles Before you start shingles cleaning, know what you are dealing with. Different stains need different approaches. Black Streaks This is algae growth. It spreads fast in humid climates. It feeds on the limestone filler in asphalt shingles. Green Moss Moss grows thick on shaded, damp areas of your roof. It lifts shingle edges and lets water sneak underneath. Lichen Patches Lichen looks like grey or green crusty patches. It actually bonds into the shingle surface and is the hardest to remove. Granule Loss You may notice bare spots or granules in your gutters. This is a sign the shingles are aging and need gentle cleaning not harsh scrubbing. Mold and Mildew Common in rainy or humid regions. Mold does not just look bad. It can spread to your attic if left unchecked. Tools and Materials Needed for Roof Cleaning Having the right gear saves time and protects your shingles. Here is what you need before starting. Equipment: Garden hose with adjustable nozzle Low-pressure sprayer or pump sprayer Soft-bristle brush (long handled) Ladder with standoff stabilizer Safety harness and rope Non-slip rubber-soled shoes Cleaning Solutions: Oxygen bleach (sodium percarbonate) — roof-safe and eco-friendly Diluted chlorine bleach solution (1 part bleach to 3 parts water) Commercially made roof cleaner (look for “shingle-safe” on the label) Dish soap as a surfactant to help solution spread Protective Gear: Safety goggles Chemical-resistant gloves Old clothes you do not mind staining Avoid wire brushes or metal tools. They scratch and damage shingles badly. Safety Tips Before Cleaning Roof Shingles Roof work is one of the most dangerous DIY jobs. Falls cause serious injuries every year. Do not skip these steps. Check the weather first. Never clean a wet or damp roof. Work on a dry, overcast day. Direct sun causes cleaning solutions to dry too fast. Use a proper ladder. Set it on solid ground. Use a ladder stabilizer so it does not rest on the gutters. Wear a safety harness. Attach it to a roof anchor. One slip can be fatal. This is not optional. Wet down plants below. Cleaning solutions can kill grass and shrubs. Wet them down before you start and rinse them after. Never walk on wet shingles. Wet shingles are extremely slippery. Work from the ladder when possible. Know your limits. Steep roofs, two-story homes, or large roofs are not beginner DIY jobs. If you are unsure, it is smarter to call a pro. If you live in the Tracy, California area, VJ Pressure Washing offers a trusted roof cleaning service Tracy CA that handles all the safety and hard work for you. No risk, no hassle. Step-by-Step Guide on How to Clean Roof Shingles Here is the full process for how to clean roof shingles safely and effectively. Step 1: Inspect the Roof First Walk around your home and look at the roof from the ground. Use binoculars if needed. Spot where the moss, algae, or stains are concentrated. Check for missing, cracked, or curling shingles. Do not clean a structurally damaged roof fix it first. Step 2: Clear Debris Off the Roof Use a leaf blower or soft broom to clear leaves, twigs, and loose debris. Always work from the peak down toward the gutters. Never blow debris under shingles. Step 3: Protect Surrounding Plants and Surfaces Wet down all plants, grass, and garden beds below the roofline. Cover sensitive shrubs with plastic sheeting if they are close to the house. Step 4: Mix Your Cleaning Solution For a basic DIY mix: 1 gallon of water 1 quart of household bleach (5.25% sodium hypochlorite) 1/4 cup of dish soap For an eco-friendly option, use oxygen bleach mixed per package directions. Let it dissolve fully before applying. Step 5: Apply the Solution Use a low-pressure pump sprayer. Start at the bottom of the affected area and spray upward. This prevents the solution from running under shingles. Let it soak for 15 to 20 minutes. Do not let it dry on the shingles. Step 6: Rinse Gently Use a garden hose with a standard nozzle. Rinse from the top down. Use low pressure only. High pressure damages shingles. Let the water carry the dead algae and moss off naturally. Step 7: Repeat If Needed Heavy moss or lichen may need a second treatment. For stubborn lichen, use a soft-bristle brush with light, downward strokes. Never scrub across shingles. That is the full breakdown of how to clean roof shingles safely. Take your time at each step. Soft Washing vs Pressure Washing Roof Shingles This is one of the most debated topics in roof care. Here is the honest answer. Soft Washing Soft washing uses low water pressure (around 100 PSI or less) combined
What Is House Washing? A Complete Guide for Homeowners
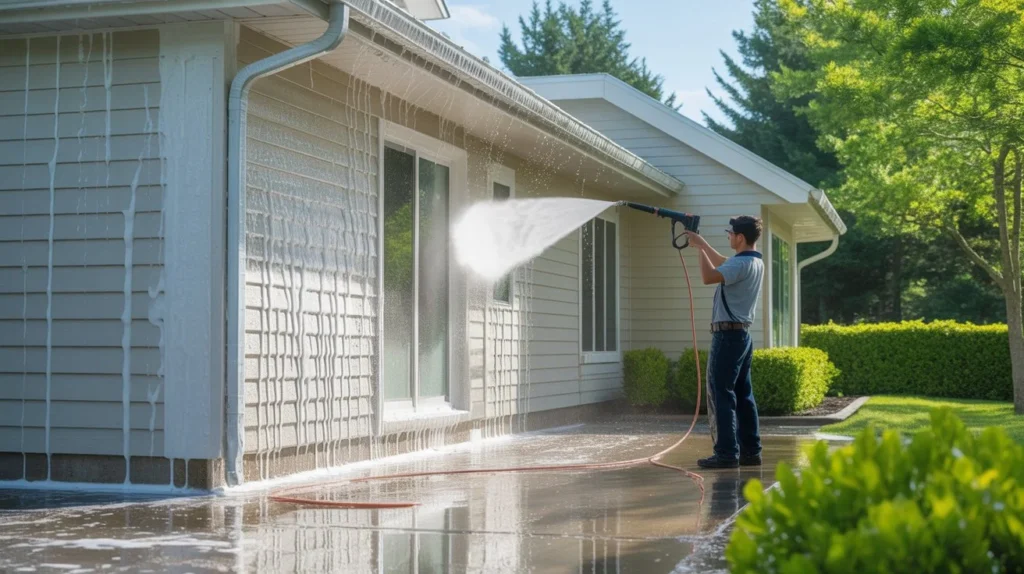
Your home’s exterior takes a beating every single day. Rain, wind, pollen, algae, and pollution all leave their mark on your siding, roof, and walkways. Over time, that buildup doesn’t just look bad it actually damages your home. Most homeowners don’t realize it until the problem is already expensive. So, what is house washing? It’s the process of cleaning a home’s exterior surfaces using water, cleaning solutions, and controlled pressure to remove dirt, mold, mildew, algae, and stains. Done right, it protects your home and keeps it looking sharp for years. What Is House Washing? House washing is a professional exterior cleaning method. At VJ Pressure Washing, we target the outside of your home siding, brick, stucco, wood, concrete, and more. There are two main methods used: Soft Washing: Low-pressure water combined with biodegradable cleaning solutions. Best for vinyl siding, painted surfaces, and delicate materials. The solution does the cleaning work, not the pressure. Pressure Washing: High-pressure water stream used for tougher surfaces like driveways, concrete, and decks. More aggressive than soft washing. Most professional house washing services use a combination of both. They match the method to the surface so nothing gets damaged. House washing removes: Green and black algae Mold and mildew stains Bird droppings Dirt and grime buildup Pollen and environmental debris Spider webs and insect nests It’s not just about looks. Washing your house is one of the most cost-effective ways to protect your investment long term. Why Is House Washing Important? Skipping regular exterior cleaning costs more in the long run. Here’s why it matters. 1. Prevents Structural Damage Algae, mold, and mildew don’t just sit on the surface. They feed on organic materials in your siding and roofing. Left untreated, they break down the material itself. That means rot, warping, and expensive repairs. 2. Improves Curb Appeal First impressions matter. A clean home looks well-maintained and cared for. Whether you’re selling or simply proud of where you live, washing a house makes an immediate visual difference. 3. Protects Your Health Mold and mildew spores on exterior surfaces can make their way inside your home. That’s a real concern for people with allergies, asthma, or other respiratory issues. 4. Saves Money on Repainting Dirt and biological growth wear down paint faster. Regular washing extends the life of your paint job by years saving hundreds or thousands of dollars. 5. Increases Property Value A clean exterior adds perceived value. Real estate studies consistently show that curb appeal affects home sale prices. If you’re in the Central Valley and need a trusted local team, VJ Pressure Washing offers professional house washing service in Tracy, CA that covers everything from soft washing siding to full exterior cleanings. They use the right techniques for every surface type. House Washing vs Pressure Washing People use these terms interchangeably. They are not the same thing. Feature House Washing Pressure Washing Pressure Level Low (soft wash) or moderate High Best For Siding, roofs, painted surfaces Concrete, driveways, patios Cleaning Solution Yes, chemical agents used Sometimes Risk of Damage Lower when done correctly Higher on soft surfaces Results Duration Longer lasting (kills algae at root) Shorter (surface-level clean) House washing focuses on the entire exterior of your home and adjusts methods per surface. Pressure washing is one technique within that broader process. Washing the house properly almost always involves soft washing for the siding and pressure washing for hard surfaces like driveways and sidewalks. The two work together. Signs Your House Needs Washing Not sure if it’s time? Here are the clear signals to look for: Green or Black Streaks on Siding This is algae or mold. It spreads if you ignore it. It won’t go away on its own. Dark Staining on the Roof Usually gloeocapsa magma is a type of algae that feeds on limestone filler in asphalt shingles. It shortens roof life significantly. Chalky or Faded Paint Dirt and oxidation leave a chalky residue on painted surfaces. Washing restores the color and prepares surfaces for repainting. Visible Dirt and Grime If you can see it, it’s already been there a while. Most buildup happens gradually and becomes obvious only after it’s heavily set in. It’s Been Over a Year Even if things look okay, most experts recommend washing your house at least once a year. Twice a year in humid or high-pollen climates. You’re Preparing to Paint or Sell Washing a house before painting helps paint adhere better and last longer. Before listing a home, it’s one of the highest-ROI prep steps you can take. DIY House Washing vs Hiring Professionals You can rent a pressure washer for around $50 to $100 a day. So why do people hire professionals? Here’s an honest breakdown. DIY House Washing Pros: Lower upfront cost Immediate availability Satisfying for people who like hands-on projects Cons: High risk of surface damage without experience Most DIYers use too much pressure on siding Rented equipment often lacks the soft wash capability Cleaning solutions must be mixed correctly or they damage plants and surfaces Ladder work on two-story homes is genuinely dangerous Missing algae at the root means it comes back fast Hiring a Professional Pros: Proper equipment and commercial-grade cleaners Trained to match technique to surface type Insured so if something breaks, you’re covered Results last longer because the job is done right Faster and safer Cons: Higher cost than DIY For single-story homes with vinyl siding and flat driveways, a confident DIYer can get decent results. But for two-story homes, delicate materials like wood or stucco, or any roof cleaning — hire a pro. The risk simply isn’t worth the savings. How to Choose a House Washing Company Not all companies are equal. Here’s what to look for before you hire anyone. Check for InsuranceThis is non-negotiable. Accidents happen. A company without liability insurance leaves you holding the bill. Ask About Their Method Do they soft wash siding or blast everything at full pressure? If they don’t mention soft washing for siding, walk away. Look
Do You Tip the Window Cleaner? 5 Honest Answers You Need to Know
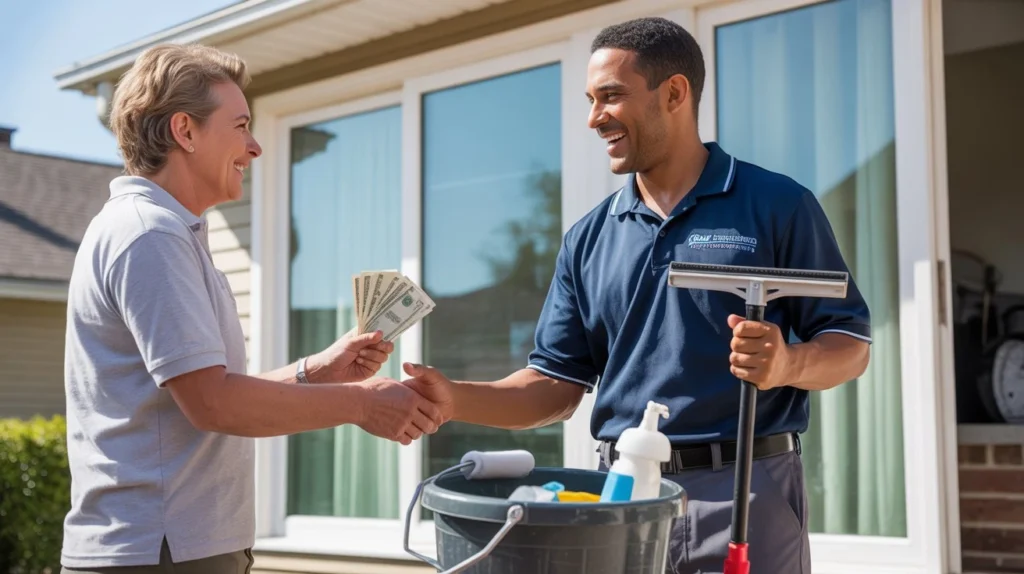
Window cleaners work hard. They climb ladders, handle heavy equipment, and deal with streaks, grime, and rough weather. It is a physical job most people would rather not do themselves. So when they finish and your windows look spotless, it is natural to wonder if you should hand them something extra. Do you tip the window cleaner? The short answer is: it is not required, but it is always appreciated. This guide breaks down when to tip, how much, and when skipping it is completely fine. 1. Is It Customary to Tip a Window Cleaner? Tipping a window cleaner is not as standard as tipping a waiter or a hairdresser. Most people do not tip for home services the same way they do in restaurants. But that does not mean it is unusual or wrong. In the United States, tipping home service workers has grown more common over the past decade. Window cleaners fall into a gray zone. They are skilled tradespeople, not servers. Their pricing usually reflects their labor. But a tip is still a kind and welcome gesture. Customs also vary by region and job size. For a quick residential visit, many homeowners skip the tip entirely. For a tough multi-story clean or a big commercial job, tipping feels much more fitting. If you are in Tracy, CA and use VJ Pressure Washing for professional window cleaning in Tracy, CA, you may notice technicians go the extra mile on larger homes. A tip in those cases is a great way to say thank you. The bottom line: tipping window cleaners is not required, but it is always a thoughtful option. 2. When Should You Consider Tipping a Window Cleaner? Some jobs call for a tip more than others. Here are the situations where tipping makes the most sense: The Job Was Harder Than Expected Tight spaces, heavy build-up, or extra equipment all mean more effort than a standard visit. The Weather Was Rough Working in heat, cold, or wind is no fun. If your cleaner showed up on a tough day and still delivered great results, a tip honors that. They Went Above and Beyond Did they clean window sills without being asked? Point out a cracked pane? Those small extras are worth recognizing. It Was a Large Job A 4,000 square foot home with 30 windows is a full day of work. Large jobs are a strong reason to tip. They Were Professional and On Time If your cleaner arrived on schedule, communicated well, and left no mess behind, that reliability is worth rewarding. None of these situations require a tip. But they all make one feel natural and deserved. 3. How Much Should You Tip a Window Cleaner? If you decide to tip window washers, the amount depends on the size and difficulty of the job. Here are common ranges: $5 to $10 for a small or quick visit $10 to $20 for a standard residential clean $20 to $50 for a large home or multi-story job 10% to 15% of the total bill for bigger projects For commercial cleaning, tips are less common. But if a crew does excellent work over several hours, a group tip of $20 to $50 split between workers is a fair gesture. When deciding how much to tip window washers, think about job size, effort, and your budget. You do not need to stretch your wallet. Even a small tip given with a smile means something. Cash is always best. It goes directly to the worker with no delays. If you do not have cash, some cleaners accept tips through apps like Venmo or PayPal. 4. When Is Tipping Not Necessary? There are times when skipping a tip is completely fine. Poor Service Streaks, late arrivals, or bad communication are valid reasons to hold back. Premium Pricing Some high-end services build labor appreciation into their rates. Workers may already be well compensated. Large Corporate Companies Big franchise operations often have policies around tipping. Many do not accept them at all. If unsure, just ask. You Already Tipped Recently Regular customers do not need to tip every visit. A seasonal tip or holiday bonus works just as well. The Job Was Tiny A single window or a quick two-minute wipe-down does not carry the same expectation as a full home clean. Knowing when tipping is not necessary saves you from unnecessary guilt. 5. Alternative Ways to Show Appreciation Not everyone prefers to tip in cash. That is fine. Here are other ways to show you value their work: Leave a Google Review A five-star review helps their business more than you might think. It takes two minutes and has a lasting impact. Refer Them to a Neighbor Word-of-mouth is gold for small service businesses. A new client referral is one of the most valuable things you can give. Offer a Cold Drink A bottle of water or a soda on a hot day is a simple, human gesture that goes a long way. Book Them Again Repeat business shows loyalty. For an independent cleaner, a steady client is worth more than a one-time tip. Write a Thank-You Note It sounds old-fashioned, but a short handwritten note means a lot to someone who spends their day working outdoors. These work especially well if you are unsure whether to tip window cleaners or just prefer not to deal with cash. 6. Factors That Influence Tipping Decisions Several things shape whether people tip window cleaners and how much they give. Type of Provider Is it a solo operator or a large company? Independent cleaners often depend more on tips than employees at bigger firms. Frequency of Service If someone cleans monthly, you might tip less per visit but more during the holidays. For a one-time deep clean, a tip right after the job feels natural. Local Tipping Culture Norms vary by city and region. In some areas, tipping home service workers is standard. In others, it is rare. Following local customs is always
What Is a Good Window Cleaner? A Complete Guide for Clear, Spot-Free Glass
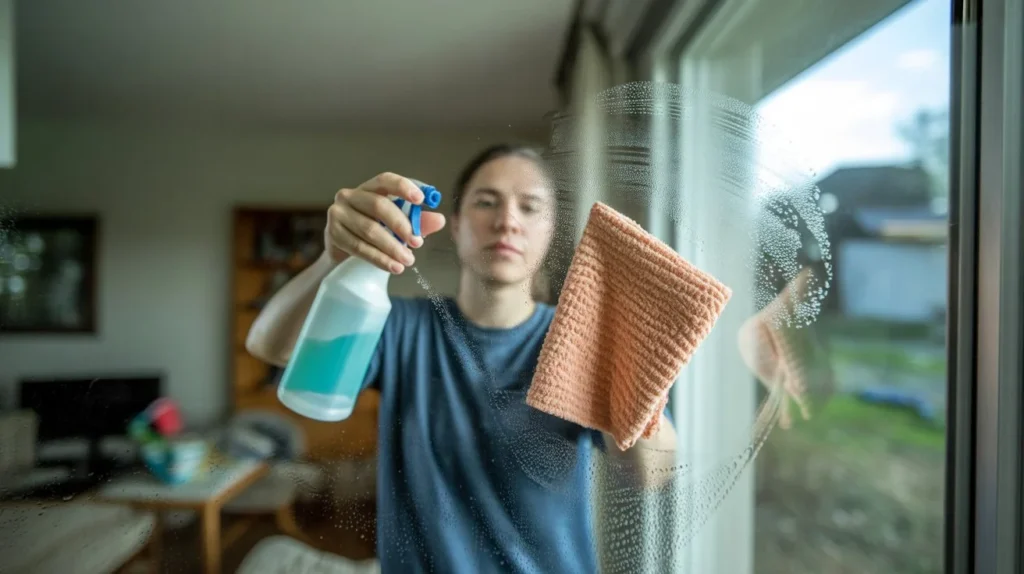
Clean windows change how a place feels. They let in more light and make any space look fresh. But not every cleaner gives the same result. Some leave streaks. Some damage glass or frames. Others rush the job and miss corners. What Is a Good Window Cleaner? A good one removes dirt, water marks, and grime without leaving streaks. They also protect your glass, frames, and seals during cleaning. This guide breaks down what really matters so you can choose the right service or do it yourself with confidence. What Is a Window Cleaner? A window cleaner is a person or method used to clean glass surfaces. It removes dust, stains, bird marks, and water spots. It can be done by hand or with tools. There are different types of window cleaning jobs. These include home windows, office glass, shop fronts, and tall building glass. This is known as types of window cleaning in the industry. Some people do it themselves. Others hire trained workers. Professional cleaners like VJ Pressure Washing use better tools and safer methods. They also reach high or risky areas without damage. Key Qualities of a Good Window Cleaner A good cleaner does more than wipe glass. The result should look clear from every angle. Here are the main qualities: Leaves no streaks or water lines Cleans edges and corners properly Uses safe pressure on glass Protects window frames and seals Works in a steady and careful way Shows up on time and finishes the job A skilled cleaner also checks their work twice. Small details matter. Smudges in corners can ruin the final look. When people ask whats a good window cleaner, the answer always comes down to results and care, not just speed. Tools a Good Window Cleaner Uses Good tools make cleaning faster and safer. Poor tools often cause streaks and scratches. Common tools include: Squeegees for smooth water removal Microfiber cloths for drying edges Buckets with clean water Scrub pads for stuck dirt Extension poles for high windows Water-fed pole systems for tall buildings Professional tools also reduce the need for ladders. This improves safety and speed. A clean tool matters as much as skill. Dirty cloths can leave marks instead of removing them. Best Cleaning Solutions Used by Professionals The cleaning solution plays a big role in results. Some are mild. Some are strong. The wrong choice can damage glass or leave haze. Most professionals use: Mild soap and water mix Vinegar-based solutions for light stains Pure water systems for spot-free cleaning A common question is, window cleaner is acidic or basic. The answer depends on the solution. Vinegar is acidic. Soap-based cleaners are usually mild and slightly basic. Pure water is neutral and safest for glass. Strong acidic or harsh chemicals are avoided on modern windows. They can damage coatings or seals over time. Signs of a Poor Window Cleaner Bad cleaning is easy to spot once you know what to look for. Warning signs include: Visible streaks after drying Missed corners or edges Dirty water left on frames Scratched or foggy glass Rushed work with no detail A poor cleaner often uses dirty tools or old clothes. They may also use too much pressure on glass. If windows look worse after cleaning, the service is not done correctly. Benefits of Hiring a Professional Window Cleaner Hiring experts saves time and improves results. It also reduces risk, especially for tall or hard-to-reach windows. A professional cleaner offers: Safer cleaning for high windows Better and longer-lasting shine No streaks or leftover marks Proper care of frames and seals Businesses like VJ Pressure Washing also offer expert care for exterior glass. In many cases, customers looking for professional window cleaning Tracy CA want reliable, trained teams who understand both safety and detail work. Professionals also bring insurance and proper tools. This reduces risk of damage or injury during cleaning. How to Choose the Best Window Cleaner Choosing the right cleaner is important for long-term results. Look for: Real customer reviews Experience in different types of window cleaning Proper insurance coverage Clear pricing with no hidden costs Photos of past work Ask simple questions before hiring: What tools do you use? How do you avoid streaks? Do you clean frames and edges? A good service will answer clearly without confusion. When people search What Is a Good Window Cleaner?, they often want a trusted checklist like this to avoid poor service. DIY Window Cleaning Tips You can clean windows at home with basic tools. But technique matters more than effort. Follow these steps: Use clean water mixed with mild soap Wipe dust before adding water Clean top to bottom Use a squeegee in straight lines Dry edges with microfiber cloth The best time to clean windows is early morning or late evening. Direct sun can dry soap too fast and leave marks. Common mistakes: Using paper towels that leave lint Cleaning in hot sunlight Reusing dirty water Skipping corners DIY cleaning works for small jobs. Large or high windows are better left to experts. Why Window Maintenance Matters Clean windows are not only about looks. They also protect glass life. Dirt and minerals can build up over time. This causes etching on glass. Regular cleaning prevents long-term damage. Clean windows also improve indoor light. This reduces the need for artificial lighting during the day. For homes and businesses, it improves overall appearance. It also adds value when selling or renting property. Conclusion So, What Is a Good Window Cleaner? It is someone or something that delivers clear glass without damage or streaks. It should protect your windows, not harm them. A good cleaner uses the right tools, safe solutions, and careful methods. They pay attention to detail and never rush the job. Whether you hire a professional or clean yourself, the goal is always the same. Clean, clear, and safe windows that last longer. For reliable exterior care, companies like VJ Pressure Washing provide trusted solutions for homeowners and businesses who want
How Much Does It Cost to Pressure Wash a Driveway
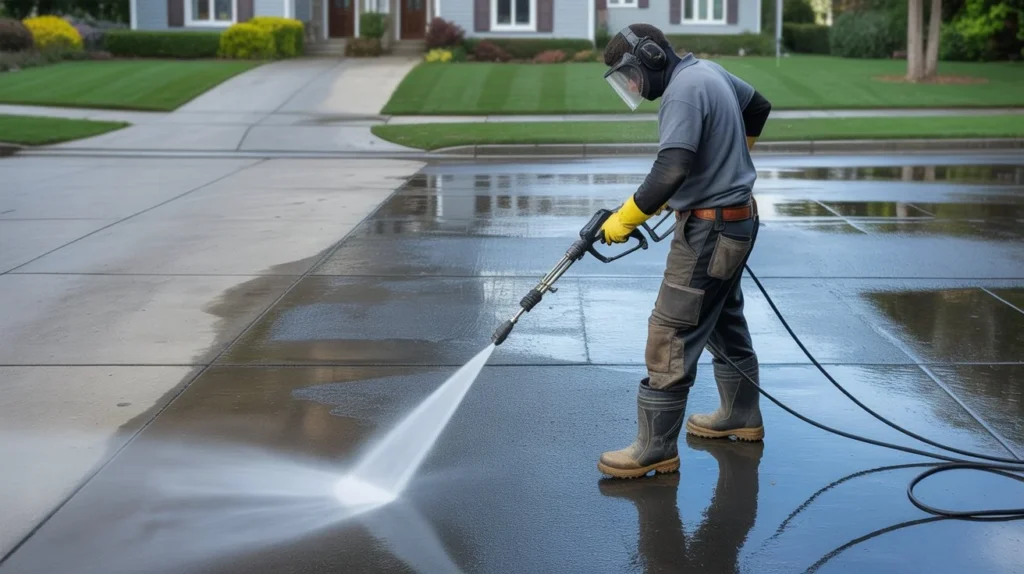
A clean driveway improves curb appeal and helps prevent long-term surface damage. Dirt, oil stains, mold, and algae build up over time. Pressure washing removes these layers and restores the original look of the surface. Many homeowners schedule this service once or twice a year to maintain property value and safety. How Much Does It Cost to Pressure Wash a Driveway depends on size, condition, and service type. Most homeowners spend between $100 and $350. Larger or heavily stained driveways cost more due to extra labor and cleaning time. Typical Cost Range Average Cost to Pressure Wash a Driveway Here is a quick breakdown of what you can expect to pay: Driveway Size Estimated Cost Small (1-car, ~400 sq ft) $80 – $130 Medium (2-car, ~600 sq ft) $130 – $200 Large (3-car+, ~1,000 sq ft) $200 – $350 Extra-large / circular $300 – $500+ Most contractors charge by the square foot, usually $0.15 to $0.35 per square foot. Some charge a flat rate per job, especially for standard residential driveways. If you are searching for a local driveway washing service Tracy CA, VJ Pressure Washing offers transparent pricing with no hidden fees. You can get a free quote based on your exact driveway size and condition. The national average for pressure washing driveway cost sits around $180 to $220 for most homes. That price includes labor, water, and equipment. It does not include add-ons like sealing or stain treatment. Factors That Affect Driveway Pressure Washing Costs A dirty driveway stands out. Oil stains, mold, and grime build up fast, especially in wet climates. The good news? Pressure washing fixes all of it in a few hours. Costs are lower than most homeowners expect, and the results are instant. So, how much does it cost to pressure wash a driveway? Most homeowners pay between $100 and $300. The average lands around $180 for a standard two-car driveway. Your final price depends on size, material, condition, and where you live. Average Cost to Pressure Wash a Driveway No two driveways are the same. Several things push your price up or down. Driveway Size The bigger the driveway, the higher the cost. Most pros measure in square feet and charge accordingly. A 400 sq ft driveway costs far less than a 1,200 sq ft one. Level of Dirtiness Heavy staining, oil buildup, mold, or algae takes more time and product to remove. Expect to pay 20–40% more for badly neglected driveways. Driveway Material Concrete, asphalt, brick, and pavers all clean differently. Some need lower pressure to avoid damage. More delicate surfaces require extra care and time. Location Labor rates vary by city and region. Urban areas and high cost-of-living cities tend to charge more. Rural areas are often cheaper. Access and Layout A tight driveway with fencing or landscaping close by takes longer. Wide, open driveways are faster to clean. Additional Services If you add sealing, degreasing, or mold treatment, the price goes up. These are worth it in many cases, but they add to the base cost. Driveway Pressure Washing Costs by Material Different surfaces need different treatment. Here is what to expect for each: Concrete Driveways Concrete is the most common material. It handles high-pressure water well. Cleaning costs range from $0.15 to $0.30 per square foot. A typical concrete driveway runs about $120 to $220 total. Asphalt Driveways Asphalt is softer than concrete. Too much pressure can damage it. Professionals use lower PSI settings and charge slightly more for the extra care. Expect $130 to $250 depending on size. Brick and Paver Driveways These take more time. Grout lines trap dirt and require careful, targeted cleaning. Costs range from $0.25 to $0.45 per square foot or $150 to $350+ for a full driveway. Gravel Driveways Pressure washing is rarely used on gravel because it displaces the stones. If you have gravel, ask about alternative cleaning methods. Additional Costs and Services The base power wash driveway cost covers basic cleaning. But some jobs need extras. Add-On Service Typical Cost Concrete sealing $100 – $250 Oil/grease stain treatment $20 – $75 Mold and mildew treatment $25 – $80 Rust stain removal $30 – $100 Edging and curb cleaning $20 – $50 Dumpster pad or apron cleaning $40 – $100 Sealing after pressure washing is the most popular add-on. It protects concrete from future stains and extends the life of your driveway. If you plan to seal, do it right after washing while the surface is clean and open. DIY vs. Hiring a Professional You have two options: rent a pressure washer and do it yourself, or hire a pro. Both have merit. Here is an honest comparison. DIY Cost Breakdown Pressure washer rental: $50 – $100 per day Cleaning detergent: $10 – $30 Your time: 2 to 4 hours Total: $60 – $130 (not counting your time) DIY works well if you are comfortable with equipment and your driveway is in decent shape. But there are real risks. Using the wrong PSI on asphalt or pavers can cause permanent damage. Without proper technique, you can leave streaks or uneven patches. Hiring a Pro A professional team like VJ Pressure Washing brings commercial-grade equipment, the right cleaning agents, and years of hands-on experience. Our team finishes the job faster and delivers better results on tough stains, oil spots, and heavy buildup. The cost to power wash driveway surfaces professionally usually ranges from $100 to $350 depending on the driveway size, material, and condition. When to hire a pro: Your driveway has oil stains, rust, or heavy mold You have pavers, brick, or an older asphalt surface You do not want to risk damaging the surface You want sealing done at the same time When DIY makes sense: Your driveway is lightly soiled and in good shape You have experience with pressure washers You want to save money on a simple job Signs Your Driveway Needs Pressure Washing Not sure if it is time to clean? Look for these signs: Dark staining
Why Gutter Cleaning is Important
Most homeowners focus on what they can see. Clean floors, painted walls, a mowed lawn. But gutters sit quietly above it all, doing one of the most important jobs on your property. When they get clogged, the damage spreads fast and quietly. Water backs up, seeps into walls, and destroys foundations before you even notice. A few hours of neglect can turn into thousands of dollars in repairs. Understanding why gutter cleaning is important could be the single best thing you do for your home this year. Clean gutters protect your roof, your walls, your foundation, and your family. This guide covers every reason you need to take gutter maintenance seriously and what happens when you do not. What Do Gutters Actually Do? Gutters channel rainwater away from your home. That is their only job. But that one job protects nearly every part of your property. Without gutters, rainwater falls directly off your roof and pools around your foundation. With clogged gutters, the same thing happens. Water overflows the sides and goes exactly where it should not go. A healthy gutter system moves water from your roof, through the downspout, and away from your home’s structure. When leaves, twigs, dirt, and debris block that path, water has nowhere to go but over the edge or backward under your roofline. Prevents Water Damage to Your Home Water is the number one enemy of any home structure. Clogged gutters cause water to overflow and run down the sides of your house. Over time, this soaks into your siding, your walls, and your interior. Here is what water damage from clogged gutters looks like in real life: Water stains on interior ceilings and walls Peeling paint on exterior siding Rotting wood around window frames and doors Warped or damaged drywall inside the home Wet insulation that loses its effectiveness One clogged gutter can direct hundreds of gallons of water toward your home during a single heavy rainstorm. That water does not disappear. It finds the path of least resistance and works its way into your structure. The importance of cleaning gutters regularly cannot be overstated when it comes to water damage prevention. It is one of the most cost-effective ways to protect your home. Protects Your Roof Life Your roof is one of the most expensive parts of your home to replace. A full roof replacement can cost anywhere from $8,000 to $25,000 depending on the size and materials. Keeping your gutters clean is one of the simplest ways to extend your roof’s life. When gutters clog, water pools on the edge of the roof. This is called roof ponding. Standing water seeps under shingles, softens the decking beneath, and causes rot. In winter, clogged gutters cause ice dams. Ice dams form when melting snow refreezes at the roof’s edge, forcing water back under the shingles. The benefits of gutter cleaning for your roof are direct and measurable. Clean gutters mean water moves off the roof quickly. No pooling. No ice dams. No premature shingle damage. At VJ Pressure Washing, we see roof edge damage regularly on homes with neglected gutters. If you are in the area and need professional gutter cleaning tracy ca services, getting this done before the rainy season can add years to your roof’s life. Avoids Foundation Problems This is where gutter neglect gets truly expensive. Foundation repairs are among the most costly home repairs a homeowner will ever face. Costs can range from $5,000 to over $50,000 depending on the severity. Here is how clogged gutters damage your foundation. When water overflows from a blocked gutter, it pools around the base of your home. The soil around your foundation absorbs this water and expands. When it dries, it contracts. This repeated cycle of expansion and contraction puts enormous pressure on your foundation walls. Over time this causes: Cracks in the foundation Bowing or leaning foundation walls Uneven or sinking floors inside the home Doors and windows that stick or no longer close properly Clean gutters direct water at least 6 to 10 feet away from your foundation through properly positioned downspouts. That distance makes all the difference. Why clean out gutters regularly? This reason alone is enough. Foundation damage is silent, slow, and devastating to both your home’s structure and its resale value. Prevents Pest and Insect Infestation Clogged gutters are not just a water problem. They are a pest problem too. Wet leaves, standing water, and decomposing debris create the perfect environment for insects and pests to nest. Here is what moves in when gutters stay clogged: Mosquitoes breed in standing water. Even a small amount of trapped water in a gutter is enough for a mosquito colony to thrive. Carpenter ants are attracted to damp, rotting wood. Clogged gutters that cause water to back up into your fascia boards give carpenter ants exactly what they need. Rodents like mice and squirrels use debris-filled gutters as nesting spots. Once they are in the gutters, they often find their way into the attic. Birds build nests in clogged gutters. While less harmful, bird nests block water flow and make the problem worse. Regular gutter cleaning removes the debris and standing water that these pests depend on. It is a simple step that keeps your home less attractive to unwanted visitors. Stops Mold and Mildew Growth Mold needs three things to grow: moisture, a surface, and warmth. Clogged gutters provide all three. When water overflows from a blocked gutter and runs down your siding or seeps into your walls, it creates persistent moisture. Mold and mildew begin to grow within 24 to 48 hours of a surface staying wet. Mold is not just a cosmetic issue. Black mold and other strains produce spores that affect indoor air quality. For people with allergies, asthma, or respiratory conditions, mold inside the home is a serious health risk. Removing mold from interior walls is expensive and disruptive. Preventing mold by keeping gutters clean costs a fraction of the price. This is
Should You Pressure Wash Your House Before Painting?
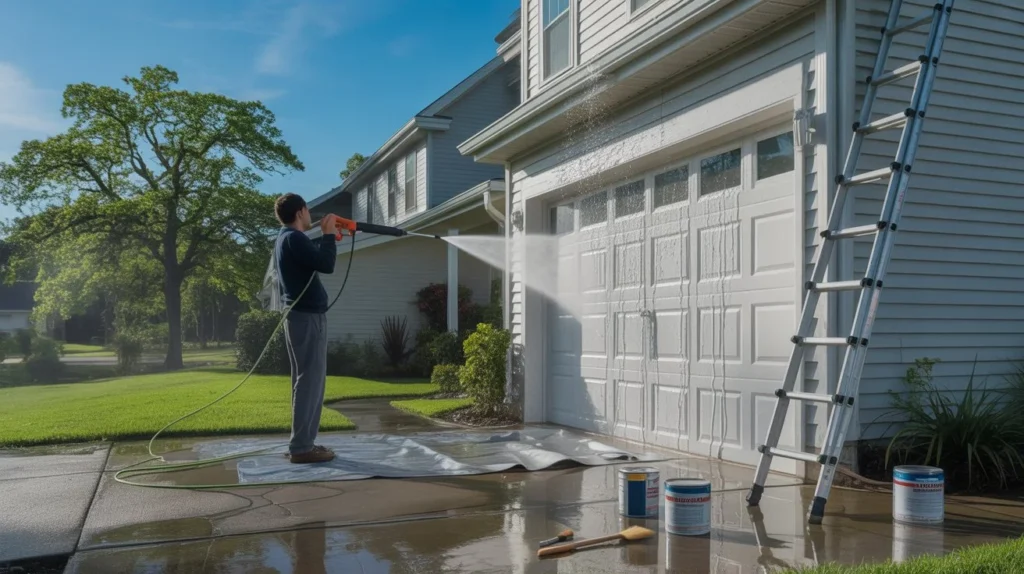
Painting a house without proper prep often leads to peeling, uneven finish, and wasted money. Dirt, dust, and mold block paint from sticking well. Clean surfaces help paint bond better and last longer over time. A quick wash removes layers you cannot see but that affect results. Should You Pressure Wash Your House Before Painting? The short answer is yes for most exterior surfaces that are dirty or exposed. A proper wash improves adhesion and gives a smooth base for paint. In many cases, a clean surface is the difference between a short-term job and a long-lasting finish. Why Pressure Washing Matters Before Painting Pressure washing removes buildup that blocks paint from bonding with the surface. Over time, walls collect dirt, grease, pollen, and mildew. These layers act like a barrier between the paint and the surface. Clean surfaces allow primer and paint to grip better. This reduces peeling and flaking later. It also helps paint spread evenly without patches or streaks. For homeowners looking into house washing services tracy ca, professionals like VJ Pressure Washing use the right methods to prepare surfaces safely. A professional wash ensures consistent cleaning across large areas, which is hard to achieve with DIY tools. Pressure washing also reveals hidden issues. Cracks, loose siding, and damaged areas become visible after cleaning. This allows you to repair problems before painting starts. When You Should Pressure Wash Before Painting You should pressure wash in the following situations: The surface has visible dirt or stains There is mold, mildew, or algae growth The house has not been cleaned in years Old paint is peeling or chalking The home is exposed to dust, traffic, or moisture If you plan to power wash before painting, timing matters. Clean the surface a few days before painting so it dries fully. Fresh cleaning helps primer stick better. It also prevents contaminants from mixing into the paint layer. When Pressure Washing May Not Be Necessary Not every project needs full pressure washing. In some cases, a light clean is enough. You may skip pressure washing when: The surface is newly built and already clean The area was recently washed and maintained You are painting indoors The surface is fragile and could be damaged by water pressure In these cases, a gentle rinse or manual cleaning works better than a full wash. Still, if you are unsure whether to pressure wash before painting, inspect the surface closely. Even light dirt can affect paint adhesion over time. Risks of Pressure Washing Incorrectly Using high pressure without care can cause damage. Common risks include: Water forced behind siding or cracks Wood surface damage or splintering Stripping loose paint layers unevenly Etching softer materials like stucco Incorrect use of a pressure washer can also push moisture into walls. This can lead to mold growth inside the structure. That is why many experts recommend controlled cleaning methods instead of aggressive washing. Choosing the right pressure and nozzle matters as much as the machine itself. Pressure Washing vs Soft Washing Pressure washing uses high force water to remove debris. Soft washing uses low pressure with cleaning solutions. Soft washing is often better for delicate surfaces like: Painted wood Vinyl siding Stucco walls Roof shingles Soft washing cleans deeply without forcing water into surfaces. It is often the preferred method when deciding whether to power wash before painting delicate exteriors. Pressure washing is better for hard surfaces like concrete driveways or brick walls. Choosing the right method depends on the material and its condition. In many home painting projects, a mix of both methods works best. Preparing the House Before Pressure Washing Preparation helps avoid damage and ensures effective cleaning. Before you begin: Close all windows and doors Cover electrical outlets and fixtures Remove outdoor furniture and decor Protect plants with plastic sheets Inspect the surface for cracks or loose parts Also check the weather. Avoid washing before rain or during high humidity. The surface must dry properly before painting. Preparation reduces risks and improves cleaning results. Skipping this step often leads to uneven work or damage. Proper Pressure Washing Techniques Technique plays a major role in results. Start from the top of the house and work downward. This allows dirt and water to flow naturally. Keep these tips in mind: Use a wide spray tip for walls Maintain a steady distance from the surface Move the wand in smooth, overlapping strokes Avoid staying in one spot too long Test pressure on a small area first For most exterior walls, moderate pressure is enough. High pressure should only be used on tough surfaces like concrete. If you are unsure about how to pressure wash before painting, practice on a hidden section first. This helps you avoid mistakes on visible areas. Cleaning Solutions and Detergents Water alone may not remove all contaminants. Cleaning solutions help break down grease, mold, and stains. Use detergents designed for exterior cleaning. Some solutions are made specifically for pre-paint preparation. Apply the solution using a low-pressure setting. Let it sit for a few minutes to loosen dirt. Then rinse thoroughly with clean water. Avoid harsh chemicals that can damage surfaces or affect paint bonding later. Always follow the manufacturer’s instructions. Additional Surface Preparation Steps Pressure washing is only one part of surface prep. After cleaning, additional steps are needed. Scrape off loose or peeling paint Sand rough or uneven areas Fill cracks and holes with filler Apply primer where needed These steps create a smooth base for paint. Even after you power wash before painting, proper surface repair is still required. Skipping these steps can lead to visible defects after painting. Good preparation ensures a clean and durable finish. DIY vs Hiring a Professional You can either do the job yourself or hire a professional service. DIY pressure washing works for small homes or light cleaning. It requires time, equipment, and basic knowledge of pressure settings. Hiring professionals like VJ Pressure Washing offers several benefits: Proper equipment and tools Knowledge of surface types Safe