
How Do I Make My Driveway Look New Again? 7 Steps That Actually Work
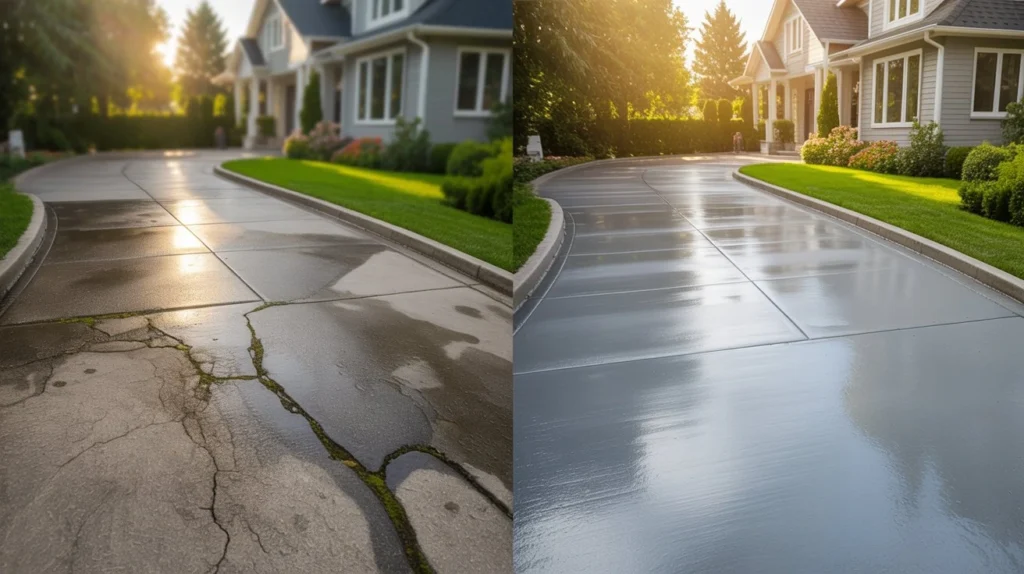
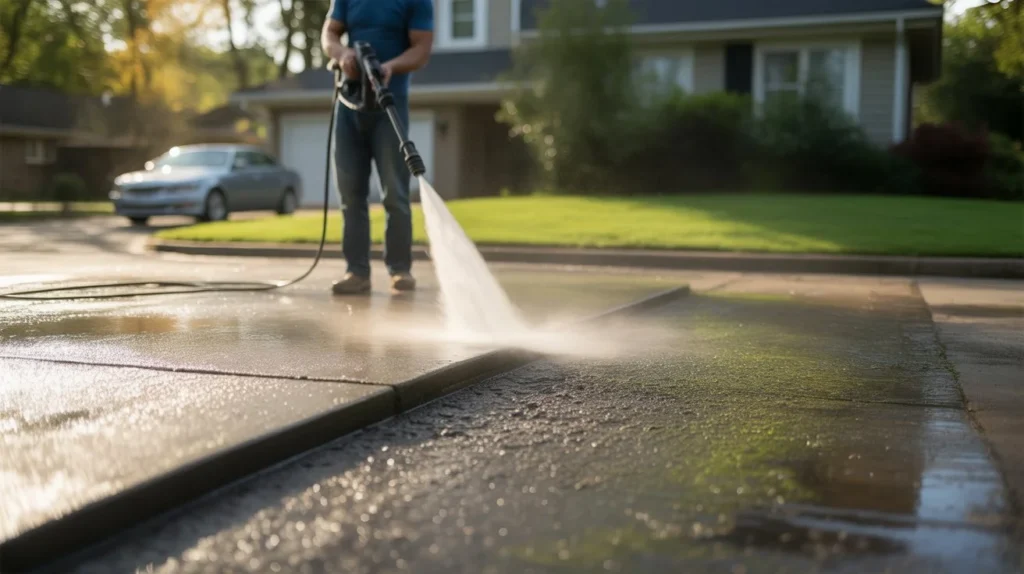
A worn-out driveway makes your whole home look neglected. Cracks, stains, faded color, and years of grime add up fast. The good news? You don’t always need to replace it. Most driveways can be fully restored without a major budget. How do I make my driveway look new again? Start with a deep clean, fix any cracks, then reseal the surface. That three-step process handles 90% of driveway aging. This guide walks you through every step in plain detail so you can get it done right. What Causes a Driveway to Look Old? Before you fix anything, it helps to understand why driveways age. Sun exposure breaks down asphalt binders and fades concrete color. UV rays cause oxidation over time, turning black asphalt gray and giving concrete a chalky look. Water damage is the biggest culprit. Water seeps into tiny surface cracks, freezes in winter, and expands. That expansion widens cracks and creates potholes. Oil and chemical spills soak into porous concrete and asphalt. They leave dark stains and weaken the surface over time. Heavy vehicle traffic compresses and stresses the surface. Combine that with age and weather, and surface crumbling starts. Lack of sealing speeds everything up. An unsealed driveway soaks up damage like a sponge. Knowing the cause helps you pick the right fix. Start with a Thorough Driveway Inspection Don’t skip this step. A quick inspection tells you exactly what you’re dealing with before you spend money on materials. Walk your entire driveway and look for: Hairline cracks — thin surface cracks that haven’t spread yet Wide cracks — anything wider than a quarter inch needs filler Potholes or depressions — soft spots that have caved in Staining — oil, rust, tire marks, or algae growth Surface crumbling — edges or corners breaking off Fading or oxidation — dull, gray, or chalky appearance Take photos as you go. This helps you track progress and decide if you need professional help or can handle it yourself. If you find deep structural damage, sunken sections, or widespread crumbling, a full replacement may be the smarter long-term investment. Clean the Driveway Properly This is the most important step. Everything else depends on it. A dirty surface won’t hold crack filler, sealant, or resurfacer. Cleaning isn’t optional — it’s the foundation. Basic cleaning steps: Sweep off all loose dirt and debris Pre-treat stains with appropriate cleaners (more on that below) Apply a concrete or asphalt degreaser to oily areas Pressure wash the entire surface at 2000–3500 PSI Let it dry completely — at least 24 hours before any treatment Pressure washing alone transforms how a driveway looks. Years of embedded grime, algae, and surface discoloration come off in one pass with the right equipment. If you don’t own a pressure washer, or your driveway is large and heavily soiled, professional help is worth it. VJ Pressure Washing provides driveway washing Tracy CA that gets the surface truly clean before restoration. Their commercial-grade equipment reaches spots a garden hose never will. How to Remove Common Driveway Stains Different stains need different treatments. Using the wrong cleaner wastes your time. Oil and grease stains Apply a commercial concrete degreaser. Let it sit for 20 minutes. Scrub with a stiff brush, then pressure wash. For old, set-in stains, repeat twice. Rust stains Use an oxalic acid-based cleaner. Apply, let dwell for 10–15 minutes, scrub, and rinse. Avoid bleach — it sets rust stains deeper. Tire marks A citrus-based degreaser works well here. Apply, scrub hard, and rinse. Some tire marks need two treatments. Algae, moss, and mildew A bleach-and-water solution (1:3 ratio) kills organic growth fast. Apply, let sit for 15 minutes, scrub, and rinse well. Keep it off grass and plants. Efflorescence (white powder on concrete) This is mineral salt coming to the surface. Use a diluted muriatic acid solution carefully, or a commercial efflorescence remover. Always wear gloves and eye protection. Leaf stains and tannin marks Oxygen bleach (like OxiClean) dissolved in warm water handles these well without harsh chemicals. Clean all stains before sealing. Sealer locks in whatever is under it including stains. Repair Cracks and Surface Damage Once the driveway is clean and dry, fix all cracks before sealing. For hairline cracks (under 1/4 inch) Use a liquid crack filler or concrete caulk. Pour or squeeze it in, smooth it flat, and let it cure per label instructions. These are easy DIY repairs. For wider cracks (1/4 to 1/2 inch) Use a polyurethane or epoxy crack filler. These flex with temperature changes, so they hold longer. Clean the crack out with a wire brush first. For large cracks and potholes Use a vinyl concrete patching compound for concrete. For asphalt, use a cold-patch asphalt repair product. Tamp it down firmly a tamper or even the flat of a shovel works. For crumbling edges Use a concrete resurfacer mixed slightly thicker to rebuild broken corners and edges. Use a form board to hold the material in shape while it cures. Let all repairs cure fully before applying sealant. Rushing this step causes peeling and cracking in the repair. Reseal the Driveway for a Fresh Look Sealing is what gives a driveway that “just paved” look. It also protects the surface for the next 2–5 years. For concrete driveways: Use a penetrating silicate sealer for older concrete. For a glossy finish, use an acrylic concrete sealer. Apply with a roller or sprayer in two thin coats. For asphalt driveways: Use a coal tar or asphalt emulsion sealer. Apply with a squeegee applicator and work in sections. Two thin coats outlast one thick coat every time. Application tips: Work on a dry day above 50°F Avoid direct midday sun if possible — it dries the sealer too fast Start from the highest point and work down toward the street Let the first coat dry 6–8 hours before applying the second Stay off the driveway for 24–48 hours after final coat Sealing is one of the highest-impact steps in driveway restoration. The color
Can Vinegar Really Clean Your Driveway? 5 Proven Methods That Work
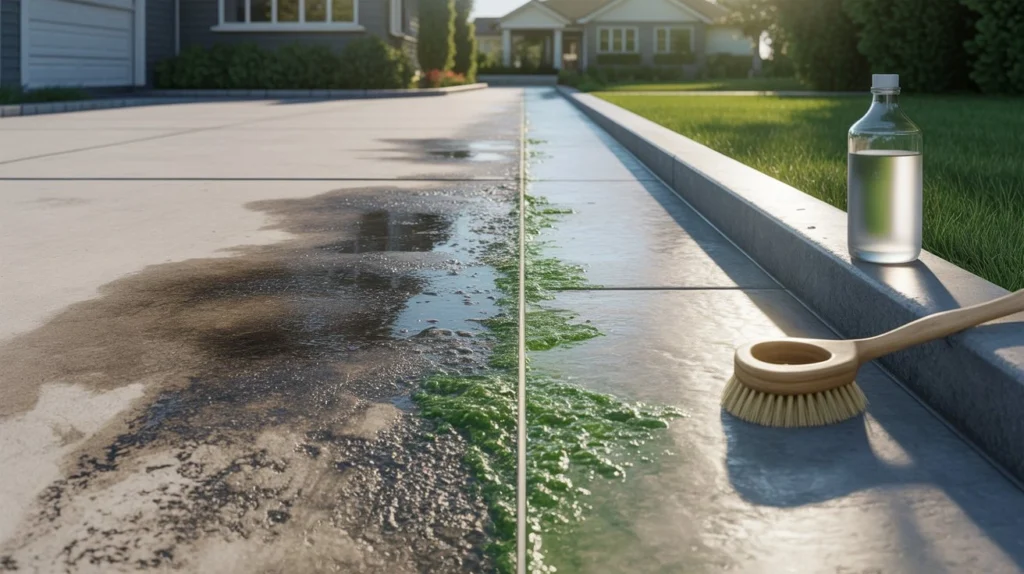
Your driveway puts up with a lot. Oil spills, dirt buildup, moss, and tire marks pile up fast. Most people reach for a commercial cleaner without thinking twice. But there’s a cheaper, greener option sitting in your kitchen cabinet. So, can I use vinegar to clean my driveway? Yes, you can. White distilled vinegar works well on light stains, algae, moss, and general grime. It’s safe, affordable, and chemical-free. That said, it’s not a one-size-fits-all solution. Some surfaces and stains need a different approach. What Makes Vinegar Effective for Driveway Cleaning? Vinegar is a mild acid. Its main active ingredient is acetic acid, which sits around 5% concentration in standard white vinegar. That acidity breaks down mineral deposits, kills moss and algae, and loosens surface grime. Here’s why it actually works: Acetic acid dissolves calcium and lime deposits Low pH kills mold spores and algae on contact No harsh chemicals means no damage to nearby soil or grass Affordable a gallon costs less than $5 Industrial-strength vinegar (20–30% acetic acid) works faster and stronger. But be careful: it can irritate skin and eyes. Use gloves and eye protection if you go that route. Types of Driveway Surfaces You Can Clean with Vinegar Not every surface reacts to vinegar the same way. Before you start, know what your driveway is made of. Concrete Driveways Vinegar works well on concrete. It removes algae, moss, and light oil stains. Avoid soaking the surface repeatedly over months. Heavy, frequent vinegar use can slowly etch concrete over time. Asphalt Driveways Use vinegar carefully here. Asphalt is petroleum-based, and acidic cleaners can break down the binder that holds asphalt together. For asphalt, stick to diluted solutions and short dwell times. Pavers and Brick White vinegar is safe for sealed pavers. Unsealed brick and natural stone like sandstone or limestone — can be damaged by acid. Test a hidden area first. Gravel Driveways No surface to damage here. Vinegar works fine for killing weeds between gravel, but it won’t “clean” loose stone the same way it cleans hard surfaces. What Kind of Stains Can Vinegar Remove? Vinegar handles a solid range of common driveway stains. Here’s a breakdown: Stain Type Vinegar Effective? Notes Moss and algae Yes Kills and loosens growth Mildew and mold Yes Surface-level treatment Hard water stains Yes Acid dissolves mineral buildup Rust stains Partially Helps lighten, may need repeat Light oil stains Partially Works on fresh, small spots Deep oil/grease No Needs a degreaser Tire marks No Requires stronger cleaners Paint stains No Not effective For tougher stains, especially deep oil and grease, you’re better off calling in a professional. VJ Pressure Washing offers reliable driveway washing service Tracy CA for exactly this type of problem. A hot-water pressure wash cuts through years of embedded grease in one session. How to Clean a Driveway with Vinegar Here’s a simple step-by-step process that works for most concrete and paver driveways. What you’ll need: White distilled vinegar or cleaning vinegar (6–10%) Water Spray bottle or garden sprayer Stiff-bristle brush Garden hose or pressure washer Step 1: Sweep First Remove loose dirt, leaves, and debris. Cleaning works better on a clear surface. Step 2: Pre-wet the Area Lightly wet the driveway. This prevents vinegar from absorbing too fast into porous concrete. Step 3: Apply Vinegar Solution Spray the vinegar mixture directly onto the stained area. For heavy moss or algae, apply full-strength cleaning vinegar. Step 4: Let It Sit Allow 15 to 30 minutes of dwell time. Don’t let it dry out. Reapply if needed. Step 5: Scrub Use a stiff brush to agitate the surface. Work in circular motions on stains. Step 6: Rinse Thoroughly Rinse with a strong stream of water. A pressure washer makes this step much more effective. Best Vinegar-to-Water Ratio for Driveway Cleaning The ratio depends on what you’re cleaning. Situation Mix Ratio General cleaning 1 part vinegar : 1 part water Moss or algae Full-strength (no dilution) Light dust or film 1 part vinegar : 3 parts water Hard water stains Full-strength or 2:1 vinegar to water Start with a 1:1 ratio for most jobs. Scale up the vinegar concentration for stubborn buildup. Can Vinegar Kill Weeds in Driveway Cracks? Yes. This is actually one of vinegar’s best uses around the driveway. Acetic acid draws moisture out of plant cells, killing the weed quickly. For cracks and joints between pavers, straight white vinegar works fast. Apply on a sunny day for best results. The heat speeds up the process. Tips for killing weeds with vinegar: Use full-strength white or cleaning vinegar Apply directly to the leaves, not just the crack Reapply every few weeks since vinegar doesn’t kill the root system For deep-rooted weeds, use a 20% horticultural vinegar with care Keep vinegar off grass and plants you want to keep. It doesn’t discriminate. Pros and Cons of Using Vinegar on a Driveway Pros Cheap and easy to find — available at every grocery store Non-toxic — safe around kids and pets after it dries Eco-friendly — biodegradable and won’t contaminate runoff water Multi-use — cleans, kills moss, and removes mineral buildup No special equipment needed Cons Not strong enough for deep oil stains or tire marks Smell — the odor is strong while wet (fades when dry) Can etch certain surfaces — risky on natural stone and unsealed pavers Temporary weed control — doesn’t kill roots Slower than pressure washing for large areas Vinegar vs Commercial Driveway Cleaners Factor Vinegar Commercial Cleaner Cost Very low Moderate to high Effectiveness Moderate High Chemical safety High Varies Environmental impact Low Moderate to high Dwell time needed 15–30 min 5–15 min Best for Moss, algae, light grime Oil, grease, deep stains Commercial degreasers and driveway cleaners outperform vinegar on oil and grease. But for regular maintenance cleaning, vinegar holds its own well. When You Should Avoid Using Vinegar Vinegar isn’t always the right call. Skip it in these situations: Natural stone surfaces Limestone, marble, and sandstone are acid-sensitive. Vinegar will etch
What does a house wash include?
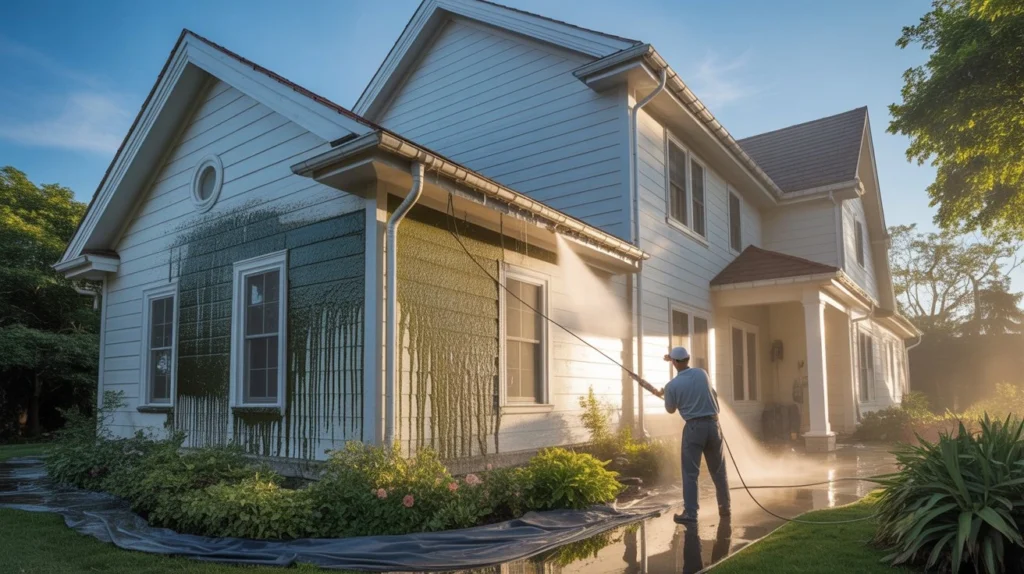
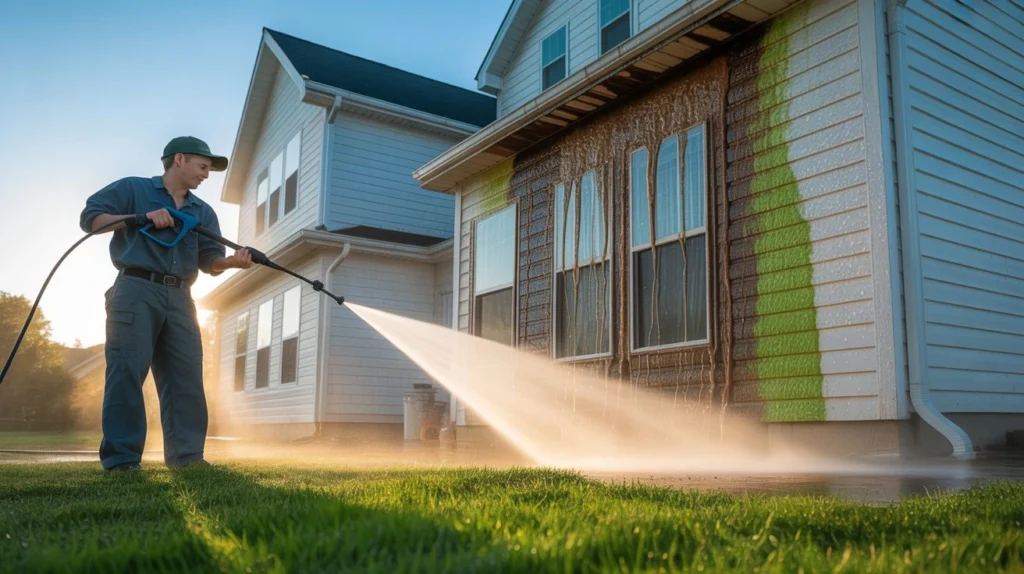
A house wash includes pressure washing or soft washing of your siding, soffits, gutters, windows, and walkways to remove dirt, mold, and grime. Most professional packages also cover light fixtures, the front porch, and outdoor furniture spots. So what does a house wash include exactly? It depends on the company, but a solid service hits every visible surface on your home’s exterior. If you’re getting quotes from house washing services, knowing what’s included helps you compare them fairly. Some companies do the bare minimum. Others go all in. Let’s break down what you should expect. What Is a House Wash? A house wash is an exterior cleaning service that removes dirt, algae, mold, pollen, and grime from your home’s outside surfaces. It’s different from just blasting your siding with a garden hose. Most companies use one of two methods: pressure washing or soft washing. Pressure washing uses high water pressure to strip away buildup. Soft washing uses lower pressure combined with cleaning solutions to kill mold and mildew at the root, not just rinse it off the surface. Your home’s siding material matters here. Vinyl siding can usually handle higher pressure. Stucco, wood siding, and painted surfaces often need the gentler soft wash approach to avoid damage. A good company checks your siding type before picking a method. What Does a Standard House Wash Include? A standard house wash covers the main exterior surfaces of your home. Here’s what’s typically part of the package: Siding cleaning comes first. This is the biggest part of the job since siding covers the most surface area and collects the most grime over time. Soffits and fascia get washed too. These are the parts under your roofline, and they trap spider webs, dust, and mildew that you can’t easily reach yourself. Window exteriors are usually included, at least a basic rinse to remove dirt and water spots. Some companies offer detailed window cleaning as an add-on. Gutter exteriors (not the inside) often get a once-over to remove streaking and grime buildup. Walkways and porches near your front entrance are typically cleaned as part of the package since they’re the first thing visitors see. This is the core of what does a house wash include for most companies. Anything beyond this list is usually an upgrade or add-on service. Areas Commonly Cleaned During a House Wash Beyond the basics, here’s where pros usually focus their attention: Vinyl, wood, brick, or stucco siding – the main surface getting treated, regardless of material. Soffits and eaves – these collect cobwebs and mildew that build up out of sight. Window frames and screens – exterior glass and frames get rinsed, though interior cleaning isn’t included. Garage doors – often overlooked by homeowners but easy for grime to collect on. Front porch and entryway – first impression areas that get extra attention. Outdoor light fixtures – wall-mounted lights collect dust and bugs over time. Driveways and walkways (sometimes as an add-on) – concrete surfaces near the house. Deck or patio areas attached to the home – depending on the package, this might be bundled in or sold separately. Knowing this list helps when you’re trying to figure out the best way to wash outside of house surfaces without missing spots that matter. What Is Usually Not Included in a House Wash? Not everything gets cleaned during a standard house wash. Here’s what’s commonly left out unless you ask for it specifically: Roof cleaning is its own service. Most house washing companies don’t include roof cleaning because it requires different equipment and safety precautions. Gutter interior cleaning (removing leaves and debris from inside the gutter) is usually a separate add-on, not part of the standard wash. Window interior cleaning almost never makes the list. House washing focuses on the outside, so interior glass stays untouched. Detailed power washing of large concrete areas like full driveways or large patios sometimes costs extra, depending on square footage. Fence cleaning is often optional too, especially if your fence isn’t directly attached to the house. Always ask your provider directly what’s bundled in and what costs more. This avoids surprise charges after the job is done. How Do Professionals Wash a House? Professional house washing follows a process that protects your home while getting it clean. Here’s how it usually works. First, the technician inspects your siding and identifies problem areas like mold, mildew, or heavy staining. This step decides whether they’ll use pressure washing or soft washing. Next, they apply a cleaning solution if soft washing is the method. This solution breaks down mold, algae, and grime before rinsing. Then comes the rinse. Using a pressure washer set to the right PSI for your siding material, they rinse from top to bottom. Working top down prevents dirty runoff from re-staining areas already cleaned. After the main wash, they spot check problem areas like corners, under eaves, and around windows where grime tends to hide. Finally, they do a walk-around to inspect the finished job and make sure nothing was missed. This process is why DIY attempts sometimes go wrong. Using too much pressure or the wrong angle can crack siding, force water behind panels, or strip paint. Benefits of Professional House Washing Hiring a professional comes with real advantages beyond just convenience. Better curb appeal. A clean exterior makes your whole property look newer and better maintained. This matters if you’re selling or just want your home to look good. Protects your siding investment. Mold, algae, and grime slowly damage siding over time if left untreated. Regular washing extends the life of your exterior materials. Prevents pest issues. Spider webs, wasp nests, and other pest hideouts get knocked down during a house wash, which can reduce pest problems near your home. Saves you time and effort. Washing a two-story home yourself with a ladder and pressure washer is risky and time consuming. Pros have the right equipment and experience to do it faster and safer. Identifies hidden issues. A good technician often
Can I Powerwash in October? Your Complete Fall Guide
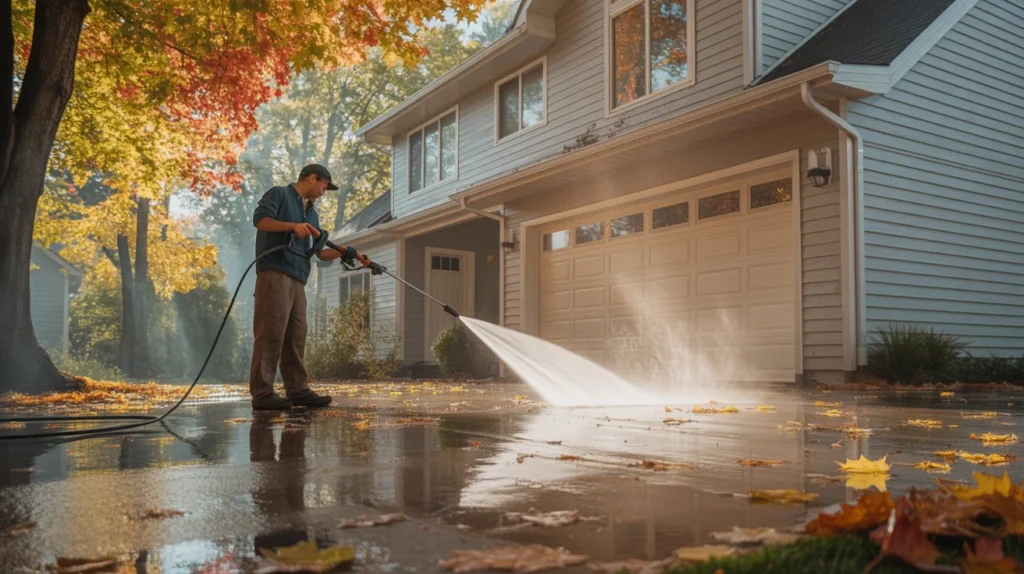
Fall is a great time to clean your home’s exterior. Leaves are falling, mud is building up, and winter is just around the corner. Getting ahead of that mess now can protect your siding, driveway, and deck from long-term damage. So, can I powerwash in October? Yes, you absolutely can. October is actually one of the best months to power wash, as long as temperatures stay above 40°F and no rain is expected for 24 to 48 hours after the job. What Is Power Washing? Power washing uses heated, high-pressure water to blast away dirt, grime, mold, algae, and stains from surfaces. The heat makes it more effective than cold-water pressure washing, especially on grease and oil. It works well on: Concrete driveways and sidewalks Vinyl, wood, and brick siding Decks and patios Fences Roofs (with the right technique) Power washing is not the same as pressure washing. Pressure washing uses cold or room-temperature water. Power washing uses heated water. Both clean well, but power washing cuts through tougher buildup faster. Can You Powerwash in October? Yes. October is a solid month for power washing in most parts of the United States. Here’s why it works. By October, summer algae and mold have had months to build up on your home’s exterior. Cleaning it now stops it from spreading further during wet fall and winter months. If you live in Tracy, CA, or similar climates in Central California, October is one of the best times of year to wash. Temperatures are mild, humidity is low, and rain is rare. Services like VJ Pressure Washing handle house power washing in Tracy, CA regularly in October because the conditions are nearly perfect. In colder states like Minnesota or Maine, you need to be more careful. If overnight temps drop below freezing, water can get into cracks and freeze, which makes existing damage worse. Bottom line: October works for most homeowners. Just check your local 5-day forecast before booking or starting. Ideal October Weather for Power Washing Temperature and weather are the two biggest factors. Here’s what to look for. Temperature The water needs time to dry after washing. Surfaces hold moisture longer when it’s cold. Aim for days where the temperature stays above 40°F throughout the day and the following night. If temps drop close to freezing right after you wash, standing water in cracks can expand and cause cracks in concrete or siding. No Rain Plan your wash on a day when no rain is forecast for at least 24 to 48 hours afterward. Washing right before rain is pointless. The rain will undo the work and leave surfaces wet longer than needed. Wind Light wind is fine. It actually helps surfaces dry faster. Avoid washing on windy days if you’re using cleaning solutions. The chemicals can drift onto plants, cars, or windows. Sunlight Sunny days are ideal. The sun speeds up drying and helps cleaning solutions activate properly. Early morning or late afternoon cleaning works best. Avoid washing in direct afternoon sun when surfaces are extremely hot, as solutions can dry too fast and leave streaks. What Surfaces Should Be Power Washed in October? Some surfaces need attention more than others going into fall. Here’s a surface-by-surface breakdown. Driveways and Sidewalks Concrete absorbs oil, tire marks, leaves, and moisture over the summer. A good wash in October preps the surface before winter. It also removes leaf stains before they set permanently. Home Siding Algae and mold love to grow on north-facing siding where the sun rarely hits. October is your last good chance to remove it before the cold locks in the moisture and spreads the growth further. Clean siding also improves curb appeal going into the holiday season. Decks and Patios Decks take a beating all summer. Food stains, mildew, bird droppings, and algae build up fast. Washing your deck in October, then sealing it, protects the wood from freeze-thaw cycles during winter. This one step can add years to the life of your deck. Fences Wooden fences are prone to mildew and dark staining. Washing before winter keeps the wood in better shape and reduces the need for repainting or staining in spring. Gutters (Exterior) The outside of your gutters collects black streaks from oxidation and organic buildup. October is the perfect time to clean them before they’re full of fall leaves. Roofs Roof washing requires a low-pressure approach (soft washing) to avoid damaging shingles. Black streaks on your roof are algae. Removing them in October protects the shingles through winter and stops further spread. When You Should Avoid Power Washing in October October isn’t perfect for every situation. Here’s when to wait. When temps are below 40°F If your area is already seeing frost or near-freezing nights, hold off. Water in cracks and porous surfaces can freeze and expand, making damage worse. After heavy rain Washing right after a storm is wasteful. Surfaces are already wet and saturated. Wait 24 to 48 hours after rain before washing. On fragile or aging surfaces Old, cracked concrete or weathered wood can’t handle high pressure well. In these cases, use a soft wash approach or hire a professional to assess the surface first. On painted surfaces that need repainting If you’re planning to repaint siding or a deck, wash first. But if the paint is chipping or peeling badly, high pressure will strip it off fast. That may actually be useful if you’re repainting, but it can be a mess if you’re not ready for it. Tips for Safe October Power Washing Follow these practical steps to get the best results without causing damage. Check the forecast first. Pick a 2-day window with no rain and above-40°F temperatures overnight. Use the right pressure for each surface. Concrete handles high pressure (3,000+ PSI). Wood siding needs lower pressure (1,200 to 1,500 PSI). Roofs need soft washing under 1,000 PSI. Apply a cleaning solution before washing. A pre-soak with a surface-appropriate cleaner loosens dirt and kills mold before the water hits.
Can I Pressure Wash Roof Tiles? (Complete Safety & Cleaning Guide)

Roof tiles protect your home from rain, heat, wind, and debris. Over time, they collect dirt, moss, algae, and lichen that can make a roof look old and neglected. Many homeowners think a pressure washer is the fastest way to restore a clean appearance. While it can remove stains quickly, it is not always the safest choice for every roof. So, Can I Pressure Wash Roof Tiles? The short answer is yes, but only in certain situations and with the right technique. Using too much pressure can damage tiles, remove protective coatings, and even create leaks. Understanding the risks and safer alternatives can help you make the right decision. Why Roof Tile Cleaning Matters A dirty roof is not just a cosmetic issue. Moss, algae, and debris can hold moisture against the surface of the tiles. Over time, this moisture may weaken roofing materials and shorten the life of the roof. Regular cleaning helps: Improve curb appeal Prevent moss and algae growth Extend roof lifespan Reduce moisture-related damage Support proper drainage A clean roof also allows homeowners to spot damaged areas before they become expensive repairs. What Are Roof Tiles Made Of? Different roof tiles react differently to cleaning methods. Before considering pressure washing roof tiles, it is important to know what material covers your roof. Concrete Roof Tiles Concrete tiles are strong and durable. They can handle more cleaning pressure than many other materials. Even so, excessive force can remove protective coatings and wear down the surface. Clay Roof Tiles Clay tiles are attractive and long-lasting. They are also more brittle than concrete. High-pressure cleaning can crack or chip them. Slate Roof Tiles Slate is a natural stone product. While durable, slate can break if handled incorrectly. Professional cleaning methods are usually recommended. Composite Roof Tiles Composite tiles are manufactured from blended materials. Their cleaning requirements vary by manufacturer. Always check manufacturer recommendations before cleaning. Can You Pressure Wash Roof Tiles? Many homeowners ask, “Can I Pressure Wash Roof Tiles?” because they want a quick and affordable solution. Pressure washing roof tiles can remove dirt, algae, moss, and stains. In some cases, it may be appropriate for certain concrete roofs in good condition. However, high pressure often causes more problems than it solves. Professional roof cleaners rarely rely on extreme pressure. Most prefer low-pressure methods combined with specialized cleaning solutions. These approaches clean effectively while reducing the risk of damage. The answer depends on: Tile material Roof age Existing roof condition Amount of moss or algae growth Pressure settings used Risks of Pressure Washing Roof Tiles Understanding the risks helps explain why many roofing experts avoid high-pressure cleaning. Tile Cracking and Breakage Roof tiles are designed to protect against weather, not direct high-pressure water streams. A strong spray can crack, chip, or loosen tiles. Loss of Protective Coatings Many tiles have protective finishes that help repel water and resist UV damage. Pressure cleaning roof tiles can strip away these coatings. Water Intrusion Water forced beneath tiles can enter the roofing system. This can lead to leaks, mold growth, and structural damage. Reduced Roof Lifespan Repeated high pressure clean roof tiles treatments can wear down surfaces and shorten the life of roofing materials. Safety Risks Working on a roof while handling pressure washing equipment increases the chance of slips and falls. Signs Your Roof Tiles Need Cleaning Not every dirty roof requires aggressive cleaning. Watch for these signs: Moss Growth Moss traps moisture on roof tiles and keeps them damp for long periods. Over time, this can weaken roofing materials, encourage further growth, and shorten the life of your roof. Black Algae Streaks Black streaks are usually caused by algae growth. They spread across roof surfaces, make the roof look dirty, and can become harder to remove if ignored. Lichen Buildup Lichen attaches tightly to roof tiles and can be difficult to remove. As it grows, it may gradually wear down the tile surface and affect your roof’s appearance. Dirt Accumulation Dust, leaves, and debris can build up over time and make the roof look older than it is. This buildup can also create conditions that support moss and algae growth. Drainage Problems Debris on the roof can block water flow and prevent proper drainage. This may lead to standing water, moisture issues, and potential roof damage if not addressed. What Is the Safest Way to Clean Roof Tiles? For most roofs, soft washing provides the safest solution. Soft Washing Soft washing uses low-pressure water combined with cleaning solutions designed to kill algae, moss, and lichen. Benefits include: Reduced risk of tile damage Longer-lasting results Better treatment of biological growth Improved roof appearance Manual Moss Removal Professionals often remove thick moss by hand before any washing begins. This helps prevent damage to roof tiles. It also stops large moss clumps from spreading spores during cleaning. Low-Pressure Rinsing Low-pressure rinsing is used to gently wash away loose dirt and remaining debris. It cleans the surface without forcing water under the tiles, which helps protect the roof structure. Professional Roof Cleaning Experienced roof cleaners know how different tile types react to moisture and cleaning solutions. They adjust their methods based on roof condition, which reduces risk and improves long-term results. Pressure Washing vs. Soft Washing Roof Tiles Both methods clean roofs, but they produce different results. Pressure Washing Advantages: Fast dirt removal Immediate visual improvement Disadvantages: Higher risk of damage Potential water intrusion Removal of protective coatings Soft Washing Advantages: Safe for most tile types Kills algae and moss at the source Longer-lasting cleanliness Disadvantages: Requires specialized cleaning solutions May take longer to show full results For most homeowners, soft washing offers the best balance of safety and effectiveness. How Professionals Clean Roof Tiles Safely Professional roof cleaners follow a structured process to protect both the roof and the property. Step 1: Roof Inspection The roof is carefully checked for cracked tiles, weak spots, and any existing damage. This step helps decide the safest cleaning method and prevents further issues during
Can you wash your driveway?
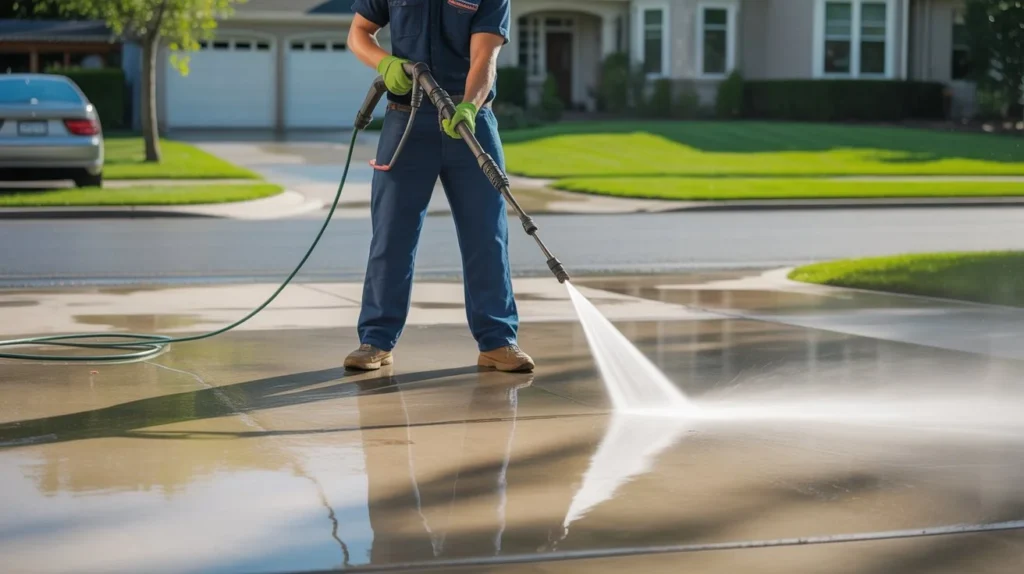
Your driveway is one of the first matters for people and they ask about your property. Even if your home seems smooth and well-maintained, a stained or grimy driveway can negatively have an effect on the general look of your property. Dirt, oil stains, mold, algae, tire marks, and particles slowly increase over time, making concrete surfaces appear antique and neglected. That`s why many owners ask, Can you wash your driveway yourself, and if so, what’s the nice manner to do it properly and effectively? So yes you could smooth your driveway yourself using the use of the right techniques and equipment. At VJ Pressure Washing, we assist owners repair and guard their driveways using superior cleansing structures designed for long-lasting results. Why Driveway Cleaning is Essential for Home Maintenance Your driveway is more than only a course in your garage—it`s a key characteristic of your house`s outside. Over time, dirt, oil stains, and climate exposure could make it appear worn and uninviting. But cleansing your driveway is more than simply appearances. Regular protection allows it to shield it from damage, prolonging its lifespan and making sure protection in your own circle of relatives and guests. At VJ Pressure Washing, we recognize the significance of taking care of each component of your domestic. That`s why we provide a complete 18-factor indoors and outside domestic protection package, together with driveway cleansing. With a focal point on preventative domestic protection, we make sure all those “honey-do” obligations are finished efficiently and professionally, saving you time, money, and stress. Tools You Need to Pressure Wash a Driveway The proper equipment and substances are critical for a hit driveway washing project. You`ll want a strain washing machine, a wheeled floor purifier, and a general wand. Pressure Washer You’ll want both an electric powered or a gas strain washing machine. Electric strain washers are much less effective than fuel line washers and cost $90 to $180 for starter models. Gas strain washers variety from about $200 to $500. Surface Cleaner A floor purifier is an attachment to the strain washing machine that has wheels and a covered, rotating wand. Pressure washers typically do not include floor cleaners, so that you have to purchase one separately ($70 to $120) Wand and Nozzles Most strain washers include a general guide and the induced water gun. The wand is 21 inches long and springs with as a minimum one or nozzle tip ends. Materials Use pre- and post-remedy substances for the cleanest effects with much less effort: For soaking pre-treatments, Byersdorf recommends an answer like 30 Seconds Outdoor Cleaner Concentrate or a moderate detergent made for strain washers. For post-treatments, Byerseorf makes use of a diluted answer of sodium hypochlorite, a form of bleach, to assist save you similarly moss growth. How to Pressure Wash Your Driveway in 6 Steps Step 1: Pick the Right Pressure Washer Driveways need power. You’ll need a pressure washing machine with at least 2,500 PSI and 2.5 GPM to remove oil stains, embedded dirt, and algae. Gas-powered units and high-powered electric models are ideal for this job. If you want professional results without the hassle, many homeowners trust expert driveway power washing tracy ca services to handle deep driveway cleaning safely and effectively. Step 2: Clear the Area Before you get to blasting, prep your canvas means area: Move cars, bikes, potted flowers and whatever else withinside the way. Sweep off free particles like gravel, leaves, or twigs. Cover close by siding, fencing, or flowers in case you are the usage of detergent. It`s additionally a first-rate time to look at the concrete or asphalt for erosion or cracks. Pressure washing could make the trouble regions on your driveway greater visible, so that you recognise what to patch later. Step 3: Pre-Treat Stains Oil and grease stains are stubborn. Spray them with a concrete-secure degreaser or driveway purifier and permit take a seat down for 10–15 minutes. This offers the detergent time to interrupt down the filth so your pressure washing machine can carry it away greater easily. Dealing with rust or tire marks? There are focused removers for those, too—simply ensure they`re secure to be used in your driveway material (whether or not concrete, asphalt, or pavers) and well matched with your preferred stress washing machine. Step 4: Start Washing! Now for the amusing part! Begin with a take a look at spray in a much less substantive nook of your driveway to get an experience for the pressure. Hold the pressure washer wand approximately 12 inches from the floor and operate in overlapping passes. Move in a consistent, sweeping motion. Don`t forestall and move or you could possibly depart choppy lines. If you`re the usage of a floor purifier attachment, you may move a touch quicker and cowl greater floor whilst preserving matters easy and uniform. Work in sections, specifically if you`re stress washing your driveway in direct sunlight. This allows safe water spots or choppy drying. Step five: Rinse and Repeat Once you`ve made your first pass, rinse the entirety off and determine your paintings. Some spots, specifically oil stains may want a 2nd round. Reapply your stain remover, wait some minutes, and move once more with a targeted spray or a rapid nozzle. Step 6: Seal the Deal If your concrete seems notable and also you need to hold it that way, recall making use of a concrete sealer as soon as the entirety is dry (generally 24–48 hours after pressure washing). Sealing allows safe destiny staining, reduces water absorption, and offers your driveway an extended life. Can You Wash Your Driveway Yourself? Yes, house owners can carry out primary driveway cleansing themselves, in particular for mild dust and floor debris. However, attaining professional-stage consequences relies upon on: Proper equipment Cleaning knowledge Correct stress settings Appropriate cleansing products Simple rinsing may also dispose of dust, however deeper stains commonly require greater superior techniques. Many house owners underestimate how tough pressure washing driveway stains can grow to be
How do professionals clean houses so fast?
Most people spend 3–4 hours cleaning their home. A professional cleaner finishes the same job in under 90 minutes. That gap isn’t luck. It’s training, habit, and a clear system applied every single time. Pros don’t clean harder, they clean smarter. So, how do professionals clean houses so fast? The short answer: they eliminate all the guesswork. Every move is intentional. No wandering from room to room, no re-cleaning, no wasted steps. Why Professional Cleaners Are So Efficient Professional cleaners don’t rush. They follow a system. Every visit follows the same order. The same tools. The same rhythm. This removes decision fatigue completely at VJ Pressure Washing. Think about it. When you clean at home, you probably: Start in one room, get distracted, move to another Go back to get a product you forgot Clean the floors, then wipe dust down onto them Pros never do any of that. Their efficiency comes from habit stacking: one action flows into the next with zero waste. They also pre-load everything. Before touching a single surface, their caddy is fully stocked. Products, microfiber cloths, scrubbers all in one hand as they walk through the door. The Professional “Top-to-Bottom” Cleaning Method This is the foundation of all professional house cleaning techniques. The rule is simple: always clean from top to bottom, left to right. Why it works: Dust and debris fall downward. If you clean floors first and then dust shelves, you’re cleaning floors twice. Pros dust ceiling fans, shelves, and countertops before they ever touch the floor. Here’s the order professionals follow in every room: Ceiling fans and vents — dust falls to the floor, not onto clean surfaces High shelves and tops of furniture — same logic Countertops and middle surfaces — wiped down after overhead dust settles Appliances and fixtures — cleaned with targeted products Baseboards and floor edges — just before the final sweep Floors last — vacuumed or mopped only when everything above is done This single rule alone cuts cleaning time by 20–30% because you never repeat work. Room-by-Room Cleaning Strategies Professionals Use Kitchen Pros spray all surfaces first counters, stovetop, sink and let the product dwell while they do other tasks. This is called dwell time strategy. The cleaner does the work so the human doesn’t have to scrub. While the spray soaks in, they wipe down cabinet fronts and appliance exteriors. Then they come back to the surfaces, wipe in one pass, and move on. Time saved: roughly 10 minutes per kitchen visit. Bathroom Bathrooms are the most time-intensive rooms. Pros attack them with speed by following a fixed pattern: Spray toilet, tub, and sink simultaneously Clean mirrors while products dwell Wipe toilet (lid, tank, seat, bowl — in that order) Scrub tub or shower Clean sink last Mop or wipe floor on the way out They never move backward. Forward motion only. Bedroom Pros change bedding at the start, let the room air while they clean other areas, then return to fluff pillows and straighten at the end. Dusting follows the top-to-bottom rule. Clutter is grouped and placed, not put away individually. Living Room Dust first, vacuum last. Cushions get flipped and straightened before vacuuming so debris falls to the floor. Remote controls, coasters, and loose items are grouped on surfaces rather than placed one by one. Time-Saving Cleaning Techniques Professionals Follow These are the time-saving cleaning hacks professionals use that most homeowners never think about. 1. The Two-Cloth Rule One cloth for dusting, one for wiping. Never cross-contaminate. Switching mid-room to grab a new cloth wastes 5–10 minutes per job. 2. Carry Everything A well-stocked caddy travels with the cleaner everywhere. No trips back to the supply closet. No “just one more thing to grab.” Every product needed for a room is already in hand. 3. Spray Ahead Before entering a room, spray surfaces. Walk in, do other tasks, come back to wipe. Products do their job while the cleaner does something else. 4. Set a Timer Per Room Professionals often use mental or physical timers. Kitchen: 15 minutes. Bathroom: 12 minutes. This prevents over-cleaning and keeps pace consistent. 5. Clean in Zones, Not by Task Most homeowners dust every room, then vacuum every room, then mop every room. Pros finish one entire room before moving to the next. This reduces back-and-forth travel time significantly. 6. Microfiber Over Paper Towels Microfiber cloths pick up dust and bacteria without streaking. They require no spray for light dusting. Paper towels leave lint and take more passes to clean the same surface. Teamwork Makes Cleaning Faster When a professional cleaning crew shows up, time drops even further. This is one of the clearest answers to how professionals clean houses so fast, more hands, clear roles. A two-person crew might split like this: Person A: handles all wet areas kitchen, bathrooms Person B: handles all dry areas bedrooms, living spaces, vacuuming No overlap. No confusion. No waiting. Both finish at roughly the same time. Solo professionals use a similar mental split: they batch all bathroom work before moving on, rather than mixing bathroom and bedroom tasks together. Professional Cleaning Habits Homeowners Can Copy You don’t need to hire someone to clean faster. These efficient cleaning systems used by pros work at home too. Build a cleaning caddy. Keep all your products in one portable bucket or tray. No more running to the cabinet for each product. Clean before it gets dirty. Pros maintain homes rather than rescue them. Wiping a counter daily takes 30 seconds. Scrubbing a sticky, built-up counter takes 10 minutes. Own fewer cleaning products. Most homes have 15+ cleaning products. Pros often carry 5 or 6 quality ones that handle multiple surfaces. Fewer products = faster decisions. Work the clock. Pick a time limit per room and hold to it. This alone will cut your cleaning time in half within a week. Declutter before you clean. Picking up items off the floor before vacuuming is not cleaning it’s prep. Pros assume surfaces are clear.
Can You Pressure Wash a Brick House?
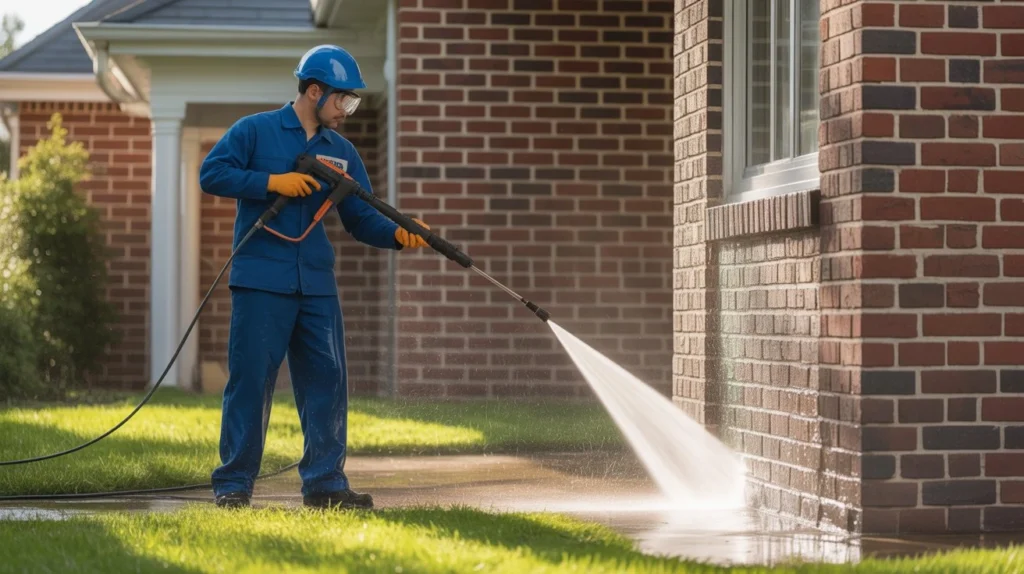
Can a brick house be power- washed? Yes, however, there are a few things to keep in mind when power washing bricks. Brick may be the toughest substance to use for a home’s exterior, but cleaning it safely can be a challenging task. Bricks are porous like concrete, so the bricks can hold water. Thankfully, the face is vertical and isn’t really bathed in the weather like a driveway or patio. This post will hopefully convey the dos and don’ts of pressure washing a brick home. Understanding Brick Surfaces Before Pressure Washing Brick is a durable material, but it has the following: It has huge pores, and so it soaks up water. It depends on the mortar joints that are softer than the bricks. It can be a magnet for dirt, mould, algae, and pollution stains. Because of these qualities, pressure washing bricks should be done gently and carefully. Too much pressure can damage not only the brick surface but also the mortar between them. At VJ Pressure Washing, we use controlled pressure and the right cleaning solutions to protect your brick while still delivering a deep, effective clean. Professionals say that you can clean brick with a pressure washer. It just takes a little caution and the right technique. Benefits of Brick Pressure Washing If performed properly, brick pressure washing has the following benefits : 1: Rids Dirt and Grime Dust, mud, and contaminants build up on brick surfaces over time. Their natural color is brought back with pressure washing. 2: Gets Rid of Mold and Algae Green or black stains are commonly caused by moist conditions. 3: Enhances Curb Appeal A washed brick home looks newer and more appealing. 4: Promotes longevity Maintaining chronic degeneration at bay. Best Pressure Settings for Brick Cleaning Selecting the correct pressure is the most important aspect when pressure washing brick house surfaces. Recommended PSI Levels 500-1000 PSI: Suitable for most bricks. Up to 1500 PSI: Ceiling for more recent, tougher bricks. Always start at the lowest pressure, increasing gradually. Choosing the Right Equipment For a successful brick pressure washing, you will need: Pressure washer with variable PSI Fan spray nozzle (25° or 40°) Use gloves and goggles as safety equipment Ladder for elevated areas Avoid the needle or turbo nozzles as they concentrate the pressure and can damage bricks. pressure washing a brick house Step 1: Check the surface repair cracks or damaged bricks before cleaning Step 2: Pre-Soak the Brick Spray the solution on the surface and water mist it so it does not soak into the substrate. Step 3: Purchase a Brick Cleaning Solution Mild brick cleaners to”: Water + Dish Soap Vinegar + water solution Special brick cleaners Test the solution on a small area before use. Step 4 :Use low pressure. Start at low pressure and hold the distance no more than 12 to 18 inches. Step 5: clean from top to bottom. This helps to avoid streaking and clean evenly. Step 6: Rinse Well. Evacuate cleaning agent residues to avoid staining. Soft Washing vs Pressure Washing Brick Experts advise soft washing as opposed to harsh power washing. Soft Washing Uses low pressure Is dependent on cleaning solutions OLDER BRICKS OR DELICATE BRICKS: Soft wash is recommended. Pressure Washing With more pressure Faster cleaning Call, more caution is needed. In most cases, a mix of utilizing both techniques will yield the best results. What Is the Best Brick Cleaning Solution? Pressure and choice of brick cleaning solution are equally important. Safe Options Mild detergent Vinegar solution Commercial brick cleaners Do not use strong acids or bleach. For homeowners searching for a reliable house pressure washing service fremont ca, using the right cleaning method matters just as much as the equipment. Water-soluble surface active agents are often the best choice because they break down dirt, mold, and grime without damaging surfaces. In most cases, low-pressure washing combined with a mild cleaning solution delivers better and safer results than high-pressure washing alone. This approach protects your paint, siding, and brick while still giving your home a fresh, clean look. Professional Brick Pressure Washing You should think about bringing in the professionals when: Is there such a thing as a multilevel bakery? The bricks are old or fragile. You don’t have the right tools. Commercial Technicians Adhere to a Scheduled Maintenance Approach. Similar to a Service Schedule for your HVAC Engine, Profession Commercial Technicians Follow a Scheduled Maintenance Approach, like Maintenance on Your Air Conditioning system or Furnace Outside Cleaning. They take Commercial House Cleaning Service Scheduling for their Exterior Maintenance Services Seriously Consistency Safety They also use advanced techniques like: Soft washing Green solutions Controlled pressure systems. Common Mistakes to Avoid When you are brick pressure washing, avoid making the following mistakes: Applying too much pressure Positioning the spray nozzle too close Neglecting to check the surface Using strong chemicals Not adhering to safety measures. Maintenance is but one slip-up away from costing repairs. Tips for Best Results: Before doing anything else, test it out in a small area. Apply with wide spray nozzles. Maintain the same distance. Don’t vary the distance between you and the nozzle as you work. Work in segments Conclusion Is It Safe to Powerwash a Brick House? This question is perfect for answering with a “pros and cons” list! When you are pressure washing brick, take note of the following: Apply the pressure between 500-1,500 psi (pounds per square inch) The Correct Nozzle to Use Apply a mild cleaning solution suitable for bricks. Keep the Distance Soft wash is the Better Choice for more delicate surfaces. Soft wash is the Best Method for Cleaning Risky and finely detailed surfaces, such as Stucco and Wood. How long should I pressure wash a brick house? After that, the popping pressure washer on your brick house will be a complete success, and you will not be scared that you are deteriorating the integrity of
How Do Professionals Clean Driveways?
Keeping your driveway clean lies not only in how it looks to the eye but in how it helps you in keeping your driveway protected, damage-free, and safe. Many people conduct a walk-around, but professionals can delve deeper with superior equipment and techniques, yielding a more thorough result that lasts longer. So, how do the professional driveway cleaners clean? The Drainage Solutions Guide to Driveway Pressure Washing will explain the driveway washing procedure and also guide you on professional driveway cleaning methods and how you can clean the right way on different driveway types, and more… Plus, you’ll get some pro tips regarding how to deal with stains on concrete driveway slabs! Understanding Different Driveway Surfaces Before you find out how the pros clean driveways, you should know that the cleaning methods differ for each material. At VJ Pressure Washing, we use different techniques for concrete, brick, pavers, and asphalt surfaces to ensure safe and effective cleaning without causing damage. 1:Concrete Driveways. It is most common and durable, but it is susceptible to oil stains and yellowing. 2:Asphalt Driveways More fragile, so it needs less pressure to prevent harm. 3:Paver Driveways If made of bricks or stones, the cleaning process has to be approached with a lot of care in order not to damage the joints. 4. Gravel Driveways Not usually pressure-washed: get them cleaned by raking and removing weeds. Professional cleaning of each of them, if you want to clean your driveway like a professional. Driveway Pressure Washing Methods Pressure washing is one of the best ways to restore a dirty driveway. That said, How Do Professionals Clean Driveways? Professionals do much more than simply hose down the surface. They use specialized driveway pressure washing techniques, proper water pressure, and targeted cleaning solutions to remove deep stains, dirt, algae, and oil safely and effectively. 1. Basic pressure washing Utilizes a high-pressure water spray Cleans dust, dirt and mild stains on the surface Good for most types of concrete surfaces 2. Power Washing (Hot Water Cleaning) It employs heated water Works well on oil, grease and other stubborn stains Hot water is better than cold water 3. Surface Cleaner Attachment Rotating surface cleaner attachment to pressure washers No Streaks Cleaning evenly without streaks Great for large areas with its rotating discs, it is Perfect for large areas with ease and with a finish free of streaks 4.Soft Washing Pressure clean with very low pressure used for soft washing to apply the products For use on sensitive surfaces, including asphalt and pavers These techniques are chosen depending on the condition of the driveway Best Way to Clean Driveway Surfaces What to do if the driveway is dirty? I’m just listing the basic tasks that are followed in most situations by professionals. How to go about cleaning a driveway will really depend on what it is made from and how dirty it is: Inspection and preparation. Surface pre-treated with cleaning solution, Power Washing, or Pressure Washing, Spot Treatment of Stain, Final Rinse, and Drying. It is this systematic change that guarantees the cleanest and longest end result. Equipment Used by Professionals Professional driveway cleaning requires the use of specialized equipment that is much more powerful than what you would find in the average home. For reliable driveway washing Tracy CA services, professionals use commercial-grade pressure washers, surface cleaners, and stain treatment solutions to remove deep dirt, oil stains, mold, and grime effectively. Among the standard Tools Are: Commercial pressure washers Surface cleaners Chemical sprayers Brush machines (like roller scrubbers) Water treatment systems These devices enable the professionals to clean effectively and uniformly. Professional Driveway Cleaning Techniques NowDay Professional Driveway Cleaning Methods. Among our services is a broad range of cleaning services available to you, which You 1:Pre-Treatment with Cleaning Solutions The experts employ unique products to disintegrate: Oil stains Mold and Algae Filth Build Up This action “softens up the contaminants beneath the surface, but it doesn’t wash them.” 2 Agitation To tackle particularly tough stains, they bring out brushes or power tools. This lifts stains that pressing alone will not eliminate. 3. Brush Detergent Cleaning There are several chemicals to handle various stains. Oil degreaser cleaner Rust with acid-based cleaning materials For molds, one should use algaecides. 4. Post-Treatment Rinse A final rinse after washing is another way to prevent residue from lingering. How to Remove Stains from a Concrete Driveway Oil and grease stains Put on a degreaser Wait the rest10-15mins Brush and wash with water. Rust Stains Use acid-based products. Don’t go overboard; you can do damage. Mold and Mildew Spray with a commercial bleach-based or DIY solution. Apply detergents that are mild. Tire Marks Try a specialized or stain-specific detergent. Lightly scrub and rinse. Paint Stains Use paint thinners or paint removers. Then, pressure washes it out. Then, pressure washes it out. Specialists have a mere few seconds to apply the ideal mixture of chemicals and procedures to protect the surface. Best Way to Clean Driveway Surfaces Material and condition dictate the best approach for cleaning driveway surfaces, but the professionals typically rely on this method: Examen et préparation, Pretreatment with cleaning solutions, Pressure or power washing, Spot cleaning for stains, Final rinse and drying. This methodical process guarantees good cleaning results and durable effects. Conclusion From professional driveway cleaning tips to advice on how to clean stains from concrete driveway areas, How Do Professionals Clean Driveways? It involves much more than simply spraying water on the surface. Professionals inspect the driveway, treat stains properly, and use the right cleaning methods to remove dirt, oil, mold, and grime without damaging the concrete. To have a driveway that looks good, lasts longer, and stays protected, you really can’t go wrong with professional cleaning. Regular maintenance helps prevent stains, surface damage, and buildup that can wear down your driveway over time. If you want reliable results and a cleaner driveway, contact us today to schedule a professional driveway cleaning service. FAQs What do professionals use to clean driveways?
How to wash walls in house
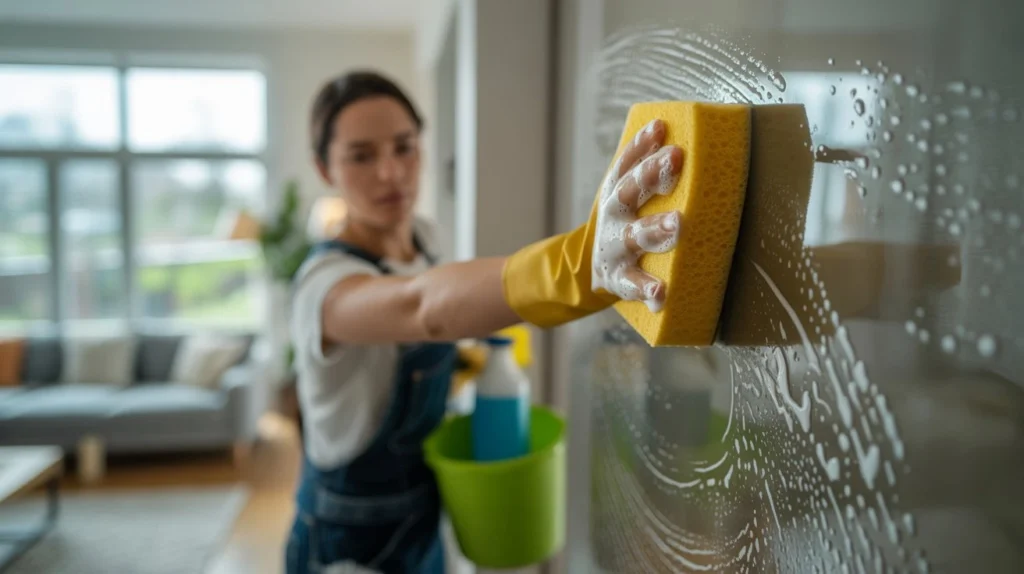
Dirty walls make even a clean room feel grimy. Scuff marks, grease, crayon lines, and dust buildup slowly steal the life out of your home. Most people clean floors and counters regularly but forget the walls entirely until the damage is obvious. The truth is, walls need attention too. Learning how to wash walls in house settings is easier than most people think. You don’t need expensive equipment. A few basic supplies, the right method, and a little patience go a long way. This guide walks you through everything, step by step. Signs Your Walls Need Cleaning Here are the clearest signs it’s time to clean: Visible dirt lines near light switches and door frames Yellow or brown stains from cooking grease or smoke Crayon, pen, or marker marks from kids Dust buildup along the top edges and baseboards Scuff marks from furniture, shoes, or bags A dull, flat look on paint that used to look bright If you see two or more of these, your walls are overdue. House cleaning habits often connect across different services, and this insight matters in both home and exterior care. House power washing Tracy CA Pro tip from VJ Pressure Washing: Walls in kitchens and hallways need cleaning more often than bedrooms. High-traffic areas collect grease, skin oils, and fingerprints fast. This same rule applies to dumpsters and surrounding areas too. High-use zones always need more frequent cleaning because buildup happens faster where activity is hea Tools and Supplies You’ll Need You don’t need much. Most of this is already in your home. Basic supplies: Two buckets (one for cleaning solution, one for rinse water) Soft sponges or microfiber cloths A soft-bristle scrub brush for tough spots A flat mop with a microfiber head (great for high areas) Drop cloths or old towels Painter’s tape Cleaning solutions: Wall Type Best Cleaner Painted walls (latex) Warm water + dish soap Semi-gloss or gloss paint All-purpose cleaner Flat/matte paint Very mild soap, minimal water Wallpaper Dry sponge or specialized cleaner Wood paneling Wood-safe cleaner, barely damp cloth Avoid bleach on painted walls. It strips color and damages the surface. Prepare the Room Before Washing Walls Skipping prep is where most people go wrong. Don’t rush this step. Step 1: Move furniture away from walls. Pull sofas, shelves, and tables at least two feet from the wall. This gives you space to work and protects your furniture. Step 2: Lay down drop cloths. Water drips. The cleaning solution drips. Protect your floors and any furniture you can’t move. Step 3: Remove wall art, frames, and outlet covers. Clean walls should be bare walls. This prevents water damage to anything hanging on them. Step 4: Dust the walls first. Use a dry microfiber cloth or a dry mop to wipe down the entire wall. Start from the top and go down. This removes loose dust and cobwebs before any water touches the surface. Step 5: Test your cleaner on a hidden spot. Before you commit to the whole wall, test your cleaning solution in a small, hidden area. Wait a few minutes. If the paint lifts, fades, or changes texture, switch to a milder cleaner. How to Wash Walls Step by Step This is the method that works. It’s straightforward and delivers clean results without damaging paint. Step 1: Mix Your Cleaning Solution Fill one bucket with warm water and a few drops of liquid dish soap. Don’t go heavy on the soap. Too many suds leave a residue that’s hard to rinse off. Fill the second bucket with clean water only. This is your rinse bucket. Step 2: Start from the Top, Work Down This is non-negotiable. If you start at the bottom, dirty water drips onto areas you’ve already cleaned. Always top to bottom. Wet your sponge or cloth, wring it out well, and start wiping. The cloth should be damp, not soaking. Step 3: Work in Small Sections Clean a two-by-two foot section at a time. Scrub gently in circular motions. For flat paint, use even less pressure. Step 4: Rinse Each Section After cleaning each section, go over it with your rinse cloth dipped in clean water. This removes soap residue. Soap left on walls attracts more dirt over time. Step 5: Dry as You Go Use a clean, dry microfiber towel to lightly dry each section before moving to the next. This prevents water streaks and keeps moisture from soaking into the drywall. Step 6: Tackle Stubborn Stains For grease, try a small amount of baking soda paste (baking soda + water). Apply it gently, let it sit for 2 minutes, then wipe clean. For crayon, a small amount of rubbing alcohol on a cotton ball works well on most painted surfaces. For scuff marks, a melamine foam eraser (like a Magic Eraser) does the job fast. But use it carefully on flat paint — it can dull the finish. Step 7: Clean Baseboards and Trim Last Once the main wall surface is clean and dry, wipe down the baseboards, trim, and door frames. These collect the most dust and grease. A damp cloth with a mild cleaner is usually enough. Best Way to Clean Different Wall Types Not all walls are the same. The best way to wash walls depends on your paint finish and surface material. Flat or Matte Paint This is the most delicate finish. It scratches and scuffs easily when scrubbed. Use a barely damp cloth Avoid scrubbing; blot gently Don’t use harsh cleaners Eggshell or Satin Paint More durable than flat paint. Handles mild soap and light scrubbing well. Warm water and dish soap work great Wring out your cloth thoroughly before use Rinse and dry quickly Semi-Gloss or Gloss Paint The easiest to clean. Common in kitchens, bathrooms, and trim areas. Can handle more scrubbing All-purpose cleaners are safe here Great at resisting moisture Wallpaper Never soak wallpaper. It warps, bubbles, and peels. Use a dry cleaning sponge for light dirt For small spots, a