
What Are the 7 Stages of Cleaning?: The Complete Step-by-Step Guide (2026)
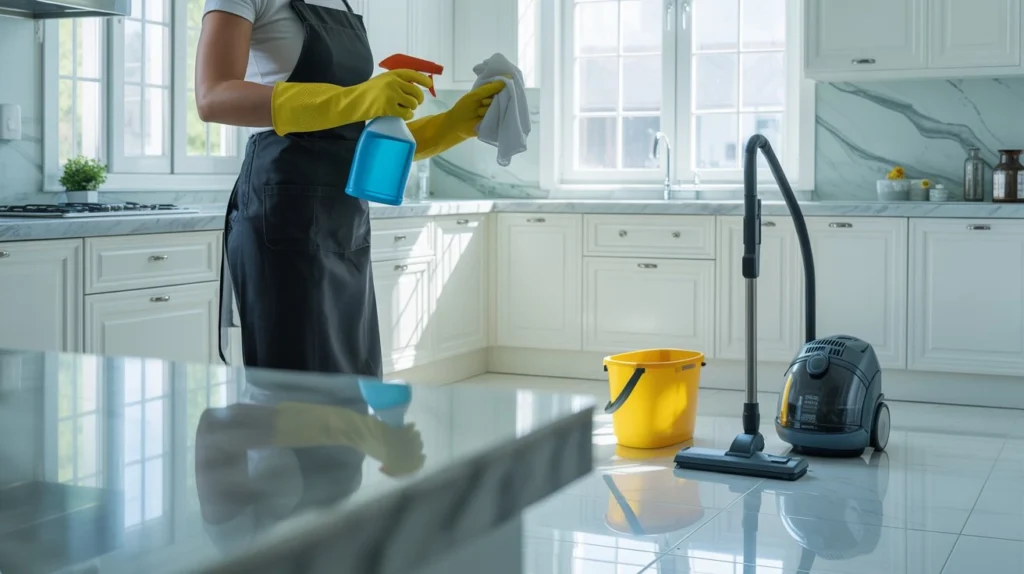
Cleaning your home or workplace takes more than a quick wipe down. Real cleaning follows a set process that removes dirt, dust, and germs in the right order. Skip a step, and grime builds up where you cannot see it. Pros use this method every single day. So what are the 7 stages of cleaning? They are prep, dust removal, washing, rinsing, sanitizing, drying, and a final check. Each stage builds on the last one to leave your space spotless and safe. What Are the 7 Stages of Cleaning? Most people think cleaning means grabbing a rag and spraying some cleaner. That is only part of the picture. A true cleaning routine has a clear order, and each part has a job to do. This order is often called the 7 step cleaning process. It is used in homes, restaurants, hospitals, and offices because it works every time. When you follow each stage in order, you remove dirt first, then bacteria, then moisture. Skipping ahead causes problems. For example, if you sanitize before you remove loose dirt, the cleaner cannot reach the surface underneath. Cleaning is the first level of any good hygiene plan, and the stages of cleaning give you a map to follow. You do not need fancy tools to get this right. You need the right steps, done in the right order, every time. Stage 1: Preparation Preparation is where everything starts. Before you touch a single cleaner, look at the space. Clear off clutter, move small items, and gather your tools and supplies in one spot. This stage also means checking what surfaces you are working with. Wood, tile, granite, and fabric all need different products. Using the wrong one can cause damage or leave a dull finish. Read labels before you mix anything. Good prep also includes safety. Open windows for airflow, put on gloves if needed, and keep kids or pets away from cleaning chemicals. A few extra minutes here saves you time and trouble later. Stage 2: Dry Cleaning or Dust Removal Once the space is ready, remove loose dirt and dust first. This step is sometimes skipped, but it matters a lot. If you skip it, you end up smearing dust around with a wet rag instead of removing it. Use a vacuum, dry mop, or microfiber duster for this stage. Work from top to bottom so dust falls onto surfaces you have not cleaned yet, not ones you just finished. Pay attention to corners, vents, and baseboards, since dust collects there fast. This stage is one of the 4 stages of cleaning that most cleaning checklists highlight, because it sets up every step that follows. A clean dry surface means your wet cleaning tools will actually work better. Stage 3: Washing or Wet Cleaning Now it is time to use water and a cleaning solution. This stage breaks down grease, grime, and stuck on dirt that dry methods cannot touch. Choose a cleaner made for the surface you are working on, whether that is glass, tile, or fabric. Work in small sections instead of trying to clean a whole room at once. Use a clean cloth or sponge, and change your water often so you are not just spreading dirt around. Let the cleaner sit for a minute on tough spots before you scrub. This gives the chemicals time to break down dirt without you needing to scrub hard. Stage 4: Rinsing Rinsing removes leftover soap, cleaner, and loosened dirt from the surface. If you skip this step, residue builds up and attracts even more dust over time. It can also leave streaks or a sticky film behind. Use clean water and a fresh cloth or mop for this stage. On hard floors, change your rinse water at least once per room. For countertops and appliances, wipe the surface twice with clean water to make sure no soap residue is left behind. Rinsing also matters for health reasons. Some cleaning chemicals can irritate skin or lungs if they are not fully rinsed away, especially in kitchens where food touches these surfaces. Stage 5: Sanitizing or Disinfecting This is the stage most people forget, but it is one of the most important. Washing removes dirt, but it does not always kill germs. Sanitizing and disinfecting target bacteria and viruses that you cannot see. Sanitizers reduce germs to a safe level, while disinfectants kill a higher percentage of germs and viruses. Kitchens, bathrooms, and door handles need this step the most, since these are high touch areas. Always check the label for contact time. Most disinfectants need to sit wet on a surface for several minutes to actually work. Spraying and wiping right away does not give the product enough time to do its job. Let it sit, then wipe or let it air dry based on the instructions. Stage 6: Drying Wet surfaces attract dirt, dust, and bacteria faster than dry ones. That is why drying is its own stage, not just an afterthought. Mold and mildew also grow fast in damp spots, especially in bathrooms and kitchens. Use a clean towel, air drying, or a fan depending on the surface. Floors should be dried or allowed to air dry fully before foot traffic returns, both to prevent slips and to stop dirt from sticking to a wet surface. For glass and mirrors, a dry microfiber cloth helps avoid streaks. Drying also protects materials like wood and metal from water damage or rust over time. Stage 7: Inspection and Maintenance The last stage is often skipped, but it closes the loop on the entire process. Walk through the space and check your work. Look for spots you missed, streaks, or areas that need a second pass. This is also the time to check your tools. Rinse out mops, wash cleaning cloths, and store supplies properly so they are ready for next time. Dirty tools spread germs instead of removing them, which defeats the purpose of everything you just did. Maintenance also
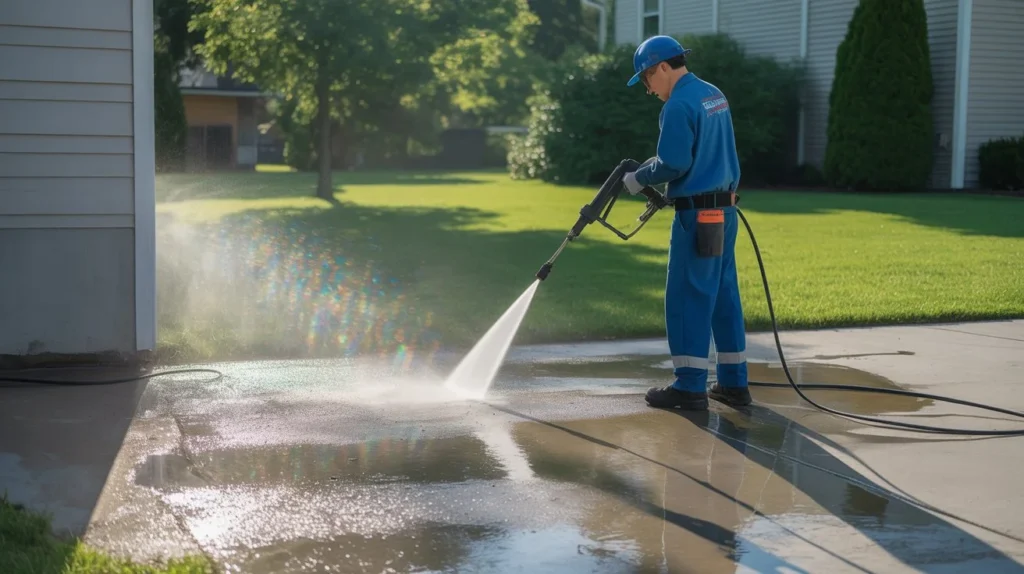
Is Powerwashing Your House a Good Idea?
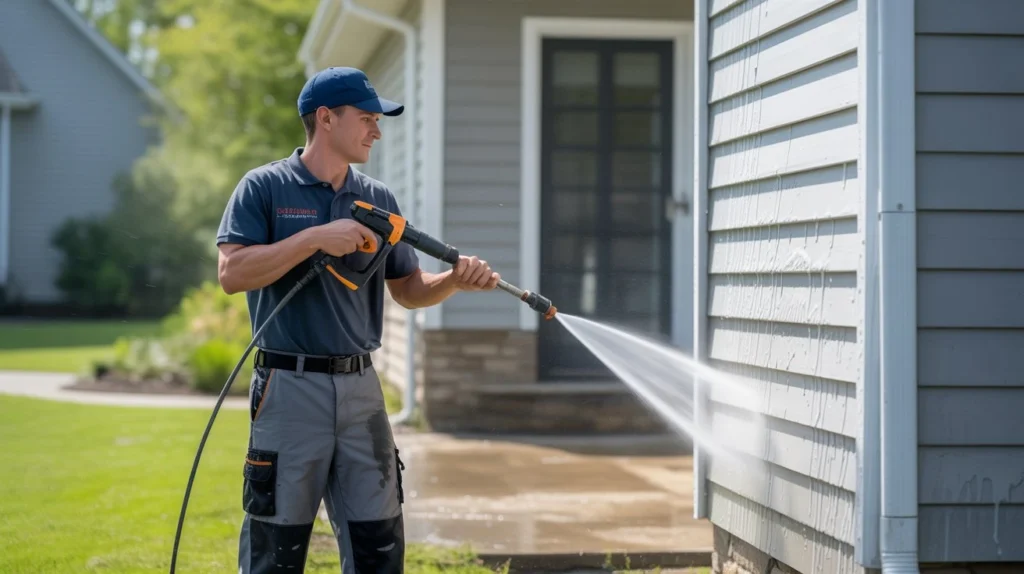
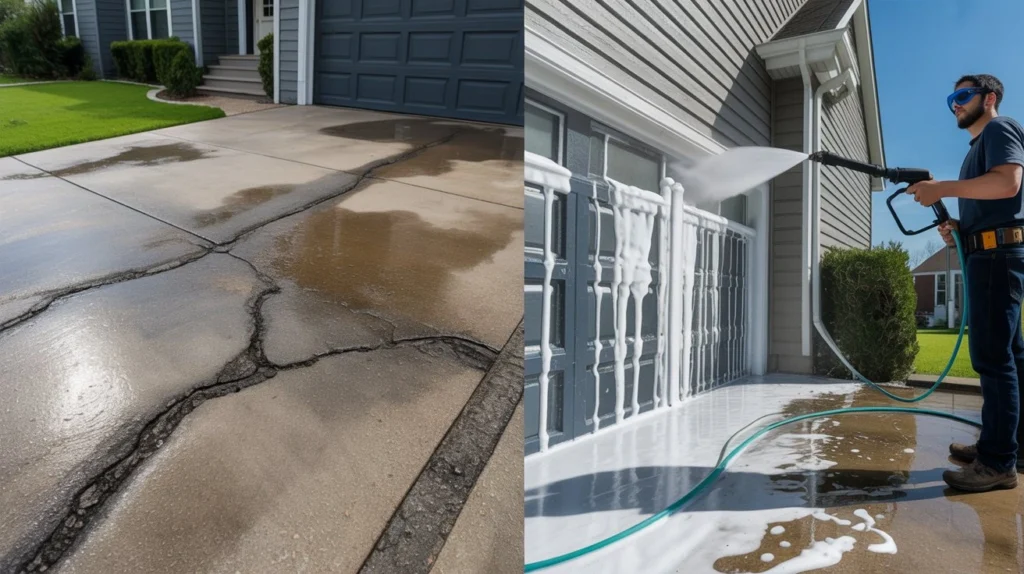
Power washing can strip years of dirt and grime off your house in a single afternoon. It also strips paint, damages wood, and forces water behind siding if done wrong. The tool itself is not the problem. The skill behind it is. So is powerwashing your house a good idea? Yes, when you use the right pressure, the right nozzle, and the right approach for your siding type. Done wrong, it causes real damage fast. What Is Power Washing? Power washing uses hot or cold water at high pressure to blast away dirt, mold, and grime from outdoor surfaces. The machine pushes water through a narrow nozzle, which builds up force strong enough to remove years of buildup in minutes. This is different from a garden hose, which only rinses the surface. Power washers reach deep into pores on concrete, brick, and some siding materials. That extra force is what makes power washing so effective, and also what makes it risky on the wrong surface. Most residential machines run between 1,300 and 3,000 PSI, depending on the job. Driveways and brick can handle the higher end. Vinyl siding and wood need a much gentler touch. Benefits of Power Washing Your House The benefits of power washing your home go beyond looks. A clean exterior protects your investment and your health at the same time. Dirt, algae, and mold eat away at paint and siding over time. Removing buildup regularly slows that damage down and helps materials last longer. This is one of the clearest benefits of power washing that homeowners notice within the first year. There is also a side to power washing for health that gets overlooked. Mold and mildew on your siding can spread spores near windows and vents, which affects indoor air quality. Removing that buildup outside helps keep those spores away from your home. Power washing also boosts curb appeal instantly. A clean house photographs better, sells faster, and simply looks cared for. Many real estate agents recommend a wash before listing a home, since buyers notice exterior conditions right away. When Power Washing Is a Good Idea Power washing makes sense on tougher surfaces that can handle higher pressure. Concrete driveways, brick walkways, and stone patios are good candidates. These materials are dense and do not absorb water the way wood or vinyl can. It also works well before painting or staining a house. A clean surface helps new paint stick better and last longer. Skipping this step often leads to peeling within a year or two. Power washing is a smart choice when mold, algae, or green stains cover a large area. Scrubbing by hand would take days, while a power washer clears the same area in hours. When You Should Avoid Power Washing Some surfaces should never see high pressure water. Older wood siding, stucco, and asbestos shingles can crack or crumble under direct blasts. Roof shingles are another surface to avoid, since high pressure lifts granules and shortens the roof’s life. Windows and window seals are also risky. Water forced at high pressure can break through old caulking and seep into the wall behind it. This often leads to hidden water damage that shows up months later as mold or rot. If your house has any of these surfaces, a gentler method works better and protects your home from accidental damage. Risks of Incorrect Power Washing Incorrect technique causes more damage than people expect. Holding the nozzle too close to siding can strip paint right off the wall. Using too much pressure on wood can leave deep grooves that never look right again. Water can also force its way behind siding panels if the angle is wrong. Once moisture gets trapped there, it leads to mold growth and wood rot that you cannot see until it gets serious. Incorrect chemical use adds another risk. Some cleaning solutions used with power washers can kill nearby plants or grass if they are not rinsed away properly. Always check what is safe for your landscaping before starting. Soft Washing vs. Power Washing: Which Is Better? Soft washing uses low pressure combined with cleaning solutions to break down dirt, mold, and algae. Instead of blasting grime off with force, the solution does the work, and a gentle rinse removes the rest. This method works better on delicate surfaces like vinyl siding, stucco, and painted wood. It cleans just as deep without the risk of cracking or stripping paint. Power washing still wins on hard surfaces like concrete and brick, where strength matters more than gentleness. For most full house exteriors, soft washing is the safer choice, while power washing handles the driveway, patio, and walkways. A good cleaning company often uses both methods on the same property, matching the right approach to each surface. DIY vs. Hiring a Professional Renting a power washer seems simple, but the learning curve is steeper than most people expect. Holding the wrong angle or standing too close for even a few seconds can damage siding or paint. DIY makes sense for small jobs like cleaning a patio or sidewalk, where mistakes are easy to fix. For full exterior house washing, professionals bring the right equipment, the right pressure settings, and years of experience reading different siding materials. Hiring reliable power washing & cleaning professionals also saves time. A job that might take a homeowner an entire weekend often takes a trained crew just a few hours, with far less risk of damage. How Often Should You Power Wash Your House? Most homes benefit from a full exterior wash once a year. Homes near trees, in humid climates, or close to busy roads may need it twice a year, since dirt and mold build up faster in those conditions. Watch for warning signs between scheduled washes. Green or black streaks, a dull or chalky look, and visible mold near gutters all signal it is time to clean again. If you live in the Central Valley and want a team that
Does Roof Cleaning Really Work? The Honest Answer Homeowners Need

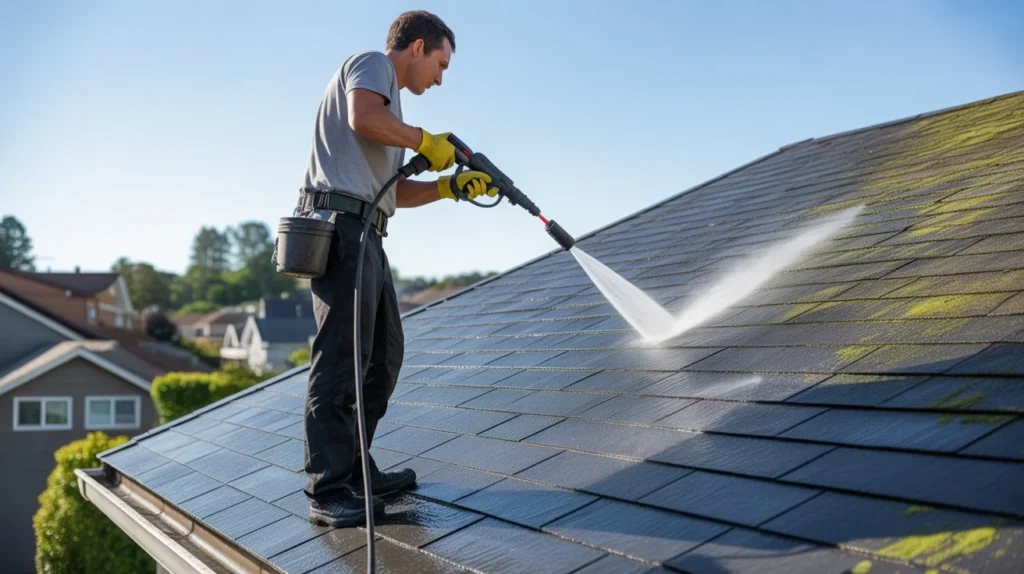
Your roof takes a beating every single day. Rain, wind, sun, algae, moss — all of it adds up over time. Black streaks appear. Green patches grow. And suddenly your home looks old, even if it’s not. Most homeowners wonder if cleaning can fix this or if it’s just a waste of money. So, does roof cleaning really work? Yes, it absolutely does. The right cleaning method removes stains, kills biological growth, and can add years to your roof’s lifespan. Done correctly, the results are visible, lasting, and worth every penny. What Causes Roof Stains and Buildup? Before we talk about solutions, it helps to know what you’re dealing with. Gloeocapsa Magma (Algae) Those dark black or gray streaks you see on asphalt shingles? That’s algae. Specifically, a cyanobacteria called Gloeocapsa Magma. It feeds on the limestone filler in shingles and spreads fast, especially in humid areas. Moss Moss holds moisture against your shingles. Over time, it causes the edges to lift, which lets water sneak underneath. This is one of the biggest causes of hidden roof damage. Lichen Lichen is a combination of algae and fungus. It bonds directly to shingles and is much harder to remove than moss or algae alone. If left too long, it can permanently etch into the surface. Debris Buildup Leaves, twigs, and dirt trap moisture. Wet debris sitting on your roof for weeks at a time is a recipe for rot, mold, and shingle breakdown. UV Damage and Oxidation Sun exposure causes granule loss from asphalt shingles. When this happens, dark patches appear. These aren’t always biological, sometimes it’s plain weathering. Knowing what’s growing on your roof helps you (and your roofer) pick the right cleaning approach. Signs Your Roof Needs Cleaning Some roof problems are obvious. Others are easy to miss until real damage has already started. Here are the signs you should not ignore: Dark streaks or staining running down from the ridge Green or black patches that look fuzzy or spongy Lifted or curling shingle edges, often caused by moss Granule loss showing up in your gutters Water stains on your ceiling, which may point to moisture sneaking under damaged shingles Your roof looks much older than homes nearby even if it was built at the same time Gutters full of biological debris like clumps of green or black material If you notice any of these signs, it’s time to call in professionals. The team at VJ Pressure Washing and a qualified roof cleaning company in Tracy, CA can inspect your roof, identify what’s growing, and recommend the safest cleaning method for your specific shingle type. Don’t wait too long. The longer biological growth sits on your roof, the harder it is to remove and the more damage it causes underneath. How Roof Cleaning Works There are a few ways to clean a roof. Each one works differently depending on the material and the type of buildup. Step 1: Inspection A professional checks the roof condition, identifies the type of growth, and determines which method is safest. Step 2: Pre-Treatment A cleaning solution is applied to the surface. For soft washing, this is usually a sodium hypochlorite mix (similar to bleach, but diluted and targeted). For other methods, a biodegradable cleaner is used. Step 3: Dwell Time The solution sits on the surface for several minutes. This is where the real work happens: the chemical kills the biological growth at the root level. Step 4: Rinse The roof is rinsed off with low or moderate pressure. The dead growth washes away. Step 5: Post-Treatment (Optional) Some professionals apply a zinc or copper-based treatment after cleaning. This creates a protective barrier that slows future growth. The whole process typically takes 2 to 4 hours depending on roof size and condition. Benefits of Roof Cleaning Cleaning your roof is not just about looks. Here’s what it actually does: Extends Roof Lifespan Algae, moss, and lichen physically break down roofing materials. Removing them stops the damage. A clean roof can last several years longer than a neglected one. Improves Curb Appeal A clean roof makes a home look newer and better maintained. This matters a lot if you plan to sell. Boosts Energy Efficiency Dark staining from algae absorbs heat. This raises your attic temperature and puts more load on your air conditioning. Cleaning your roof can reduce cooling costs. Protects Manufacturer Warranties Many roofing material warranties require regular maintenance. Skipping it can void your warranty when you need it most. Prevents Insurance Issues Some home insurance companies flag roofs that show visible biological growth. A clean roof keeps your coverage intact. Does Roof Cleaning Prevent Roof Repairs? This is one of the most common questions homeowners ask. The short answer is yes — but with a condition. Roof cleaning prevents roof damage that is caused by biological growth. If moss has been lifting shingles for two years, cleaning removes the moss, but it can’t reverse the damage that’s already been done. The lifted shingles may still need to be replaced. Think of it this way: cleaning is preventive care, not a repair tool. It’s the same as getting your teeth cleaned. It stops future problems from forming, but it won’t fix a cavity that’s already there. If caught early, regular cleaning can: Stop algae from eating through shingle granules Prevent moss from creating water pathways under the roof Keep lichen from permanently etching into the material If ignored too long, you may still need repairs even after cleaning. That’s why the timing matters. Roof Cleaning Methods Explained Not all roofs are cleaned the same way. Here are the main methods professionals use: Soft Washing This is the most recommended method for asphalt shingles, tile roofs, and older roofs. It uses low pressure and a chemical solution to kill biological growth. No high-pressure blasting — just chemistry doing the work. Best for: Asphalt shingles, clay tile, cedar shake, flat roofs Result: Deep kill of algae, moss, and mold at the root level
What Is the 3 Second Rule in Cleaning? A Simple Habit That Keeps Your Home Spotless
Most people clean when things get too dirty to ignore. But there is a smarter way. Small habits, done fast, stop messes before they spread. The best cleaners do not wait. They act in the moment, every time. So, what is the 3 second rule in cleaning? It is simple: if a cleaning task takes 3 seconds or less, do it right now. Do not put it off. This one habit builds a cleaner home without long scrubbing sessions. What Is the 3 Second Rule in Cleaning? The 3 second rule in cleaning is a mindset rule. If you can clean or tidy something in 3 seconds, you do it immediately. No waiting. No “I’ll do it later.” Wipe the counter after cooking. Pick up the sock on the floor. Rinse the coffee cup before it stains. These tiny actions take almost no time alone. But skipping them causes buildup that takes hours to fix later. The idea comes from productivity thinking. It is similar to the 2-minute rule but focused on physical cleaning. The goal is to stop dirt and clutter before they pile up. This rule works for both homeowners and professional cleaners. It is one of the most practical cleaning tips for maintaining a tidy home every single day. How the 3 Second Rule Works The rule is built on one core idea: prevention beats deep cleaning. Here is how it plays out in real life: You cook dinner. Sauce splashes on the stovetop. Instead of leaving it, you grab a cloth and wipe it in 3 seconds. Done. No scrubbing baked-on grease later. You brush your teeth. Toothpaste hits the mirror. You wipe it off right away. The mirror stays clear all week. You come home. Shoes go directly to the rack, not the floor. Mail goes in a tray, not on the table. Three seconds each. The rule stops the snowball effect. One mess leads to another. When your kitchen is already dirty, you feel less motivated to clean the next spill. The 3 second rule breaks that cycle. This is the same philosophy used by professional cleaning teams. At VJ Pressure Washing, we always say that consistent small actions keep surfaces in better shape than one big cleaning day. It is also why services like roof cleaning in Tracy, CA focus on regular maintenance rather than waiting for heavy buildup to take hold. When you let grime sit, it bonds to surfaces and becomes far harder to remove. Apply the 3 second rule to every room. Train yourself to see small messes as 3-second fixes, not tasks to save for the weekend. Benefits of the 3 Second Rule Why does this rule change how you clean? Here are the real results people notice. 1. Less Deep Cleaning Overall When you stop messes at the source, heavy cleaning happens far less often. Your home stays in a baseline clean state every day. 2. Lower Stress Clutter and mess trigger mental stress. A tidy space feels calmer. The 3 second rule keeps your home at a level that does not feel overwhelming. 3. Faster Daily Cleaning Routines When nothing is severely dirty, your daily wipe-down takes minutes, not hours. You spend less time cleaning total. 4. Better Hygiene Bacteria grow fast on countertops and wet surfaces. Acting in 3 seconds means spills do not sit long enough to become health problems. 5. Builds Good Habits Automatically After a few weeks, the rule becomes muscle memory. You do not even think about it. Clean behavior becomes your default. 6. Protect Your Home Surfaces Stains set. Grease bonds. Rust forms. Acting fast prevents permanent damage to counters, floors, and fixtures. Examples of the 3 Second Rule in Action Let us walk through real daily examples. These show how the rule fits into normal life without adding stress. Kitchen: Wipe stovetop splash right after cooking Rinse dishes before food dries on them Wipe the sink after washing hands Close pantry doors and cabinet handles after use Bathroom: Wipe toothpaste off the sink right after brushing Hang the towel back on the rack Close the shampoo bottle and put it back Wipe the toilet handle after flushing Living Room: Return remote controls to their spot Take cups and plates to the kitchen, not the coffee table Fold the blanket after using it Pick up any item from the floor as you walk past Bedroom: Hang or place clothes immediately after taking them off Make your bed right when you get up Put items back in drawers after use Entryway: Shoes on the rack, not the floor Keys in the bowl, not on the counter Wipe shoes before entering Every single one of these takes 3 seconds or less. But skipping them daily creates clutter and grime that takes real effort to reverse. Areas Where the Rule Works Best Bathrooms Moisture and soap scum build up fast. A quick daily wipe of the sink and mirror takes seconds and prevents hard water stains from forming. Floors Near Entryways Dirt, mud, and debris come in from outside. Catching it at the door prevents it from spreading through the whole house. Laundry Areas Lint, detergent spills, and damp clothes all create issues fast. Handling each one at the moment prevents mold and odors. Outdoor Surfaces Patios, driveways, and walkways collect leaves, dust, and stains. While these often need professional equipment, regular quick sweeps reduce buildup between professional cleanings. Tips to Make the 3 Second Rule Effective The rule only works if you set yourself up for success. Here are practical tips to make it stick. Keep Cleaning Tools Within Reach A microfiber cloth near the sink. A small brush by the stovetop. A trash bin in every room. When the tool is already there, you do the 3-second task without thinking. Do It Now, Always The rule breaks the moment you say “in a minute.” Train yourself to act on sight. If you see a mess, clean it right now. Do Not
What Are the 5 Rules of Smart Cleaning?
A clean home does not happen by accident. It takes the right approach, the right tools, and a system that actually works. What are the 5 rules of smart cleaning? They are the foundation every homeowner needs to stop wasting effort and start seeing real results. Whether you are cleaning a bathroom, a kitchen, or your outdoor spaces, these rules apply across the board. At VJ Pressure Washing, we have seen firsthand how following a smart cleaning system transforms a home from dull and grimy to fresh and well-maintained. Skipping these rules means more time spent cleaning and less satisfying results. Follow them and every cleaning session becomes faster, safer, and more effective. Rule #1 – Clean From Top to Bottom This is the most basic rule in smart cleaning. And it is the one most people ignore. When you clean a ceiling fan before sweeping the floor, the dust falls down onto the floor you already cleaned. You end up doing double the work. Always start at the top and work your way down. Here is the correct order: Ceiling fans and light fixtures first Shelves and countertops next Furniture and appliances after Floors and ground surfaces last This rule applies indoors and outdoors. If you are cleaning your home’s exterior, the same logic holds. At VJ Pressure Washing, our crew always starts from the top of the wall and works downward. This prevents dirty water from running over clean surfaces. The same principle applies when you need power washing driveway tracy ca services. Professionals start from one end and push dirt in a single direction, so they never re-contaminate a clean section. Pro Tip: When cleaning a room, dust and wipe all surfaces before you vacuum or mop. Never vacuum first. Rule #2 – Use the Right Cleaning Products Using the wrong product is one of the most common smart cleaning mistakes. The wrong cleaner can damage surfaces, leave residue, or simply not work at all. Different surfaces need different products. Here is a quick reference: Wood floors: pH-neutral cleaner only. Harsh chemicals strip the finish. Glass and mirrors: Streak-free glass cleaner or diluted white vinegar. Stainless steel: Microfiber cloth with a small amount of dish soap. Always wipe with the grain. Grout and tile: Baking soda paste or a grout-specific cleaner. Carpets: Enzyme-based cleaner for stains. Avoid soaking the carpet. Concrete driveways: Degreaser for oil stains. High-pressure water for general grime. Upholstery: Always check the fabric code before using any cleaner. One product does not clean everything. Using a bathroom cleaner on wood floors or a glass cleaner on stainless steel creates more problems than it solves. Always read the label. A cleaner that says “all-purpose” still has limits. Check what surfaces it is safe for before using it. Using eco-friendly, biodegradable cleaners is also a smart move. They are safer for your family, your pets, and your home’s surfaces. Rule #3 – Clean Regularly Instead of Deep Cleaning Rarely Most homeowners wait until their home is visibly dirty before they clean. That is the wrong approach. Regular light cleaning is far more effective than occasional deep cleaning. Here is why. Dirt and grime build up in layers. The longer you wait, the harder it is to clean. A quick wipe-down of your kitchen counters every day takes 2 minutes. Letting grease build up for three weeks turns that into a 30-minute scrubbing session. The Smart Cleaning Schedule Daily tasks (5 to 10 minutes): Wipe kitchen counters after use Rinse the sink Do a quick sweep of high-traffic floors Make the bed Weekly tasks (30 to 60 minutes): Vacuum all rooms Mop hard floors Clean bathrooms Wipe down appliances Monthly tasks (1 to 2 hours): Clean inside the fridge Dust blinds and window sills Wipe down walls and baseboards Clean light switches and door handles Seasonal tasks (every 3 to 6 months): Wash windows inside and out Power wash outdoor surfaces Clean gutters Deep clean carpets A consistent schedule keeps your home clean with less effort. You never have to deal with a massive backlog of cleaning again. Rule #4 – Declutter Before You Clean You cannot clean a cluttered space properly. Clutter hides dirt, traps dust, and makes every cleaning task take longer than it should. Before you pick up a mop or a sponge, clear the space. Put things away. Throw away what you do not need. Move items off surfaces so you can actually clean those surfaces. This step feels like extra work but it saves you time overall. Here is what happens when you skip decluttering: You clean around objects instead of cleaning under and behind them Dust and dirt accumulate in hidden corners You spend extra time moving things mid-clean The space never feels truly clean The 3-Box Method When decluttering before cleaning, use three boxes or bags: Keep – Items that belong in this room Relocate – Items that belong elsewhere in the home Remove – Items to donate, sell, or throw away This method speeds up decluttering and prevents you from standing still trying to make decisions. Make a quick choice and move on. Decluttering also makes your cleaning products more effective. Cleaning a clear countertop takes seconds. Cleaning around a pile of objects takes minutes and often gets missed. Rule #5 – Focus on High-Touch Areas Not all surfaces carry the same amount of germs, dirt, and bacteria. High-touch areas collect the most contamination and need more frequent cleaning. Most homeowners spend time cleaning visible surfaces like floors and countertops. But they ignore the areas touched dozens of times every day. High-Touch Areas You Must Not Skip Door handles and knobs – Touched by everyone, cleaned by almost no one Light switches – One of the germiest spots in any room TV remotes and phone screens – Cleaned rarely despite constant use Faucet handles – Touched before and after hand washing Toilet flush handles – High bacteria zone Keyboard and mouse – Collect oils, food particles, and bacteria
What Is the Best Pressure for Pressure Washing?
Pressure washing provides a fast and effective method for cleaning the outdoor areas of your home or business. From greasy driveways to slippery pool decks, a pressure washer can take away dirt, grease, stains, algae and more. But a lot of homeowners share the same crucial question: What is the best pressure washer pressure? That depends on the surface to clean, the level of dirt on the surface and the type of pressure washer you are using. When you’re soaping up your car, yard or house with a pressure washer, make sure you’re not overdoing it, dear readers: excess pressure can have disastrous results and imperil your well-being. If the pressure is too low, you will get the expected poor cleaning results. To wash safely and effectively, you really should know the necessary PSI levels and cleaning methods. Understanding Pressure Washer PSI Pressure washers can mostly be categorised into three types: 1:Light-duty pressure washer 13,00-19,00 PSI Best for cars, patio furniture, grills and small outdoor areas 2:Medium-duty pressure washers2,000 to 2,800 PSI Ideal for decks and fences, siding and driveways 3:Heavy-duty pressure washers2,900 to 4,000+ PSI Best for commercial use: concrete, brick, and industry cleaningCar, patio furniture, grills, and moreBest for cleaning wagons, fences, siding, and driveways suitable for decks, fences, siding and drivewaysMedium-duty pressure washers2,000 to 2,800 PSILight-duty pressure washers Heavy-duty pressure washers 2,000 to 2,800 PSIBest for decks and fences, siding and drivewaysHeavy-duty pressure washers2,900 to 4,000+ PSIFree Shipping on Orders Over $75Buy 1993112 12 Amp High Performance Water Blaster $69.99 Medium-duty pressure washers2,000 to 2,800 PSILight-duty pressure washersHeavy-duty pressure washers2,900 to 4,000+ PSISuitable for commercial work; concrete, brick, industry cleaningKnowing these categories is a first step in figuring out the Best PSI for pressure washing different surfaces. What Is the Best Pressure for Pressure Washing? What PSI Should I Use for Pressure Washing? At VJ Pressure Washing, we understand that nothing online can give you a definitive answer on what PSI to use for each type of work. Different materials need different amounts of pressure. Here is a more in-depth description of the suggested PSI ranges for some of the more popular residential surfaces. 1: House Siding Vinyl siding & wood siding need a medium pressure. Pressure washing too hard or too close can break the siding and can push water in behind your walls. Recommended PSI: 1,300–1,800 PSI Best Method: Soft Washing with Detergent Safe distance: 3/4 feet from the surface In many cases, soft washing is better than high-pressure washing for house exteriors since it cleans without causing damage. 2: Wooden Decks and Fences Wood is softer than concrete and is also prone to splintering when the pressure is too high. Suggested Pressure Levels: 500–1,200 PSI Spray with a fan spray nozzle. Spray always in the direction of the wood grain. One of the best tips for residential pressure washing is to begin at a low pressure and gradually increase as needed until the dust is safely removed. 3: Concrete Driveways Strong pressure can be applied to concrete as opposed to wood or siding. Gasoline spots and tyre marks may require you to work at a higher pressure. PSI recommended: 2,500-3,000 PSI. If you have one, use a rotating surface cleaner. Hot water removes grease stains. Pressure Washing Concrete Driveway Areas: Stronger Pressure for Deep Cleaning and Faster Results when cleaning concrete with a pressure washer? Yes, pressure washers – or power washers, as they’re sometimes called – are great for cleaning concrete surfaces of all sorts, but there are some things you should bear in mind before you start. 4: Cars and Vehicles Vehicles need to be washed gently to protect the paint and finishes. Recommended PSI: 1,200–1,900 PSI Use foam soap and wide-angle nozzles Do not use soap that is too old or too new Agent concentrations in the doser must not change Avoid spraying too closely to the glass because it may cause spots (warranty does not cover damages caused by spots) Soap pH: 11 Two phases: Slow slow Fast slow you can go in fast mode if necessary (make sure all users are informed and warning is visible) Please remove all dirt or ice from windscreen before Ejaculation glass stove oven 1″. 5″ and pieces 0.12″). 5: Brick and Stone Can be long-lasting, but older mortar may deteriorate. Recommended PSI: 1,500–2,500 PSI. Check cracks before cleanings. Use medium pressure initially. A good Pressure washer PSI guide also helps to avoid unintended damage to the old bricks. Residential Pressure Washing Tips Maintenance-free has a new face: pressure washing! These Residential Pressure Washing Tips will enable you as a homeowner to clean effectively and efficiently without doing any damage. Whether you are tackling your siding, deck, or looking for a professional driveway pressure washing service tracy ca, following the right tips will always deliver safer and better results. 1: Try Out On A Small Area Wait and see how the surface reacts to the pressure before you work on the entire area of the surface. This should help you avoid any surprises. 2: Obligation To Wear Safety Equipment Is Required Apply: Safety goggles Closed-toed shoes or boots Gloves Hearing protection when required Water under high pressure can injure the eyes and skin. 3: Risks for Electric Shock Are Avoided Stay clear of electrical outlets, light fixtures and power lines when using water. 4: Use Appropriate Detergent There are different cleaners made for concrete, wood, cars, vinyl and so on. The incorrect cleaner may harm surfaces. 5: Keep the Right Distance Spraying too closely can lead to discolouration or cracking. Begin at a distance and gradually go closer. 6: Never Spray People or Pets Pressure washers are strong and dangerous weapons; they should be treated as such forever. These Residential pressure washer tips will help you achieve better results and still remain safe. Pressure Washing a Concrete Driveway Properly Concrete is harder and more solid than wood or vinyl siding. The high pressure will also help to lift deep set sTips for pressure
What Is the Best Time to Power Wash a House?
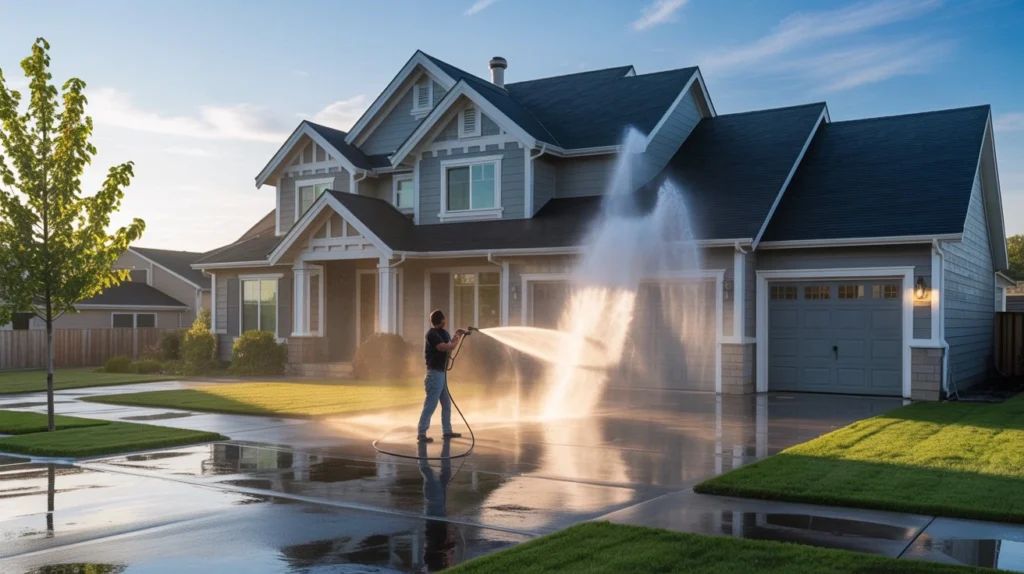
Power washing is one of the most effective ways to keep a home looking beautiful and lasting for many years. Over the years, exterior surfaces have become coated with grime, dirt, dust, mold, mildew, algae, bird droppings, and pollution. These pollutants stain your home’s siding and cause you to need to constantly paint your house; they can also begin to eat away at your siding, decks, driveways, and roofs. When is the Best Time to Power Wash a House? Many homeowners still ask, “When do I power wash my house? It varies a little with the season and weather, temperature, humidity, as well as the exterior surface you are cleaning. Knowing when is the best time of year to power wash your home, can assist you in preserving your investment and enhancing the look of your house. The best weather to clean the exterior of your home also guarantees a better cleaning job and will help you to avoid damaging your home. Also, homeowners should learn when to pressure wash their house safely to avoid possible accidents and surface damage. A Proper Schedule for House Exterior Cleaning. You want to ensure a clean, healthy home environment year-round, and to do that, having a good cleaning schedule for your house exterior is just as important as cleaning your interior. Importance of Power Washing a House Power washing is more than just improving curb appeal. Dirt, mold, and grime can damage your home over time. VJ Pressure Washing helps protect your home and keep it looking clean year-round. Benefits of Power Washing Among the benefits of power washing are: Improve the Visual Appeal of Your Home Eliminate Mold/Mildew and Stains Stops Long-Term Damage Adds Home Value Creates a Healthier Home Gets surfaces ready for painting or repairs What Is the Best Time to Power Wash a House? When is the Best Time to Powerwash a House? Spring and fall are ideal when it comes to power washing your home. The temps aren’t too hot, and it’s not too wet. However, the best timing might differ for a: Climate, how dirty the surface is, humidity, the siding or surface type, as well as the weather in the past. When to clean the house. The houses should be washed at a time when they can dry, and the cleaning agents may have their effect. Best Season for House Power Washing Selecting the right time of year for house power washing Tracy CA is important because weather conditions can affect cleaning results. Different seasons impact how well surfaces dry, how quickly mold grows, and how effective the cleaning process will be. Spring Power Washing What If I Told You That Spring Is The Best Time For Exterior Cleaning? Why Spring Is Ideal Homes gather dust: During winter, homes collect: Mud, Salt residue, damp stains on a wall, Mold or mildew, Dirt from storms. Power washing in spring cleans off all the winter accumulation and brightens up the look of your home. Benefits of Spring Cleaning Renews curb appeal after winter months Eliminates allergens such as pollen grains Inhibits mold during the moisture season Get patios ready for summertime fun! Assists homeowners in identifying winter damage Spring weather is generally moderate, allowing for an even drying of surfaces following washing. Summer Power Washing Summer is good for power washing, too, as long as you don’t live somewhere where it’s really hot outside. Benefits of Summer Cleaning Dry off faster More daylight hours! Easy Scheduling: There is nothing a busy homeowner appreciates more than our team being able to schedule them with minimal delays in the summer. High temperatures may cause the following: Heat can dry the soap before you rinse it. Soap dries too quickly. Mineral deposits and soil can leave streaks and water spots. Cleaning effectiveness is worse. You’re encouraged to power wash in the early morning or late night to avoid this. Fall Power Washing Fall is also a great time to power wash your house, and is often included in the best season to power wash your house! Why Fall Is Good The autumnal “falling” of leaves, moisture, and dust on outdoor surfaces and during Cleaning After Winter helps protect your house from cold-weather damage. For most of us, this is the perfect time to clean the windows and wash the house, no doubt! Benefits of Cleaning in the Fall Deters algae and mold growth in the winter. Protects your siding from freezing temperatures. Fall is an ideal season to do these outside jobs to ready your home for winter! You should clean the exterior of your house when the weather is cool and not too humid, which is usually advised. Power Washing in the Winter Season Winter cold is usually not advised in cold regions. Downsides of Cleaning in Winter Water can freeze on surfaces. Ice is a slipping hazard. Pipes and machinery can freeze. Surfaces don’t always dry out properly. Nevertheless, in warmer areas where the temperature does not drop below freezing, a limited winter washing is feasible. Ideal Weather Conditions for Power Washing Selecting the suitable weather to do the house cleaning outside is just as important as the time of year. Mild Temperatures The best temperature to power wash is usually: 50°F to 85°F / 10°C to 29°C This temperature will allow for: To clean effectively, solutions work. To dry Surfaces. To reduce freezing or overheating risk. Dry Conditions Dry is one of the key factors required for power washing success. Why Dry Weather Is Important Dry conditions: Help prevent streaking, Speed up drying time, Prevent moisture buildup, Prevent mold from returning sooner. When washings are followed by rains, the cleaning value of the washings is reduced. Low Humidity Conditions Low humidity permits rapid drying of surfaces, and moisture is not trapped within the siding or wood. Higher levels of humidity can encourage the growth of mold, even after cleaning. Calm Wind Conditions High winds can: Resuspend dirt onto surfaces, Impede spraying, Under clean, uneven surfaces. Calm weather
What Chemicals to Use When Pressure Washing Concrete (Pro Guide)
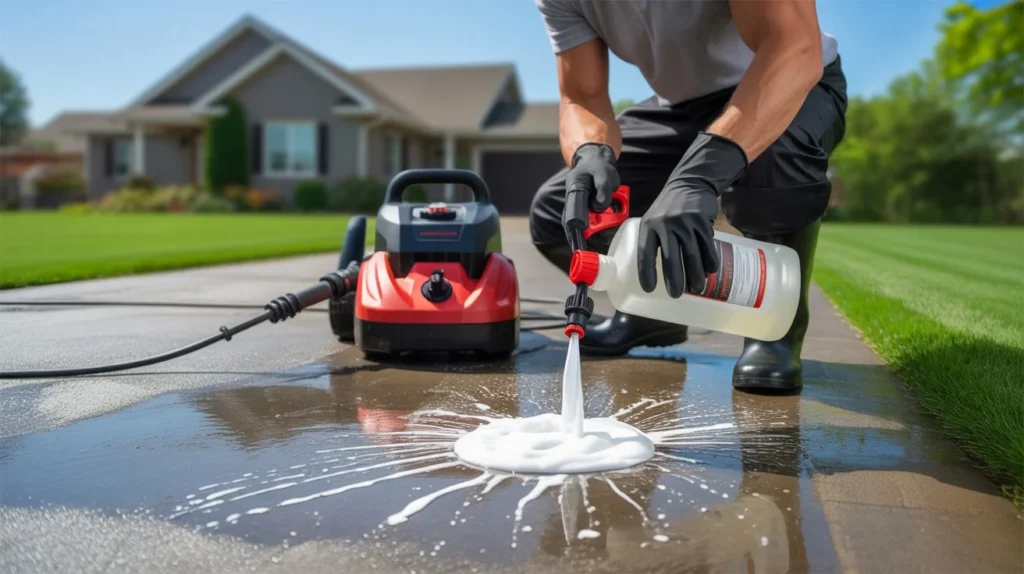
Dirty concrete doesn’t always come clean with water alone. Grease, mold, rust, and oil stains need the right chemical to break them down first. Using the wrong one wastes time, and sometimes makes things worse. Knowing what chemicals to use when pressure washing concrete is the difference between a surface that looks brand new and one that still looks tired after all that work. This guide covers exactly what to use, when, and how. What Chemicals Are Used for Pressure Washing Concrete? Before grabbing any bottle off the shelf, it helps to understand the basic categories. Chemicals for concrete cleaning fall into a few main groups: degreasers, acidic cleaners, alkaline cleaners, bleach-based solutions, and enzyme cleaners. Each one is built to handle a specific type of stain or buildup. None of them are “all-purpose” in a true sense, even if some labels say so. Here’s the quick breakdown: Degreasers break down oil and grease. Acidic cleaners handle rust and mineral stains. Alkaline cleaners work on general grime, mold, and organic buildup. Bleach solutions kill mold, mildew, and bacteria. Enzyme cleaners are the gentler option for organic stains like food, pet waste, or leaves. Types of Chemicals Used When Pressure Washing Concrete 1. Degreasers Degreasers are your go-to for driveways and garage floors. Oil and grease bond to concrete fast. Water alone won’t lift them. Look for a concrete degreaser labeled for pressure washer use. Most are alkaline-based. They work by breaking the molecular bond between the grease and the concrete surface. Apply the degreaser, let it dwell for 5 to 10 minutes, then pressure wash it off. For heavy buildup, scrub with a stiff brush first. Popular options include Simple Green Concrete Cleaner, Zep Heavy-Duty Citrus Degreaser, and Krud Kutter Concrete Cleaner. 2. Sodium Hypochlorite (Bleach) This is one of the most effective power washing chemicals for concrete, especially for mold, mildew, algae, and discoloration from organic material. A common mix is 1 part bleach to 10 parts water. For heavy mold growth, some contractors go as strong as 1:4. Always test a small area first. Bleach works best on horizontal surfaces like patios and walkways. It’s less ideal for colored or stamped concrete since it can fade pigment over time. One thing to know: bleach is not a degreaser. It won’t touch oil stains. Use it for biological growth only. 3. Muriatic Acid (Hydrochloric Acid) Muriatic acid is one of the stronger pressure washer chemicals for concrete. It removes rust, hard water deposits, mineral efflorescence, and old paint residue. It’s highly effective but also highly hazardous. Dilute it carefully, usually 1 part acid to 10 parts water, always adding acid to water, never the reverse. This isn’t something beginners should apply without reading the full safety directions. It can etch concrete if left too long and can damage skin, lungs, and nearby plants. 4. Oxalic Acid Oxalic acid is gentler than muriatic acid. It’s the right pick for rust stains and tannin stains from leaves or wood. It won’t damage most concrete surfaces when used correctly. It comes as a powder or liquid. Mix it with warm water, apply to the stain, let it sit for 10 to 15 minutes, then rinse with your pressure washer. 5. Trisodium Phosphate (TSP) TSP is a heavy-duty alkaline cleaner. It handles grease, grime, mildew, and general filth that lighter cleaners can’t touch. It’s one of the older chemicals for pressure washing concrete that professionals have relied on for decades. One caution: TSP is phosphate-based. It’s restricted or banned in some states because of its environmental impact on waterways. Check local regulations before using it. 6. Enzyme-Based Cleaners These are the eco-conscious options. Enzyme cleaners use biological agents to break down organic matter. They work well on pet stains, food spills, and leaf stains. They’re slower than chemical cleaners. Dwell time can be 20 to 30 minutes. But they’re safe around kids, pets, and plants, which makes them popular for residential use. 7. Concrete Degreasers with Surfactants Many modern chemicals for concrete cleaning combine degreasers with surfactants. Surfactants reduce water surface tension, which helps the cleaning solution penetrate deeper into the concrete pores. These combination products work well as an all-around pre-treatment before pressure washing. Matching Chemicals to Common Concrete Stains Getting this right saves time and protects your surface. Here’s a simple guide: Oil and grease stains: Use a concentrated degreaser. Let it dwell, scrub if needed, then pressure wash. Mold, mildew, and algae: Use sodium hypochlorite (bleach) solution. Apply, dwell 10 minutes, rinse thoroughly. Rust stains: Use oxalic acid or muriatic acid (diluted). Oxalic is safer for lighter stains. Go to muriatic for heavy or old rust. Paint or tire marks: TSP or a commercial paint stripper works here. Muriatic acid can help on stubborn paint residue. General grime and dirt: A basic alkaline cleaner or enzyme cleaner handles everyday buildup. White mineral deposits (efflorescence): Use muriatic acid diluted at 1:10 or a commercial efflorescence remover. Leaf and tannin stains: Oxalic acid or an enzyme-based cleaner. Both work well without damaging the surface. How to Apply Chemicals Before Pressure Washing The order you do things matters. Applying chemicals incorrectly reduces their effectiveness and wastes product. Step 1: Clear the area. Remove furniture, vehicles, and any items nearby. Wet surrounding plants with water to protect them from chemical runoff. Step 2: Pre-rinse the concrete. Rinse the surface with plain water first. This removes loose dirt and prevents the cleaner from being diluted by debris. Step 3: Apply the chemical. Start from the top and work down on vertical surfaces. For flat surfaces, apply evenly in sections. Use a pump sprayer, a low-pressure setting on your washer, or a brush for thick solutions. Step 4: Dwell time. This is where most people rush. Let the chemical sit for the time listed on the product, usually 5 to 20 minutes depending on the cleaner. Don’t let it dry. If it starts drying, mist lightly with water. Step 5: Agitate if needed. For heavy
What Does a Basic House Cleaning Include?
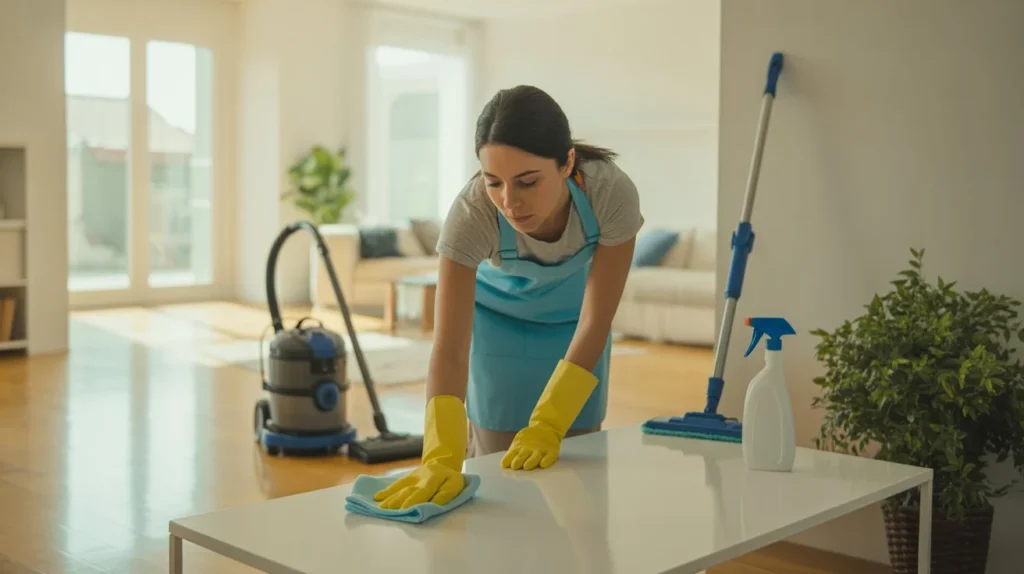
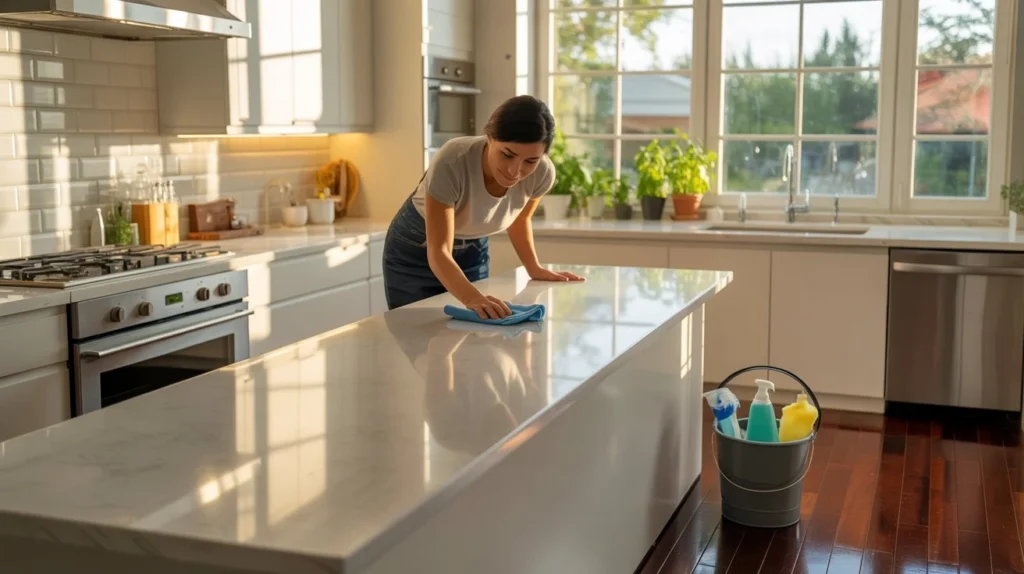
A Clean Home is Comfort, Well-being, relaxation, and a warm beverage on a cozy blanket. Basic House Clean. What is treated? Like most things in life, a basic clean-your-house-your-rules housecleaning service will be different from two very similar cleaners. A clean home is not only aesthetically pleasing but is a healthier environment for the family, children, and pets. Quite a few people were asking me about regular cleaning; they just wanted regular cleaning services without the luxury of deep-cleaning. A general cleaning service is focused on regular tidying and cleaning to maintain a house looking its best. A freshen up can make all the difference when it comes to the whole home, whether it’s tidying furniture or hoovering floors. What Does a Basic House Cleaning Include? A standard home clean from VJ Pressure Washing consists of regular cleaning duties that help remove dust, grime, and mildew from your home. These services are designed to refresh and maintain clean living spaces rather than provide deep restoration cleaning. Includes most regular cleaning services such as: Dust surfaces vacuum floors mop hard floors cleaning Bathrooms Wipe down the kitchen counters. Trash bins out Common areas to be picked up The precise duties/services are subject to change depending on the agency, home size, and customer demand. Importance of Basic House Cleaning But before we dive into the wild cleaning to-do, let’s discuss why cleaning your home is so important and why you should be doing it regularly. 1:Health Benefit Bacteria and mold build up quickly in homes. “Cleaning helps improve indoor air quality and decrease illness.” 2:Enhanced Appearance It is a very nice feeling to live in a clean house, whether you have just the family or guests with you. 3:Reduced Stress Cluttered surroundings have been found to raise stress and anxiety. Clean people are joyful people, and clean people are busy people. Easy house cleaning checklist Bottom line: A clean house is a clean house, so no corner should be left dirty during the cleaning process. Most professionals follow a room-based system to maintain consistent quality and efficiency. For exterior results that match, trust house power washing Tracy CA services from VJ Pressure Washing. This is a general outline of what you will receive in a basic house cleaning. 1:Cleaning the Bedroom Bedrooms ought to be kept clean and calm as they are places to rest and relax. House Cleaning in the Bedroom?ResourcesIncludedTasks: Clean a window. Squeeze a lemon! A basic bedroom cleaning may include: Dustfurniture Vacuum carpets Sweep floors Mopping floors, making beds, cleaning toilets, and cleaning mirrors. Remove dust from nightstands and dust around the room. Empty ashtrays. Empty trash cans. Record daily temperatures to track your status. Shelving off such floors, vacuuming carpets, dust, panic dust, Mop dust, removing carpet dust, and pet dander. Making beds, cleaning mirrors, dusting nightstands, and emptying wastebaskets Some cleaning companies will consider changing bed sheets as a special service. 2:Kitchen cleaning The kitchen is among the must-clean areas in a house cleaning checklist, as that is where the food is cooked. Cleaning the kitchen usually involves the following: Wipe down countertops Scrub the sink Sweep the floor Mop the floor Wipe down the appliances. Clean the cabinet doors.” Take out the trash Dust accessible surfaces With regular cleanings, you generally only need to worry about cleaning the outsides of appliances. For a deeper clean, you may want to opt out of interior oven cleaning or interior refrigerator cleaning. 3:Cleaning the Bathroom In order to keep bacteria from breeding in your bathroom, your bathroom needs to be cleaned regularly. Bathroom Cleaning 101: What’s Included in Basic Cleaning in the Bathroom Basic Cleaning Packages typically include: Wash toilets Scour sinks Wipe down mirrors Clean Countertops Swab the floors Sanitize surfaces Bath and showers cleaned, not included. Empty bins. 4:Dining Room Wiping Up the dining room is a mess! These are your winners from our basic block the dust list. Dining Room Cleaning Tasks Tables and chairs are dusted. Wiping down surfaces Rug cleaning with a vacuum cleaner Sweeping the floor Mopping the floors Wash mirrors or ornaments. A spotless dining room is a nice place for family meals and entertaining. 5:Corridors and entrances As hallways and doorways are busy places, hordes of dust bunnies are always hiding, and cleaning them on the regular is a necessity. Hallway Cleaning Agent: When Home Cleaning? The basics of cleaning are: Sweep floors Vacuum carpets Mop hard surfaces Dust the furniture Come Get Rid of That Cobweb! Doors are what guests open first when they come to your home, so keeping them clean improves the overall appearance of your home. 6:Floors and Carpets Cleaning the floor seems to be one of the vital tasks of all house cleaning regimens. What Does a Standard Floor Clean Include? Basic Cleaning Services tend to include the following: Sweeping Vacuuming Mopping Spot cleaning visible stains Deep carpet shampooing is rarely part of standard cleaning offerings. 7:Dusting Services Frequently Dusted areas Tables Shelves Picture frames Lamps Window Sills TV stands Ornaments Dusting contributes to the improved quality of indoor air and floor cleanliness in your home. Advantages of Engaging Standard Cleaning Services Many homeowners opt for professional standard cleaning service as it saves time and energy. 1:Saves Time Cleansing a house thoroughly may take ages. Professional cleaners provide busy homeowners with clean, happy homes. 2:Professional Results Skilled cleaners also use more effective cleaning methods and products, resulting in a superior clean. 3:Consistent Cleaning Routine cleaning appointments ensure your home stays clean. 4:Customizable Services Several companies enable customers to tailor the standard house cleaning. Why Regular Cleaning Increases Home Value Routine maintenance cleaning helps maintain a home. 1:Prevents Property Damage Water and dirt can damage floors, countertops, and furniture. 2:Improve Appearance Cleaned homes are much more likely to look as if they have been cared for. 3: Help during Home Sale A clean home is more attractive and photogenic, and can assist in selling your home. Conclusion If you ever wondered what
What chemical is used for house washing?
In the pressure washing industry, one of the major questions we get requested each day is, what chemical do you use? There isn`t simply one solution for that query due to the fact there are numerous distinctive chemical compounds used relying on what we’re cleaning, however the major one with the aid of using a long way is sodium hypochlorite. For years this became visible as an extremely taboo situation due to the fact 9 instances out of 10, “bleach” will be the time period used, and even as sodium hypochlorite is the lively element in bleach, don`t anticipate us to spray Clorox for your home. What are detergents? Detergents are regularly used as a synonym for cleaning soap and cleaners however they’re different. A detergent is an artificial combination of chemical compounds particularly formulated for cleaning. This is why you`ll discover many detergents which are designed to clean one material very well, along with laundry detergent for fabrics. Soaps are crafted from natural components like fats and oils, making them suitable for general exterior house soft wash tracy ca. However, they are often less powerful than detergents when tackling tough dirt, mold, and algae. While soaps can be the more eco-friendly choice, this is not always guaranteed. What is sodium hypochlorite? Without getting too technical, sodium hypochlorite is the salt shape of hypochlorite, that’s a strong and risky and consequently fallacious to be used through itself, after being become its salt shape, that’s a brine dissolving and turning the strong right into a liquid for its a couple of applications. Once on this liquid shape, it absorbs into the growth and denatures the proteins in organics, and breaks them down. How to Use Sodium Hypochlorite Safely? It is a sturdy cleaner and stain remover. But at VJ Pressure Washing, we always apply it carefully to protect your home’s surfaces and surrounding areas. 1:The Chemical Process Sodium hypochlorite breaks down natural dependents like mold, algae, and mildew. It kills them with the aid of converting their mobileular structure. That`s why it`s so true at getting rid of these difficult inexperienced and black stains on roofs and siding. It`s an incredible siding purifier. Safe Use in Soft Washing For sensitive surfaces like vinyl siding, painted areas, and roofs, tender washing is best. This approach makes use of low-pressure water with a vulnerable sodium hypochlorite solution. Usually, it`s 1-2% for siding and 3-5% for roofs. The chemical does the difficult work, sitting at the surface to kill the growth. Then, a mild rinse washes it away. This avoids the excessive strain which can harm fragile materials. Please don`t make the solution too sturdy, or it may motivate harm or discoloration. Always moist close by plant life and grass earlier than making use of the answer, and rinse them properly in a while to maintain them safe. Understanding Other Effective and Safe Cleaning Agents Besides sodium hypochlorite, different chemical substances are utilized in pressure washing. Each has its benefits. 1:Oxalic Acid This is specifically for putting off rust and brightening timber. It`s a milder acid than a few commercial cleaners. It could make weathered timber decks and fences appear new again. 2:Citric Acid This is a green option. It works nicely for mineral stains, rust, and a few natural growth. It`s frequently used on concrete. It`s a terrific preference in case you need a much less competitive purifier. 3:Degreasers For oil and grease stains on concrete driveways or storage floors, degreasers are very useful. These chemical substances damage down oil-primarily based total residues. This makes it less complicated to rinse away with pressure washing. The Benefits of Deep Cleaning Your Exterior Surfaces Getting your outside surfaces professionally wiped clean gives many benefits. Better Curb Appeal: A clean outside makes your property or business appearance a lot better. Higher Property Value: A well-saved outside can grow your property`s value. Prevents Damage: Mold and mould can harm surfaces over time. Regular deep cleansing stops this, saving you cash on repairs. Healthier Environment: Getting rid of mildew and mold reduces allergens. This improves the air around your property. Longer-Lasting Surfaces: Removing dust extends the lifestyles of your siding, roof, and concrete. This protects your investment. Pest Control: Dirt and particles can appeal to pests. An easy outside maintains them away and safe. Conclusion Understanding what chemical is used for house washing allows owners to comprehend that expert outside cleansing is predicated closely on specialised detergents and gentle wash solution now no longer simply water pressure. From sodium hypochlorite remedies to expert surfactants, those cleansing marketers assist do away with mould, algae, dirt, and stains accurately and effectively. Need an expert outside cleansing you may trust? Contact VJ Pressure Washing now for secure house washing services, superior gentle washing solution, and professional outside care that continues your property clean and protected FAQs What chemical is used for house washing? This is not something unusual, the chemical used for residence washing is a diluted sodium hypochlorite residence wash solution mixed with detergents and surfactants. Are house washing chemical compounds secure for siding? Yes, expert residence washing chemical compounds are usually secure while carried out efficiently through skilled technicians. What is a soft wash cleansing solution? A soft wash cleansing solution is a low-pressure cleansing aggregate designed to do away with mould, algae, dirt, and mould accurately from sensitive surfaces. What is protected in outside residence cleansing detergent? An exterior house cleansing detergent can also additionally consist of surfactants, cleansing marketers, mould remedies, and stain removers designed for outside surfaces. Why is sodium hypochlorite utilized in house washing? Sodium hypochlorite residence wash solutions are incredibly powerful at killing mold, algae, and micro organisms on outside surfaces.