
What are the cons of pressure washing?

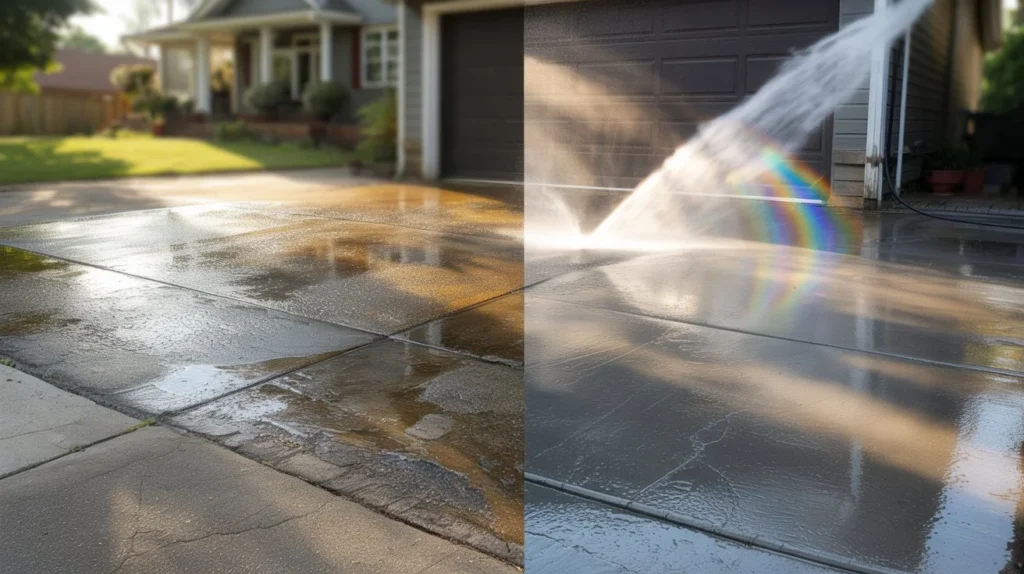
Pressure washing can clean fast, but it can also cause damage if used wrong. It uses high-pressure water that can harm surfaces, waste water, and create safety risks. Many homeowners focus on the shine but miss the downsides that come with it. So, what are the cons of pressure washing? The main issues include surface damage, water leaks, safety risks, and cost. In this guide, you will learn the real pressure washing risks so you can make a smart decision. Risk of Surface Damage One of the biggest disadvantages of power washing is how easily it can damage surfaces. The strong water stream can strip, crack, or wear down materials. Wood is very sensitive. High pressure can cause splintering and leave rough marks. Painted surfaces can lose their coating in seconds. Once paint peels, you may need a full repaint. Vinyl siding can bend or loosen. Even concrete is not fully safe. Too much pressure can leave visible lines or etching marks. This is a common case of pressure washer damage to surfaces. Many people think more pressure means better cleaning. That is not true. It often leads to costly repairs. If you are cleaning a roof, the risk is even higher. Shingles can break or lose their protective layer. This reduces their life and can lead to leaks. Water Intrusion Issues Water does not just clean the surface. It can also get inside places where it should not go. When water is forced into cracks, it can reach insulation, wiring, or wooden frames. Over time, this trapped moisture leads to mold growth. Mold is not just ugly. It can affect air quality and health. Fixing mold damage is often more expensive than the cleaning itself. Doors and windows are common weak spots. If seals are old, pressure washing can push water inside your home. This is one of the hidden pressure washing risks many homeowners ignore. You may not notice the problem right away, but it can show up weeks later. Safety Hazards Pressure washers are powerful tools. If handled wrong, they can cause serious injury. The water jet is strong enough to cut skin. Many accidents happen when users point the nozzle too close to their body. Even a short mistake can lead to deep wounds. Slippery surfaces are another issue. After washing, decks and driveways can become very slick. This increases the chance of falls. There are also electrical dangers. Using water near outlets or wires can lead to shocks. This is one of the major pressure washing safety concerns. Ladders add another level of risk. Many people use pressure washers while standing on a ladder. The force can push them off balance. Environmental Concerns Pressure washing may look clean, but the runoff water tells a different story. The water often carries dirt, oil, paint chips, and chemicals. This runoff can enter storm drains and reach local water sources. Plants and grass can also suffer. Strong water pressure can damage roots or wash away soil. Cleaning agents can harm nearby greenery. Water waste is another concern. A pressure washer uses a large amount of water in a short time. This can be a problem in areas with water limits. These environmental issues are often overlooked but are a key part of the disadvantages of power washing. Cost and Maintenance Factors Many people think pressure washing saves money. That is not always true. Buying a good pressure washer can be expensive. On top of that, you need hoses, nozzles, and cleaning solutions. Maintenance also adds cost over time. Repairs can cost even more. If you damage your siding or deck, fixing it may cost more than hiring a professional from the start. This is why some homeowners choose services like exterior house washing services tracy ca offered by VJ Pressure Washing. A trained team can reduce mistakes and long-term costs. Still, hiring experts also comes with a price. This makes cost one of the key factors when asking, what are the cons of pressure washing? Not Suitable for All Surfaces. Pressure washing is not a one-size-fits-all solution. Some surfaces need a gentler method called soft washing. This uses lower pressure and special cleaners. Older bricks can crumble under high pressure. Stucco can crack or chip. Wooden decks can lose their smooth finish. Roofs are another example. High pressure can damage shingles and void warranties. Many manufacturers do not recommend pressure washing at all. Understanding where not to use it helps avoid serious pressure washer damage to surfaces. Time and Skill Requirements Pressure washing may seem easy, but it takes skill to do it right. You need to know the correct pressure level for each surface. Using the wrong setting can cause damage in seconds. Technique also matters. Holding the nozzle too close or staying in one spot too long can leave marks. Learning these skills takes time. Beginners often make mistakes that lead to extra work or repairs. This is why many people underestimate the effort when asking, what are the cons of pressure washing? Noise and Disturbance Pressure washers are loud machines. The noise can disturb neighbors, especially in quiet areas. If you live in a residential zone, this can become a problem. Some areas even have noise rules for certain hours. The sound can also be stressful if used for long periods. It is not a major risk, but it is still a drawback worth noting. Risk of Overcleaning Cleaning too often can also cause harm. At VJ Pressure Washing, we often see issues caused by overuse. Repeated pressure washing can wear down surfaces over time. Paint fades faster, and wood becomes weaker, which can lead to costly repairs if not handled properly. Many homeowners think frequent cleaning keeps things in good shape. In reality, it can shorten the life of materials. This adds to the list of pressure washing risks that are easy to overlook. Conclusion Pressure washing is useful, but it is not risk-free. It can damage surfaces, cause water leaks, and create
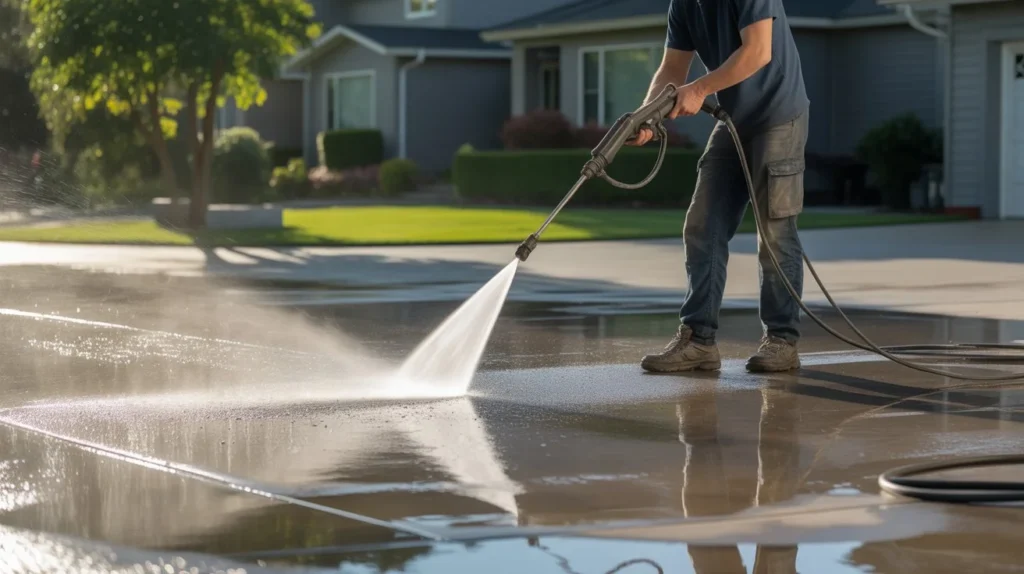
Is powerwashing a driveway worth it?
A dirty driveway changes how a home feels before you even step inside. Stains, moss, and oil marks build up slowly over time. Regular rain and traffic make it worse. Many homeowners ignore it until the surface looks old or unsafe. Cleaning it with high pressure water can restore the original look fast. Most people ask one simple thing before spending money or time on it. Is powerwashing a driveway worth it? The answer depends on the condition of your surface and how you maintain it. In many cases, it improves safety, appearance, and long term durability. It also helps remove buildup that normal washing cannot handle. Benefits of Power Washing a Driveway Power washing gives results that basic cleaning cannot match. It uses strong water pressure to lift deep dirt from concrete pores. This is where most stains sit. One of the main driveway pressure washing benefits is visual improvement. A clean driveway makes the whole property look fresh and cared for. This matters if you plan to sell your home or host guests. It also improves safety. Algae and moss can make concrete slippery. This is common in shaded or damp areas. Power washing removes this layer and reduces slip risk. Another benefit is long term protection. Dirt and grime can slowly break down concrete. Cleaning it regularly prevents early cracks and surface wear. Many homeowners also use it as part of seasonal upkeep. It pairs well with sealing and minor repairs. A clean surface helps sealant stick better. Signs Your Driveway Needs Cleaning Not every driveway needs frequent washing. But some signs are clear: Dark oil spots that spread over time Green or black patches from algae Rough or sticky surface texture Dust buildup that returns quickly after rain Visible tire marks that won’t fade If you notice these issues, cleaning becomes more than cosmetic. It turns into basic care. How Power Washing Works Power washing uses a machine that pushes water at high pressure through a nozzle. The force breaks dirt loose from concrete pores. Some cleaners also use mild detergents for tough stains. Hot water systems are used for oil-heavy surfaces. Cold water is enough for dust and algae in most cases. The key is pressure control. Too much pressure can damage older concrete. This is why technique matters more than power. Potential Drawbacks Power washing is useful, but it is not perfect. First, wrong pressure settings can damage concrete. Older driveways are more sensitive. Surface lines or etching can appear if used carelessly. Second, it is not a permanent fix. Dirt returns over time. Without maintenance, results fade in a few months. Third, water usage can be high. This may matter in dry areas. Lastly, DIY attempts can go wrong without experience. Many people overuse pressure and end up with uneven cleaning marks. When It Is Worth It There are situations where cleaning clearly makes sense. If your driveway has oil stains, algae growth, or heavy dirt, cleaning brings strong value. It improves safety and appearance in one step. It is also worth it before selling a home. First impressions matter in real estate. A clean driveway often improves perceived property value. Homeowners using services like driveway washing service tracy ca from VJ Pressure Washing often see fast visual improvement without risking surface damage. In these cases, is power washing a driveway worth it? becomes an easy yes because the return is clear and immediate. When It May Not Be Necessary There are times when you can skip it. If your driveway is fairly new and clean, simple rinsing may be enough. Light dust does not need deep cleaning. If there are no stains, algae, or buildup, pressure washing adds little value. Budget also matters. If the concrete cleaning cost is too high for your current situation, you can delay it and focus on spot cleaning instead. In dry climates with low debris, annual washing may be enough instead of frequent cleaning. DIY vs Professional Power Washing Many homeowners debate between doing it themselves or hiring a service. DIY Approach DIY can save money. Rental machines are available at hardware stores. You control timing and effort. But there are risks: Incorrect pressure can damage concrete Uneven cleaning marks may appear Oil stains often need stronger treatment No professional-grade equipment DIY works best for light cleaning, not deep stains. Professional Service Professional cleaners understand pressure levels and surface types. They also use better equipment and cleaners. They can handle stubborn issues like oil spots and deep grime. They also work faster and reduce risk of damage. When comparing results, professionals usually deliver a more even finish. Many homeowners compare concrete cleaning cost with time saved and risk avoided. In most cases, hiring a service becomes more practical. For example, VJ Pressure Washing handles full driveway restoration with controlled pressure and safe cleaning methods. How to Remove Oil Stains from Driveways Oil stains are one of the hardest problems. Basic rinsing does not work. You need degreasers or hot water pressure washing. The longer oil sits, the deeper it sinks into concrete. A good method includes: Absorbing fresh oil quickly with powder or sand Using degreaser before washing Applying high pressure in controlled passes Repeating treatment if needed These exterior surface cleaning tips help reduce long term staining and improve results. Maintenance Tips After Power Washing Cleaning once is not enough. Maintenance keeps results longer. Sweep driveway weekly Rinse spills quickly Avoid parking leaking vehicles on bare concrete Apply sealant every 1–2 years Clean light stains early Small habits reduce future cleaning effort. Environmental Considerations Power washing uses water and sometimes detergents. Eco-friendly cleaning products reduce impact on soil and plants. Many professionals now use biodegradable cleaners. Proper drainage also matters. Water should not flow into garden beds or storm drains with chemicals. Responsible cleaning protects both the surface and surroundings. DIY vs Professional Cost Comparison DIY costs include rental machines, water, and cleaning agents. It may seem cheaper upfront. Professional services cost more but
How much does it cost to pressure wash a house
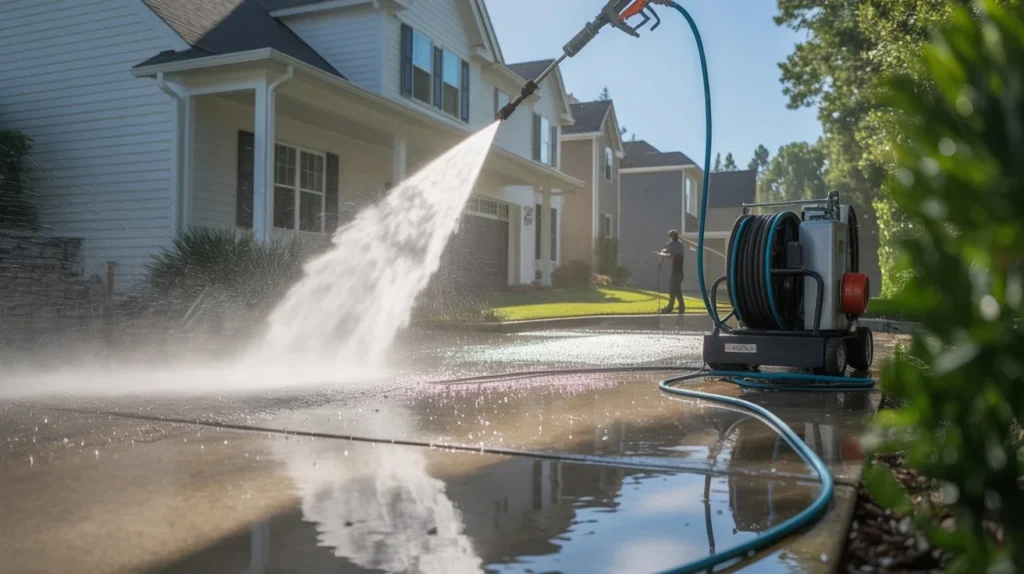
Over time, grime, mildew and different materials can increase to your deck, roof and siding. That ought to bring about discoloration, terrible slash appeal, and withinside the case of mildew, fitness risks. Pressure washing may be the efficient manner to dispose of stains and undesirable outside debris. Of course, there`s a value to pressure washing, and it’s going to hinge on elements just like the size of your home and whether or not you do the work yourself or outsource it. If you are new to pressure washing, you`ll need to recognize what price you`re searching at and whether or not it can be paid to a professional. Factors that Impact How Much Pressure Washing Costs Understanding price elements allows you to expect wherein your mission might also additionally fall at the stress washing pricing spectrum. 1:Square Footage Many experts calculate pricing primarily based totally on square ft, which allows a correct estimate for surfaces of various sorts and sizes. The usual price falls between $0.08 and $0.50 in keeping with square foot, relying on how tough the floor is to smooth and the extent of buildup. For distinctive regions, right here is how square ft is usually measured: Siding: Combined top x width of every outdoors wall Driveways and walkways: Length × width of floor Decks and fences: Floor area, plus railings if included Roofs: Combined length x width of every segment of the roof, adjusted to account for steepness 2:Home Size For house power washing Tracy CA, home length is a key price factor. Larger houses take more time, need more cleaning solutions, and may require a different cleaning method, which increases the overall cost. Less than 1,000 sq. ft.: $300-$800 1,000-2,000 sq. ft.: $375-$1,600 2,000 – 3,000+ sq. ft: $600-$2,000+ 3:Home Height Height is regularly certainly considered one among the most important elements affecting price. Tall houses require extra tools, like extension wands, ladders, or protection systems to get admission to better regions safely. One-tale houses: Typically variety among 900 to 1,200 square ft and are commonly the less expensive at $72-$1,000. Two-tale houses: Typically variety among 1,500 to 2,000 rectangular ft, requiring extra time and reach. Pressure washing a two-tale domestic can price $120-$1,600. Three-tale houses or houses with peaks and dormers: Typically variety among 2,500 to 3,000 rectangular ft. Accessing the 1/3 tale is normally beyond the scope of all pressure washing companies, that means this mission would require a scissor elevator or a few different manners to the 1/3 tale. In those situations, stress washing can cost anywhere from $200 to $2,800. 4:Project Type Different regions of your home might also additionally have distinctive price primarily based totally on length, accessibility, and soil level. Here are common sorts and what to expect: Exterior residence washing: A complete wash gets rid of mold, mildew, and dust from siding and trim. This is normally priced better than single-floor tasks as it covers a massive area. Driveways: Driveways regularly gather oil stains, tire marks, and dust, so they will require extra attempt or pre-treatment. Patios and walkways: Concrete, stone, and pavers advantage from periodic cleansing to save you discoloration and slippery buildup. Deck and fence cleansing: Wood and composite substances require a mild touch, regularly with tender washing or cautiously controlled stress. Roof washing: To keep away from adverse shingles, roofs are usually tender washed. Gutters: This gets rid of oxidation and streaks to assist brighten the advent of your home`s trim. 5:Surface Type Each cloth reacts in a different way to pressure, so experts alter cleansing techniques accordingly. This enables shield surfaces at the same time while clean. Vinyl siding: Requires slight pressure, expenses variety from $0.30-$0.40 according to square foot Brick: Durable however can lure dust in crevices, expenses variety from $0.31-$0.37 according to square foot Stucco: Porous and delicate, expenses variety from $0.33-$0.45 according to square foot Wood decks or fences: Prone to splintering if washed too aggressively, expenses variety from $0.35-$0.50 according to rectangular foot Composite decks: Sensitive to excessive pressure, expenses variety from $0.50-$2.00 according to square foot Metal siding: Often used to clean Asphalt: Most usually use material for roof shingles, expenses variety from $0.50-$1.00 according to rectangular foot. Pressure washing price per square foot. The nationwide average cost to pressure wash a home ranges from about $0.08 to $0.47 per square foot for houses between under 1,000 and 5,000 square feet. With VJ Pressure Washing, your exact price will depend on where you live and the specific pricing model used, ensuring a fair and accurate estimate for your home. Here’s a examine countrywide common pressure charges through a property’s general square ft: Square footage Average fee Square Footage Price Range (USD) 1,000 or less $190 – $291 1,000 – 2,000 $273 – $408 2,000 – 3,000 $331 – $488 3,000 – 4,000 $414 – $599 4,000 – 5,000 $550 – $834 How a whole lot does it feel to stress wash a residence? In common, the cost to pressure wash a residence stages from around $241-$418. Here’s a examine expenses primarily based totally at the property’s height: 1 story: $218-$363 2 stories: $279-$472 3 stories: $286-$509 Remember: These expenses can differ depending on the sort of siding you have, the rectangular footage, how grimy your property is, and more. Your residence’s siding is one in all many things you could stress wash. Here’s a rundown of the countrywide common expenses to pressure wash different regions and systems round your home. How to save on pressure washing. If you`re on a good budget, attempt the usage of those techniques to shop cash: Take Advantage of Seasonal Discounts and Promotions Look for seasonal reductions and promotions. Pressure washing provider companies to your place may also provide seasonal reductions and promotions. These reductions assist you to save money, specifically in case you plan your cleansing initiatives accordingly. Search for unique gives throughout slower seasons, which include wintry weather or early spring. During those times, strain washing agencies can
What’s the best way to clean a driveway?
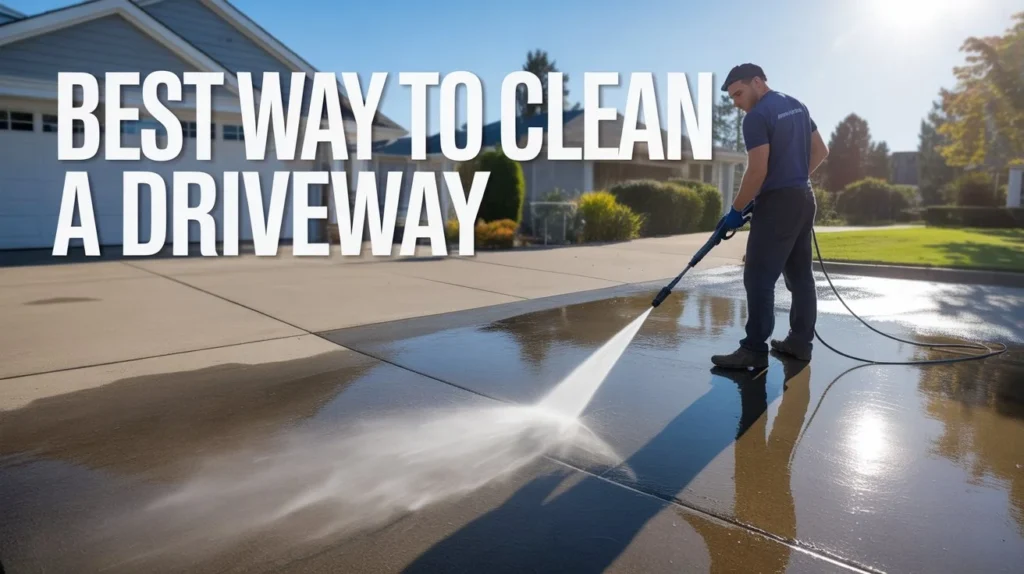
Your driveway is sort of a carpet for your car. It`s a platform for displaying your car because it slowly works its way once in a while pausing for photos, of course in your garage. But in case your driveway is stained, dirty, or in any other case unsightly, what precisely are you displaying off? Instead of hiding out from your neighbors and the paparazzi, reclaim your glamorous popularity with the aid of analyzing our manual on a way to smooth your driveway. What Gets Your Driveway So Dirty? Driveways are designed to get beat up. A fleet of cars frequently pulls in and out, and wind, rain, and the solar frequently beat at the pavement`s surface. So, it shouldn`t be too sudden that now and again driveways get dirty. Specifically, driveways are liable to a number of hazards: Black algae Dirt and mud Grease and oil Green algae Moss The natural growths indexed right here thrive in damp, darkish environments. If your driveway sits withinside the coloration, otherwise you stay in a humid area, you’re much more likely to cope up with those issues. On the other hand, grease and oil stains are not an unusual place on driveways, mainly in case you maintain a car parked out of doors as opposed to for your garage. If your driveway is crafted from asphalt, they’ll be much less noticeable, however they nevertheless require cleaning. Should I Be Cleaning My Driveway? Cleaning your driveway can look like a massive task, however it’s far one which wishes doing each as soon as in at the same time as. From concrete, to tarmac to paving stones, every fabric has its very own traits that dictate the handiest cleansing methods. For example, concrete is porous and might soak up stains, while asphalt is softer and greater at risk of floor harm. Understanding the fabric of your driveway guarantees you pick out the best cleansing merchandise and techniques, and may save you any harm alongside the way. Professional driveway washing service Tracy CA can help prevent damage that may shorten the lifespan of your driveway, saving you from costly paving repairs sooner than expected. Checklist: Tools and Cleaning Products for Driveways Cleaning a driveway correctly begins with the use of the suitable gear and tools tailor-made to the sort of surface you have. Essential gear consist of a high pressure washer, a strong scrub brush, a broom, and a lawn hose. When selecting cleansing agents, it`s essential to suit the product in your driveway fabric. For example, an expert concrete cleanser works great on concrete, at the same time as a milder asphalt cleanser is more appropriate for asphalt surfaces. For a greener approach, take into account green options along with vinegar or baking soda solutions. What are the one of a kind driveway cleansing methods? There are 3 driveway cleansing methods. Here are the common ones discussed below. Using a pressure washer Some people like to smooth driveways with the aid of using pressure washers themselves. These beneficial driveway-cleansing offerings are to be had for buy or rent. We need to stress that mistaken coping with pressure washers ought to result in injuries, so first-time customers should exercise utmost care with the aid of reading, understanding, and following the practice guide earlier than the use of them. As with any do-it-yourself (DIY) task, continually put on protection tools while the use of this gadget. Cleaning your driveway manually This driveway cleansing technique calls for a multi-purpose cleansing answer and guide scrubbing to eliminate cussed stains and unfasten debris. Avoid the use of cleansing dealers with sturdy chemical compounds that might harm your driveway, and pick ones which are well suited together along with your paving materials. You can smooth your driveway manually when you have the time, competencies, and power to spare. Professional cleansing Hiring authentic driveway cleaners is the first-class method of getting a smooth driveway. Professionals like us have the proper competencies and gadgets to offer fantastic consequences and prevent you from spending your weekend brushing and scrubbing. The fee of cleansing offerings will rely on numerous factors, along with the dimensions of your driveway and the sort of floor that desires cleansing. You may also need to spend extra on extra offerings like driveway sealing. How to easy a driveway Regular maintenance will maintain your driveway easy and alluring for years to come. Below, you`ll locate the satisfactory driveway cleansing practices. Assess your driveway`s situation Evaluate your driveway`s situation earlier than beginning. Look for regions with cussed stains, cracks, or any essential repairs. Understanding the troubles will assist you select the most appropriate cleansing methods, products, and different mission requirements. Gather the essential gear and materials To easy your driveway effectively, accumulate the subsequent gear and materials: Broom or leaf blower to cast off free debris Stiff-bristle brush or broom for scrubbing Pressure washing machine or lawn hose with an adjustable nozzle Cleaning answer suitable to your driveway material (e.g., detergent, degreaser, or particular cleaners) Safety goggles, gloves, and protecting clothing Before starting up to paintings, you need to recognize the pressure washer commands and decide the satisfactory cleansing solution to your driveway floor. Prepare the area Prepare the encompassing area with the aid of disposing of any objects, vehicles, or barriers from the driveway. Cover closed plants, sensitive surfaces, or gadgets sensitive to cleansing sellers or strain washing. Apply the cleansing solution Use an industrial or home made cleanser to cast off hard stains. Concrete driveway stains and greases can be eliminated by the use of slight detergent, water, or a concrete cleanser. Follow the product commands for dilution ratios and methods. Specific stains, like rust, mould, or mildew, may also require different cleansing products. Seek expert advice. Asphalt driveways are greater touchy, so keep away from harsh chemical substances which could harm them. For paver driveways, keep away from acid-primarily based totally cleaners which could discolour or harm the pavers. Apply the cleansing solution throughout
What Is Gutter Cleaning
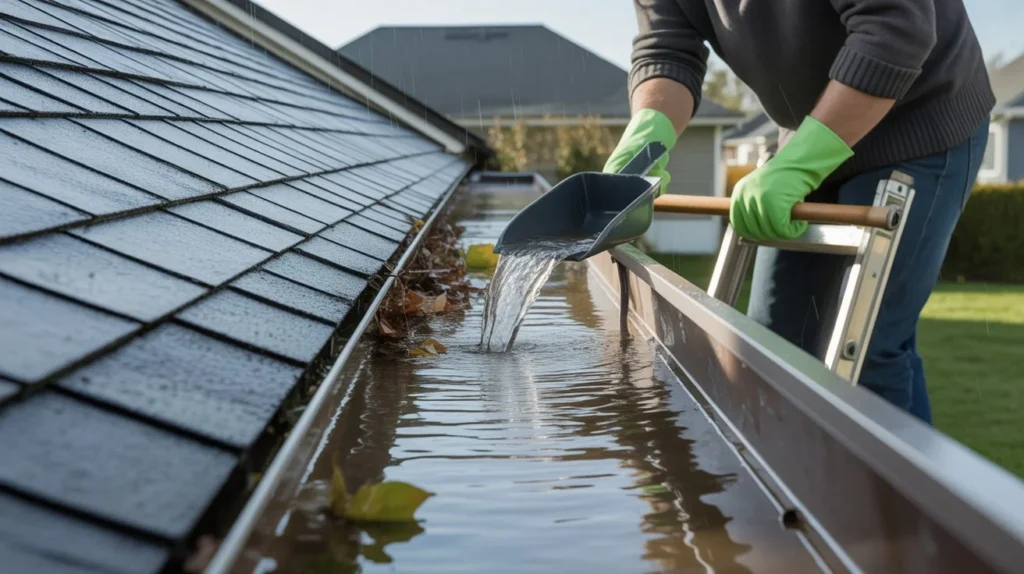
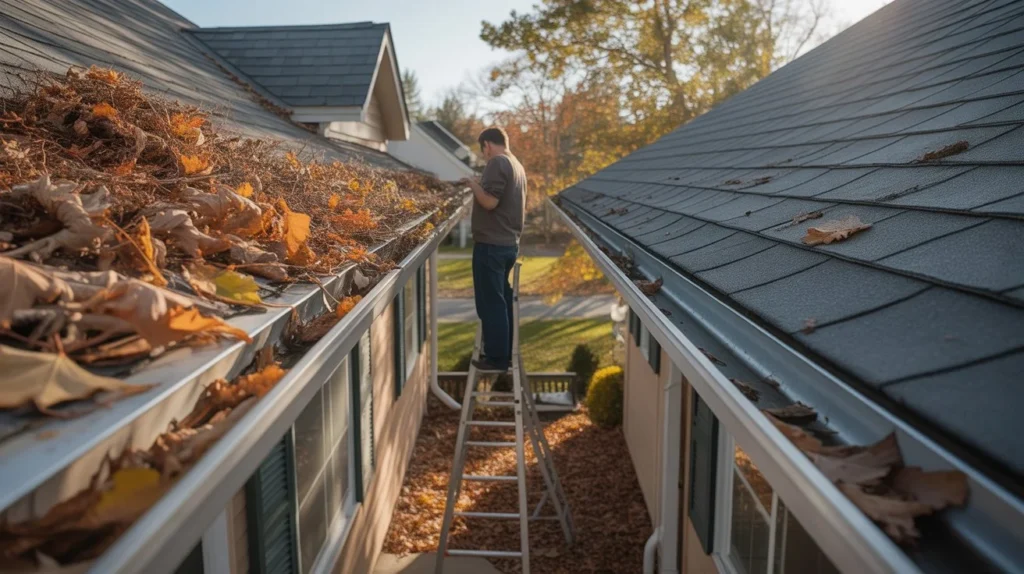
Gutters protect your home by moving rainwater away from the roof and walls. When they clog, water spills over and causes damage. Leaves, dirt, and debris build up fast, especially during seasonal changes. If ignored, this small issue can lead to costly repairs. Keeping gutters clean is one of the simplest ways to protect your home and avoid stress later. So, what is gutter cleaning? It is the process of removing debris from gutters and downspouts to keep water flowing properly. It also connects to a common concern, how often should i clean gutters, which most homeowners ask when planning maintenance. What Is Gutter Cleaning? Let’s keep it simple. What is gutter cleaning? It is the process of clearing leaves, dirt, twigs, and other debris from your gutter system. Gutters sit along the edge of your roof. Their job is to carry rainwater away from your home. When they get blocked, water cannot flow properly. So, gutter cleaning means removing anything that stops water from draining. This includes cleaning both the gutters and the downspouts. You can do it by hand, with tools, or by hiring professionals. The goal is always the same. Keep water moving safely away from your home. Why Gutter Cleaning Is Important The importance of gutter maintenance cannot be ignored. Clean gutters protect your home from several problems. First, they prevent water damage. Blocked gutters overflow and soak your walls. Second, they protect your roof. Water buildup can cause leaks and wood damage. Third, they keep your foundation safe. Water pooling near your home can cause cracks. Fourth, they reduce pest problems. Debris attracts insects and small animals. When you clean the gutters regularly, you avoid these issues and keep your home in good shape. For reliable results and safe service, you can always trust VJ Pressure Washing to handle your gutter maintenance with care and expertise. What Happens If You Don’t Clean Gutters? Ignoring gutter cleaning leads to bigger problems over time. Water starts to overflow during rain. This damages siding and walls. Roof leaks may develop. Moisture weakens wood and causes mold. Your foundation may crack. Water collects around your home and weakens the base. Plants can grow in gutters. This adds weight and causes sagging. Pests may move in. Birds and insects love clogged gutters. So, if you wonder again what is gutter cleaning, think of it as prevention. It stops small issues from turning into expensive repairs. How Gutter Cleaning Works The process is simple but important. It requires care and attention. First, debris is removed by hand or with tools. Leaves, dirt, and twigs are cleared out. Next, gutters are flushed with water. This checks if water flows properly. Then, downspouts are cleaned. Any blockages are removed to ensure proper drainage. Finally, the system is inspected. Any cracks or loose parts are fixed. If you want reliable results, professionals like VJ Pressure Washing offer expert help. Their gutter cleaning services tracy ca ensure your gutters are cleaned safely and completely. This step-by-step method explains what is gutter cleaning in real action. Tools Used for Gutter Cleaning You need the right tools to do the job safely. A sturdy ladder helps you reach the gutters. Always place it on stable ground. Gloves protect your hands from dirt and sharp debris. A scoop or small tool helps remove debris quickly. A garden hose is used to flush out remaining dirt. Safety gear like goggles adds extra protection. Using proper tools makes it easier to clean the gutters without risk. DIY vs Professional Gutter Cleaning Homeowners often ask whether to do it themselves or hire help. DIY Cleaning DIY cleaning saves money. You can do it with basic tools at home. But it takes time and effort. Climbing ladders can also be risky. You must be careful and follow safety steps. Professional Cleaning Professionals handle the job quickly and safely. They have the right tools and experience. They also inspect your gutters for damage. This helps prevent future problems. For large homes or heavy buildup, professional cleaning is the better option. Benefits of Regular Gutter Cleaning Regular cleaning offers long-term benefits It protects your roof from water damage and saves repair costs It keeps your foundation strong by directing water away properly It improves home safety by reducing the risk of leaks and mold It extends gutter life so they last longer and work better The importance of gutter maintenance becomes clear when you look at these benefits. Tips to Keep Gutters Clean Longer You can reduce cleaning time with a few simple steps Install gutter guards to block large debris from entering Trim nearby trees to reduce leaf buildup Check gutters after storms and remove small debris early Make sure gutters are properly sloped so water flows easily These tips help reduce how often you need to clean the gutters. Common Mistakes to Avoid Many homeowners make simple mistakes that lead to damage Cleaning once a year is not enough because debris builds up quickly Ignoring downspouts is a common issue since blockages stop water flow Skipping safety steps can be dangerous, so always use a stable ladder Waiting too long makes the job harder as small clogs turn into big problems Avoid these mistakes to keep your gutters working well Extra Insight: How Often Should You Clean Gutters? Even though this article explains what is gutter cleaning, many homeowners also ask about timing. Most homes need cleaning twice a year. Spring and fall are the best times. Homes with many trees may need cleaning more often. Storm-prone areas also require extra checks. So, when asking how often should i clean gutters, think about your surroundings and weather. Conclusion Gutter cleaning may seem like a small task, but it plays a big role in home care. It protects your roof, walls, and foundation from damage. Now you know what is gutter cleaning and why it matters. It is simply the process of removing debris to keep water flowing properly. If you stay
How Often Should I Clean Gutters? The Complete Homeowner’s Guide
Gutters do one job: move water away from your home. But when they fill up with leaves, dirt, and debris, they fail fast. Most homeowners ignore them until something goes wrong, and that’s where the real damage starts. A little maintenance now saves you a lot of money later. So, how often should I clean gutters? For most homes, twice a year is the standard. But depending on your trees, roof type, and local weather, you may need to clean them more. This guide covers everything you need to know to stay ahead of it. How Often Should I Clean Gutters? How Often Should I Clean Gutters? The short answer: clean your gutters at least twice a year. Once in late spring and once in late fall. But that’s a baseline, not a rule for everyone. Here’s a quick breakdown based on your situation: Situation Recommended Frequency Few trees nearby Twice a year Moderate tree coverage 3 times a year Heavy tree coverage (pine, oak) 4+ times a year After major storms As needed Gutter guards installed Once a year minimum If you live in an area with heavy rainfall or frequent storms, check your gutters after each major weather event. Even a “cleaned” gutter can collect fast-moving debris in a single bad storm. Why Regular Gutter Cleaning Is Important Gutters protect your home’s foundation, walls, roof, and landscaping. When they clog, water has nowhere to go. It overflows, seeps into places it shouldn’t, and causes damage that builds silently. Here’s what regular cleaning actually protects: Your foundation — Overflowing water pools around the base of your home and can cause cracks over time. Your roof — Standing water in a clogged gutter can back up under shingles and rot the wood. Your siding — Water constantly running down the outside of your walls stains and warps siding. Your basement — Flooded gutters are one of the top reasons basements take on water. Your landscaping — A waterfall effect from clogged gutters destroys flower beds and erodes soil. Regular gutter maintenance isn’t just about the gutters. It’s about protecting your entire home. If you’re in the Central Valley and want this handled by professionals, VJ Pressure Washing offers a trusted gutter cleaning service Tracy CA homeowners rely on for thorough, reliable results. Signs Your Gutters Need Cleaning Don’t wait for the calendar to tell you it’s time. Your gutters will show you. Watch for these warning signs: Water spilling over the sides This is the most obvious sign. If rain pours over the edges instead of through the downspout, there’s a blockage. Plants growing in your gutters Dirt, seeds, and moisture are all that a weed needs. If you see greenery sprouting from your gutters, they’ve been neglected too long. Sagging gutters Wet, heavy debris weighs down gutters. If they’re pulling away from the fascia board, clean them immediately before the hardware fails. Staining on siding Dark streaks running down your exterior walls mean water is overflowing consistently. Animals or pests near your roof line Birds, squirrels, and insects love clogged gutters. Debris makes a perfect nesting spot. No water coming from downspouts during rain If it’s raining hard and nothing’s coming out of your downspout, the gutter or the downspout is blocked. Basement dampness after rain This one isn’t always obvious, but consistent moisture in the basement after rainstorms often traces back to gutters that are dumping water against the foundation. What Happens If You Don’t Clean Gutters? Skipping gutter cleaning isn’t just a maintenance issue. It’s a financial risk. Here’s what can happen when gutters go uncleaned for too long: Roof damage — Water backing up under shingles leads to rot, mold, and leaks. A roof repair can cost thousands. Foundation cracking — Water that pools around the foundation due to overflowing gutters puts pressure on concrete. Foundation repair is one of the most expensive fixes a homeowner faces. Fascia and soffit rot — The wood behind your gutters absorbs standing moisture and begins to rot. This weakens the structure that holds your gutters in place. Mold growth — Moisture from clogged gutters seeps into walls and attic spaces, creating conditions for mold to spread. Mold remediation is costly and disruptive. Ice dams in winter — In colder climates, clogged gutters trap water that freezes and expands. Ice dams form and push back under shingles, causing serious leaks when things thaw. Pest infestations — Stagnant water in gutters breeds mosquitoes. Wet debris attracts rodents, birds, and insects. These pests can work their way into your home. The cost of cleaning gutters twice a year is minor compared to any one of these repairs. Factors That Affect Gutter Cleaning Frequency How often do you need to clean gutters? That depends on several factors specific to your property. Tree Coverage This is the biggest factor. If you have oak, pine, maple, or other heavy-shedding trees near your roofline, debris falls constantly. Pine needles in particular are notorious for getting past gutter guards and causing blockages. Your Roof Pitch Steeper roofs shed debris faster into gutters. Low-pitched or flat roofs collect more debris on the surface, which eventually slides into gutters during rain. Your Climate Areas with heavy rain, frequent storms, or strong seasonal winds will need more frequent cleaning. If you get a lot of fall foliage, budget for at least one cleaning after the leaves drop. Type of Gutters Wider gutters (6-inch K-style) handle more debris than standard 5-inch gutters. If your gutters are older or smaller, they clog faster. Gutter Guards Gutter guards reduce cleaning frequency but don’t eliminate it. You still need to check and clean at least once a year. Fine mesh guards handle small debris better than cheaper screens. Your Home’s Age Older homes often have gutters that weren’t installed correctly. Poor slope, low-quality hangers, or undersized downspouts mean faster clogging. Inspect older systems more often. DIY Gutter Cleaning vs Professional Service Both options work. The right choice depends on your comfort level, safety,
How to Install Solar Panels Guard
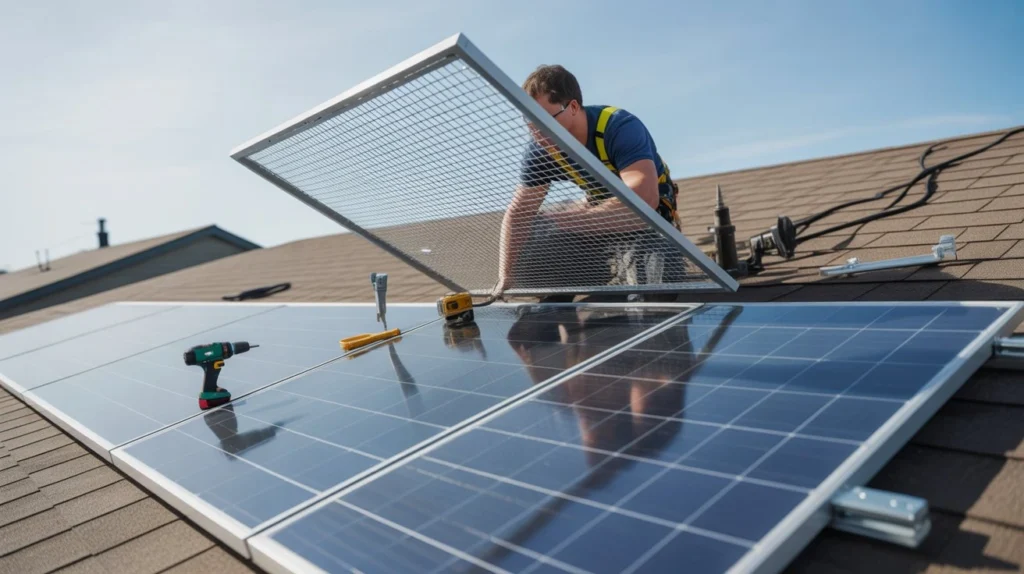
Solar panels save money and cut power bills. A proper guard system protects them from birds, debris, and damage. If you install both the panels and the guard the right way, your system lasts longer and works better. This guide explains how to install solar panels Guard step by step. You will learn planning, tools, safety, and real tips used by professionals. Understanding Solar Panel Systems Before installing solar panels, you need to know the basics. A solar setup is simple once you break it down. A standard system includes: Solar panels (capture sunlight) Inverter (turns DC into usable power) Mounting system (holds panels in place) Wiring (connects all parts) Battery (optional for storage) When you install solar energy, all these parts must work together. A guard system is added around the edges. It blocks birds, leaves, and dust from getting under panels. Assessing Your Home for Solar Installation Start with a full home check. This step decides how smooth your solar energy system installation will be. Check these key factors: 1. Roof Condition Your roof must be strong and in good shape before you start installing solar panels. Check for cracks, leaks, or weak spots. If your roof is old, it is better to repair or replace it first. A solid roof will support the weight of the panels and prevent future damage or costly fixes. 2. Sunlight Exposure Solar panels need direct sunlight for most of the day to work well. Look at your roof during different times of the day and check for shadows from trees, buildings, or poles. Even small shaded areas can reduce energy output, so try to choose the most open and sunny spot. 3. Roof Direction The direction your roof faces plays a big role in energy production. South-facing roofs usually get the most sunlight and give the best results. East- and west-facing roofs can still work, but they may produce slightly less energy. Proper angle and tilt can also improve performance. 4. Space Availability Make sure your roof has enough open space for the number of panels you need. You also need extra room for mounting structures and guard rails. Avoid placing panels too close together, as proper spacing helps with airflow and makes maintenance easier later. 5. Solar Panel Guard Installation Planning This is where you plan your Solar Panel Guard Installation. It ensures no gaps are left under panels. Companies like VJ Pressure Washing often suggest proper spacing and guard mesh to prevent nesting. Calculating Your Energy Needs Before installing solar panel system, know how much power you use. Follow these steps: Check your monthly electricity bill Find your average daily usage Decide how much you want solar to cover Example: If your home uses 900 kWh per month, you need a medium-sized system. This step helps you avoid overspending or underbuilding your system. Planning and Permits Every area has rules for install solar energy projects. You may need: Building permits Electrical approvals Utility company permission Check local laws before starting. Skipping permits can cause fines or delays. You can also decide here: DIY installation Hiring professionals DIY can save money, but professional help ensures safety and better results. Choosing the Right Equipment Your system quality depends on your equipment choices. Solar Panels Monocrystalline panels offer high efficiency and take up less space, making them a good choice for smaller roofs. Polycrystalline panels are more budget-friendly and still provide reliable performance, though they may need a bit more space to produce the same energy. Inverter Types A string inverter is a common and cost-effective option that connects multiple panels in one system. A microinverter is installed on each panel, which helps improve performance and makes it easier to monitor individual panel output. Guard Materials Galvanized steel mesh is strong, durable, and resists rust, making it ideal for long-term use. PVC-coated wire adds an extra layer of protection against weather and corrosion while also giving a cleaner finish around your panels. Choose strong and rust-resistant guard material. It should last as long as your panels. Tools and Materials Required Before you start installing solar panels, gather all tools. You will need: Drill machine Mounting brackets Bolts and screws Safety gloves Ladder Measuring tape Wire cutters Solar guard mesh Having everything ready saves time and avoids mistakes. Step-by-Step Installation Process Now let’s go through how to install solar panels Guard in simple steps. Step 1: Install Mounting Structure Fix the mounting brackets firmly on your roof. These brackets will hold the full weight of the panels, so placement matters. Make sure they are aligned properly, level, and tightly secured to avoid movement during strong wind or rain. Step 2: Place Solar Panels Carefully lift and place the solar panels onto the mounting structure. Handle them with care to avoid damage. Once positioned, secure each panel using bolts and clamps so they stay stable and do not shift over time. Step 3: Connect Wiring Now connect the panels using electrical wiring. You can join them in series or parallel depending on your system design. After that, run the wires safely toward the inverter, keeping them organized and protected from damage. Step 4: Install Inverter Mount the inverter close to your main electrical panel. This device converts solar energy into usable electricity for your home. Connect the DC wires from the panels to the inverter carefully, following proper safety guidelines. Step 5: Install Solar Panel Guard This step is often skipped, but it is very important for long-term protection. Attach a strong mesh around the edges of the panels Use clips or fasteners to secure it properly Make sure there are no open gaps where birds or debris can enter Keep enough space for airflow to prevent overheating This step completes the core part of how to install solar panels Guard properly and helps protect your system from damage. Step 6: Connect to Main Power Link the inverter to your home’s electrical system. This allows solar energy to power your home. If required,
How Much Does It Cost to Install Gutter Guard In 2026?
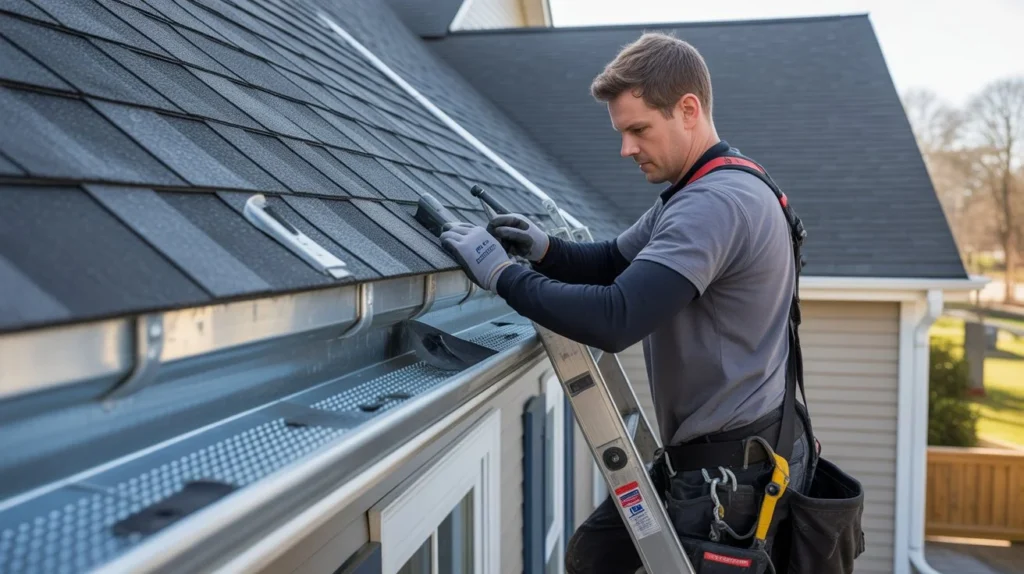
Gutter guards stop leaves, twigs, and debris from clogging your gutters. They save you from climbing a ladder twice a year and protect your home from water damage. But before you buy, you need to know the real numbers. If you’re wondering how much does it cost to install gutter guard, the typical range is $600 to $2,400 for a standard home. Most homeowners pay around $1,000 to $1,500 depending on the type of guard, linear footage, and labor in your area. This guide breaks it all down. What Is a Gutter Guard? A gutter guard is a cover or filter placed over your gutters. It lets water flow in while keeping debris out. Without one, leaves and dirt pile up inside gutters. Water backs up, overflows, and eventually damages your fascia, foundation, and siding. Gutter guards prevent that. They come in several materials and styles. Some sit inside the gutter. Others clip on top. Each type has a different price point and performance level. Average Cost to Install Gutter Guard Here’s the short answer: most homeowners spend between $1 and $13 per linear foot for gutter guard installation, including both materials and labor. For a typical single-story home with 150 to 200 linear feet of guttering, total costs look like this: Home Size Linear Feet Low Estimate High Estimate Small home 100–150 ft $300 $900 Average home 150–200 ft $600 $1,800 Large home 200–300 ft $900 $3,500 Two-story home 200–250 ft $1,200 $4,500 The gutter guard installation price varies most based on the type of guard you choose and how accessible your roofline is. If you’re in the Tracy, CA area and want an accurate quote from professionals who know the local terrain, VJ Pressure Washing offers trusted best gutter guard installers Tracy CA services with transparent pricing. Types of Gutter Guards and Their Costs Not all gutter guards are created equal. Here’s a breakdown by type. 1. Screen Gutter Guards Cost: $0.50 – $2 per linear foot (material only) These are the most affordable options. They’re flat mesh screens that sit over the gutter opening. They block large debris but let smaller particles through over time. Best for: Homeowners on a tight budget who want basic protection. 2. Micro-Mesh Gutter Guards Cost: $2 – $6 per linear foot (material only) Micro-mesh guards have very fine openings that block even small debris like shingle grit and pine needles. They’re considered the most effective type available. Best for: Homes surrounded by pine trees or fine-leafed plants. 3. Foam Gutter Guards Cost: $2 – $3.50 per linear foot (material only) Foam inserts sit inside the gutter and let water pass through while blocking debris on top. They work initially but tend to collect algae and small debris over time. Best for: Short-term use or mild debris environments. 4. Brush Gutter Guards Cost: $3 – $5 per linear foot (material only) These look like large pipe cleaners placed inside the gutter. Debris sits on top of the bristles while water flows through. Like foam, they can trap smaller debris between bristles. Best for: Homes with mostly large leaf debris. 5. Reverse Curve (Surface Tension) Guards Cost: $3 – $6 per linear foot (material only) Water follows the curve around the guard and drops into the gutter while debris falls off the edge. These work well in heavy rain but can struggle with light drizzle. Best for: Areas with frequent heavy rainfall. 6. Perforated Aluminum or Steel Guards Cost: $1 – $4 per linear foot (material only) These solid covers have small punched holes for water entry. They’re durable and low maintenance but can struggle with very fine debris. Best for: General use in most climates. Factors That Affect Gutter Guard Installation Cost The gutter guard install cost for your home depends on more than just the product you pick. Roof Height and Accessibility Single-story homes are the cheapest to work on. Two-story and steep-pitch roofs require more safety equipment and take longer. Expect to pay 20% to 40% more for two-story installations. Linear Footage of Gutters More gutters mean more material and more labor hours. Measure your home’s perimeter at roofline level for an estimate. Most homes run 150 to 200 linear feet. Gutter Condition If your gutters are sagging, rusted, or pulling away from the fascia, they need repair before guards go on. Gutter repair adds $75 to $350 on top of the installation cost. Location and Labor Rates Labor costs vary significantly by region. In high-cost-of-living cities, labor alone can run $1 to $3 per linear foot. In rural areas, that number is lower. Brand and Warranty Premium brands like LeafFilter, HomeCraft, and Gutter Helmet charge more partly because of the warranty they offer. Some come with lifetime transferable warranties. Budget brands offer no such guarantee. DIY vs Professional Installation Cost DIY Gutter Guard Cost If you buy the materials yourself and do the work, you can pay as little as $150 to $600 for a full home. Screen guards and micro-mesh clips are the easiest to install without professional help. What you save: Labor, which typically runs $0.50 to $1.50 per linear foot. What you risk: Improper installation can void your roof warranty, cause water to overflow in the wrong direction, or create gaps that let debris in anyway. Professional Installation Cost Professional gutter cover installation cost runs $600 to $4,500 depending on type and home size. You’re paying for experience, proper tools, and a warranty on the work something VJ Pressure Washing ensures with every installation. Most professional installs take 2 to 6 hours for an average-sized home. Bottom line: DIY saves money upfront. Professional installation saves money long-term through proper fit and lasting results. Benefits of Installing Gutter Guards Here’s why people pay for them. Fewer cleanings. Standard gutters need cleaning 2 to 4 times per year. With guards, that drops to once every 1 to 3 years. Prevents water damage. Clogged gutters cause overflow. That overflow damages foundations, basements, and siding. Guards keep water flowing
Is Solar Panel Cleaning Worth It?
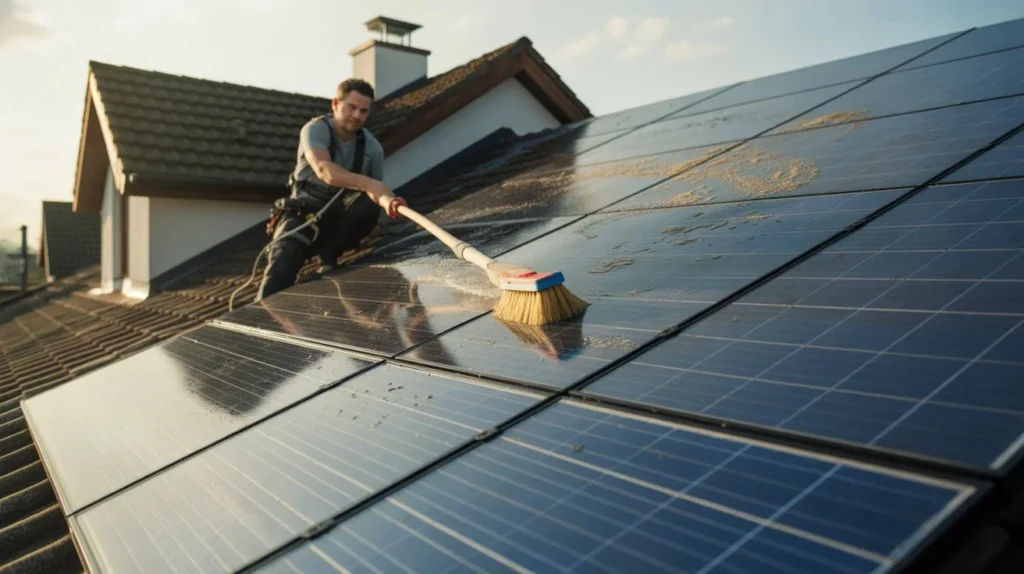
Solar panels work best when they get full sunlight. Dust, dirt, and bird droppings can block light and reduce output. Many homeowners install panels to save money, but small issues like dirt can lower those savings over time. This leads to one simple question: does cleaning really matter? Is Solar Panel Cleaning Worth It? Yes, in most cases it is. Clean panels produce more power, last longer, and give better returns. If your panels collect dust or debris, regular cleaning can make a real difference. How Do Solar Panels Work? Solar panels convert sunlight into electricity using photovoltaic cells. These cells absorb sunlight and turn it into usable energy for your home or business. For this process to work well, sunlight must reach the panel surface without blockage. Even a thin layer of dust can reduce how much sunlight gets through. That means less power and lower efficiency. This is why solar panel maintenance plays a key role in system performance. Keeping panels clean helps them work at full capacity. What Happens When Solar Panels Get Dirty Over time, panels collect dust, pollen, bird droppings, and pollution. In dry or urban areas, this buildup happens faster. The solar panel dirt impact can be bigger than many people expect. Studies show that dirty panels can lose 10% to 25% of their energy output. In some cases, losses can be even higher. Here’s what happens when panels stay dirty: Less sunlight reaches the cells Energy production drops Electricity bills increase System efficiency declines In extreme cases, dirt can cause uneven shading. This may lead to hot spots, which can damage panels over time. Benefits of Solar Panel Cleaning There are clear cleaning solar panels benefits that make it worth considering. 1. Better Energy Output Clean panels absorb more sunlight without any blockage. Even a thin layer of dust can reduce how much light reaches the cells. When panels are clean, they capture maximum sunlight and convert it into electricity more efficiently. This leads to higher daily energy production and better overall system performance. 2. Improved Savings When your solar panels produce more energy, you depend less on grid electricity. This directly lowers your monthly power bills. Over time, even small efficiency gains can add up to noticeable savings. Clean panels help you get the most value from your solar investment every day. 3. Longer Panel Life Dirt buildup can cause uneven heating on the panel surface. This may lead to long-term wear or damage if ignored. Regular cleaning prevents these issues and keeps the system in good condition. It also supports proper solar panel maintenance, helping your panels last for many years. 4. Higher Return on Investment Solar systems require a significant upfront cost. To recover that cost faster, your panels need to work at full efficiency. Keeping them clean ensures you get maximum energy output over time. This improves your return on investment and makes your system more cost-effective in the long run. 5. Consistent Performance Clean panels deliver steady and reliable energy output. Dirt and debris can cause sudden drops in performance, especially during peak sunlight hours. By keeping panels clean, you avoid these fluctuations and maintain stable energy production throughout the day and across seasons. When Is Solar Panel Cleaning Worth It? Is Solar Panel Cleaning Worth It? The answer depends on your location and environment. Cleaning is worth it in these situations: Dusty or Dry Areas Places with low rainfall and high dust levels need more frequent cleaning. Dust settles quickly on panels and stays there for long periods without rain to wash it away. This buildup blocks sunlight and reduces efficiency, making regular cleaning more important. Near Roads or Construction Panels installed near busy roads or construction sites collect dirt faster. Air pollution, vehicle exhaust, and fine debris settle on the surface daily. Over time, this layer becomes thick enough to impact performance, so cleaning is needed more often. Bird Activity Bird droppings are one of the most common causes of blocked panels. They do not wash away easily and can harden on the surface. If not cleaned quickly, they can create stubborn stains and reduce sunlight exposure in specific spots. Flat or Low-Angle Panels Panels that are installed at a low angle tend to hold more dust and water. Unlike tilted panels, they do not allow debris to slide off easily. This leads to faster buildup and increases the need for regular cleaning. Commercial Systems Large solar systems produce more energy, so even a small drop in efficiency can mean significant losses. Regular cleaning helps maintain consistent output and protects long-term performance, making it more valuable for commercial setups. If your panels look dirty or your energy output drops, cleaning is usually worth it. How Often Should You Clean Solar Panels? Cleaning frequency depends on your environment and system setup. General Recommendation Every 3 to 6 months for most homes More often in dusty regions Less often in rainy climates Signs Your Panels Need Cleaning Visible dust or stains Sudden drop in energy output Bird droppings or leaves If you are looking for expert help, services like best solar panel cleaning tracy ca offered by VJ Pressure Washing can ensure safe and effective cleaning. Regular checks are part of smart solar panel maintenance and help maintain peak performance. DIY vs Professional Solar Panel Cleaning DIY Cleaning Many homeowners choose to clean solar panels themselves because it costs less and works well for small systems. It can be a good option if the panels are easy to reach and only lightly dirty. However, there are some risks. Cleaning panels on a roof can be unsafe, and using the wrong tools may scratch the surface. DIY cleaning also may not remove deep or stubborn dirt. It is best for simple jobs where safety is not a concern. Professional Cleaning Hiring experts is often safer and more effective for cleaning solar panels. Professionals use the right tools and proper techniques, which helps avoid damage and gives better results.
Is Pressure Washing Driveway Illegal? 5 Laws You Must Know
Most homeowners don’t think twice before grabbing a pressure washer and blasting their driveway. It looks harmless. Water, dirt, done. But in many cities across the US, that runoff water carries oil, chemicals, and debris straight into storm drains. And that can get you in real trouble. So, is pressure washing driveway illegal? The short answer is: it depends on where you live and how you handle the wastewater. In this guide, we break down the actual laws, what can get you fined, and how to stay on the right side of the rules. Is Pressure Washing Your Driveway Illegal? Pressure washing your driveway is not automatically illegal. The act itself is perfectly legal in most places. The problem is what happens to the water afterward. In the US, the Clean Water Act (CWA) is the main federal law that governs water pollution. Under this law, allowing contaminated runoff to flow into storm drains or waterways is illegal. Local municipalities enforce this at the city and county level. So if you pressure wash your driveway and dirty water flows into the street gutter, you may be violating local pressure washing rules and regulations without even knowing it. The key factors that determine legality: What’s on your driveway: Oil, paint, pesticides, or chemical stains make the runoff hazardous. Where the water goes: Into a lawn or grass is usually fine. Into a storm drain is often illegal. Your city’s specific rules: Some cities ban all driveway washing runoff from entering the street. Whether you use cleaning chemicals: Detergents or degreasers make runoff more regulated. Why Pressure Washing Can Be Illegal in Some Areas The reason comes down to storm drains. Most people don’t realize that storm drains do not connect to water treatment plants. They flow directly into local rivers, lakes, and the ocean. Untreated. When you pressure wash a driveway, that water picks up motor oil, heavy metals from brake dust, fertilizer residue, and soap. All of that goes straight into the storm drain if you don’t control it. driveway power washing Tracy CA services should always hire a licensed contractor like VJ Pressure Washing who knows local runoff regulations and handles wastewater containment properly. Violating these rules isn’t just a fine risk. Repeated violations can trigger inspections, citations from the local water authority, and in extreme cases, civil liability if contamination is traced back to your property. What Happens to the Dirty Water? (The Real Issue) This is the heart of the whole legal question. Where does the water go? Here’s what happens when you pressure wash a typical driveway: Water hits the concrete surface at high pressure. It loosens dirt, oil, algae, and any chemicals on the surface. That mix of water and contaminants flows across the driveway. It enters the street, flows down the gutter, and drops into the storm drain. From there, it travels untreated directly into a local waterway. Most homeowners never think past step one. But environmental agencies track water quality at the point where it enters waterways. If your neighborhood’s water quality drops and they trace it back to residential washing activity, enforcement follows. The EPA classifies motor oil, pesticides, and many cleaning agents as hazardous pollutants. Even small amounts from driveways add up across an entire city. When Is Pressure Washing a Driveway Legal? Pressure washing your driveway is completely legal when you manage the wastewater properly. Here’s when you’re in the clear: Runoff flows onto grass or soil: Natural ground filters out most contaminants. Many cities explicitly allow this. You collect and dispose of wastewater properly: Using a wet/dry vacuum, containment berm, or squeegee to collect water and dispose of it in the sanitary sewer (with permission) is legal in most areas. Your driveway has no hazardous materials: A driveway with no oil stains, no chemicals, and no paint residue produces relatively clean runoff. You follow local permit rules: Some cities require a simple permit for commercial washing. Homeowners often don’t need one, but it’s worth checking. You use biodegradable cleaners: Some cities are more lenient if you use environmentally safe cleaning products. The safest approach is to assume your city has strict rules and plan your wash accordingly. That way you’re always covered. Local Laws and Regulations You Should Check There’s no single national law that covers every driveway wash in the US. Laws vary by state, city, and county. Here’s where to look: Federal Level The Clean Water Act (Section 402) prohibits discharging pollutants into navigable waters. The EPA’s National Pollutant Discharge Elimination System (NPDES) permits govern stormwater runoff. Violations can carry civil penalties of up to $25,000 per day. State Level Most states have their own version of the Clean Water Act. California’s Porter-Cologne Water Quality Control Act is one of the strictest in the country. Texas, Florida, and New York also have specific state rules about stormwater discharge. City and County Level This is where most enforcement actually happens. Cities like Los Angeles, Seattle, and Portland have specific municipal codes that address residential pressure washing runoff. Check your city’s stormwater management or public works website. You can also call your local public works or environmental services department. Most will tell you exactly what’s allowed and what isn’t for your specific neighborhood. HOA Rules If you live in a neighborhood with a homeowners association, there may be additional rules about when and how you can wash your driveway. Some HOAs require professional contractors for exterior cleaning work. Fines and Penalties for Illegal Pressure Washing Yes, people do get fined. Here’s a realistic picture of what violations can cost: First-time warning: Many cities start with a written warning for minor violations. No fine, but it’s on record. Civil fines: Range from $100 to $1,000 for