
How to Prepare for House Washing? 7 Steps That Actually Work
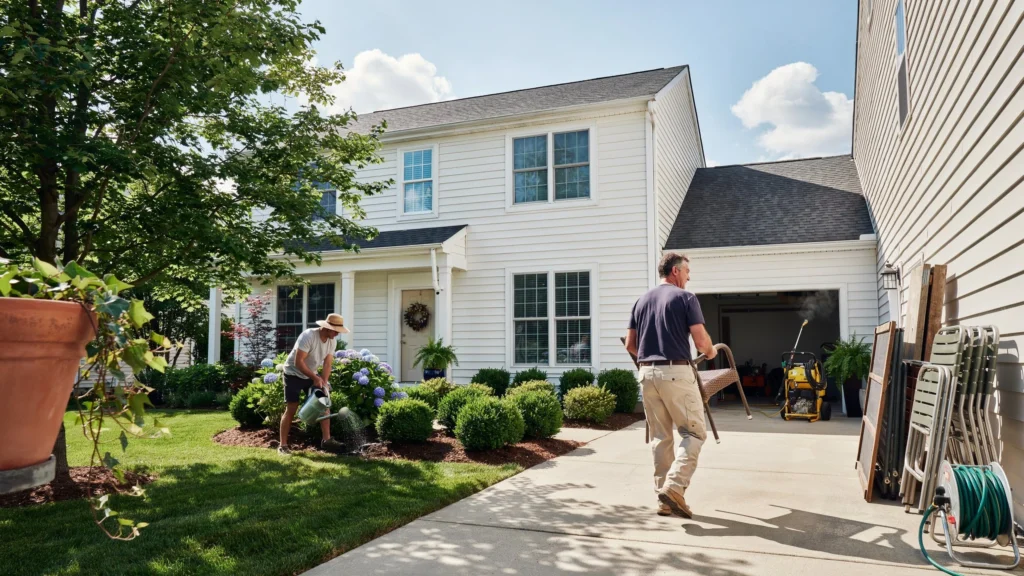
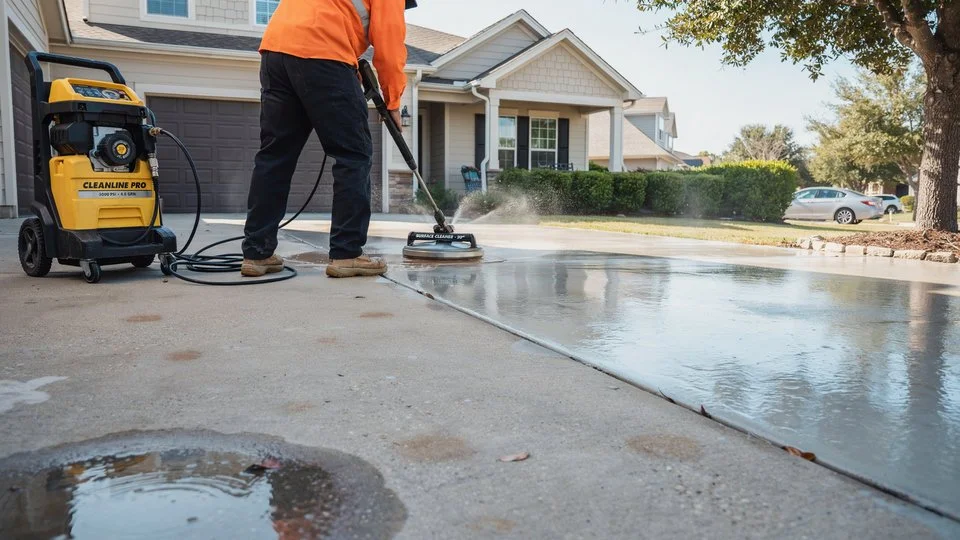
Your home’s exterior takes a beating all year. Dirt, algae, mold, and grime build up fast. Most homeowners skip preparation and then wonder why results fall short. Good prep is what separates a clean house from a truly restored one. So, how to prepare for house washing? Start at least a day before. Move outdoor furniture, cover plants, close all windows and doors, and disconnect electrical items near the wash zone. These steps protect your property and help the cleaning crew work faster and safer. What Is House Washing? House washing is the professional cleaning of a home’s exterior surfaces. It removes dirt, algae, mold, mildew, and stains from siding, brick, stucco, and wood. There are two main methods: Soft washing uses low water pressure combined with a cleaning solution. It is ideal for painted wood, vinyl siding, and older surfaces. The chemicals do the heavy lifting, not the water force. Pressure washing uses high-pressure water. It works well on concrete, driveways, brick, and tougher surfaces that can handle the force. Many professionals use both methods together depending on the surface type. The right choice protects your home while getting it fully clean. Why Preparation Matters Before House Washing Skipping prep is one of the biggest mistakes homeowners make. Here is why preparation matters: It protects your property. High-pressure water can push into gaps, damage plants, or soak outdoor furniture. A few minutes of prep prevents hours of cleanup. It speeds up the job. When the area is clear, technicians can move efficiently. No stopping to shift chairs or cover exposed items mid-job. It gives better results. Water and cleaning solutions need a clear path to work. Obstacles block spray angles and create uneven cleaning. It keeps your family safe. Cleaning chemicals and high-pressure water are not safe around children, pets, or uncovered electronics. If you are looking for trusted house washing services Tracy CA, VJ Pressure Washing handles residential properties with care and expertise. Their team walks you through what to expect before they ever start a machine. Proper preparation is something they emphasize with every client. Understanding the residential pressure washing preparation process also helps you communicate clearly with your service provider. You know what they need, and they can do their best work. Steps to Prepare for House Washing Here is a complete exterior home cleaning checklist to follow before your appointment. 1. Clear the Area Around Your Home Walk the perimeter of your house. Move everything that does not need to be there. This includes: Outdoor furniture (chairs, tables, loungers) Potted plants and garden decor Doormats and outdoor rugs Kids’ toys, bikes, and sports equipment Garden hoses and tools Move these items at least 10 feet from the house. This gives the technician full access without tripping hazards or accidental damage. 2. Protect Plants and Landscaping Cleaning solutions can damage grass, shrubs, and flowers. Even soft wash chemicals are strong enough to harm delicate plants. Here is what to do: Water your plants and grass thoroughly the morning of the wash. Saturated soil dilutes runoff chemicals. Cover sensitive plants with plastic sheeting or tarps. Keep garden beds wet during and right after the wash. A good professional will also rinse surrounding vegetation as part of their soft wash house preparation process. But you should not rely on that alone. 3. Close All Windows and Doors Walk through every room of your house. Make sure every window is fully closed and latched. Check sliding glass doors too. Pressure washing spray travels fast and far. Water getting into your home can damage floors, walls, and furniture. It can also create moisture problems and mold inside your walls. Check attic vents, dryer vents, and crawl space openings. These are easy to miss but can allow water entry. 4. Cover Outdoor Electrical Outlets and Fixtures Water and electricity are a dangerous mix. Before the wash team arrives: Cover outdoor electrical outlets with waterproof covers or tape plastic sheeting over them Turn off and cover outdoor light fixtures Unplug any outdoor string lights, speakers, or cameras Let your technician know where these items are located. This is a key part of residential pressure washing preparation that many homeowners overlook. 5. Move or Cover HVAC Units and Vents Your air conditioning unit has electrical components and metal fins that can be damaged by direct pressure washing. If the unit is near an exterior wall being washed: Turn it off before the job starts Cover it with a tarp or plastic sheet Tell the technician its location The same applies to gas meters and electrical panels on exterior walls. 6. Secure Your Pets and Inform Your Family The noise from pressure washing equipment is loud. It can scare pets and cause them to bolt. Keep dogs and cats inside during the entire job. Also let family members know the schedule. Children should stay inside and away from windows during washing. The process involves chemicals and high-pressure water that are not safe to be near without protection. 7. Do a Final Walkthrough With Your Technician Before work begins, walk the property with the technician. Point out: Areas with stubborn stains you want focused attention on Loose siding, cracked caulking, or damaged surfaces Items you were unable to move Fragile landscaping or features This walkthrough is important. It helps the team plan their approach and ensures nothing gets missed or damaged accidentally. Common Mistakes to Avoid Even with good intentions, homeowners make prep errors. Watch out for these: Leaving windows cracked. A small gap is enough for water to pour in. Check every window twice. Forgetting second-floor items. Items on balconies or decks get hit by overspray. Bring them inside or cover them. Not watering plants beforehand. Dry soil absorbs chemical runoff directly into the roots. Wet soil buffers the impact. Parking cars too close. Move vehicles to the street or a safe distance from the house. Overspray can leave water spots on paint and glass. Assuming the crew handles everything. Professionals handle the
Can You Pressure Wash Tile Grout?
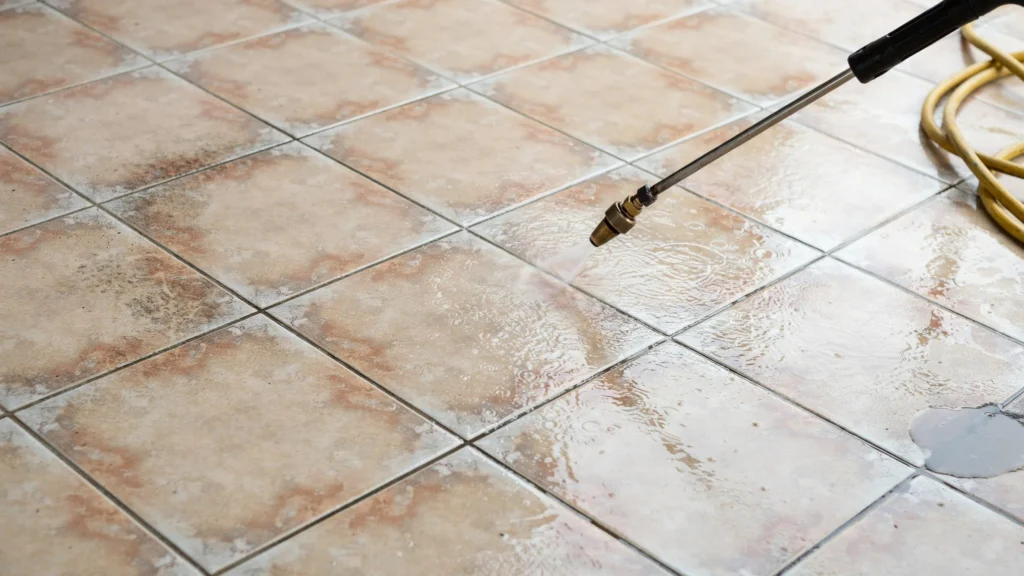
The resilient beauty and easy upkeep of tile floors and walls have made them staples in homes and business buildings. However, it is also true that tiles collect dust and dirt (even the clean and polished ones) due to the existence of lines of grout between them. That’s why so many homeowners are asking, “Is it OK to pressure wash tile grout?” So, the verdict is yes, you can pressure wash tile grout in some cases. With the right equipment, proper technique, and a few safety precautions, you can clean tile and grout without causing damage. Follow these tips to restore your floors to their original appearance with VJ Pressure Washing. Understanding Tile Grout Grout is a filler-type material that is used in the construction industry to fill the gaps between tiles. It secures the tiles and prevents water from running beneath them. Most grout is porous, and dirt, grease, mold, mildew, and other contaminants can get embedded in it over time. And as grout is also more porous than tile, it gets dirty more quickly. Even brooms and mops aren’t enough to clean up that sticky dirt. No wonder so many guys think the best solution is to pressure wash tile grout. Can You Pressure Wash Tile Grout? Yes, having the grout pressure washed is an option, and it’s great for exterior use on: Patios Walkways Pool Decks Outdoor Kitchenettes Garage Floors Entrances Pressure washers use jets of high-pressure water to rapidly remove dirt and grime from the surface of materials, such as grout. When used correctly, they’ll bring the colour of your grout back to life and remove tough stains. Having said that, there is a pressure-washing grout no-no. Water pressure too high can damage aged, cracked, or flaking grout. Check your grout first before performing any work to see if it’s in good shape. How to Clean Grout with a Pressure Washer Many homeowners ask Can you use a pressure washer to clean grout. Instructions along the lines of this could be helpful in achieving the best results. Step 1: Check the Surface Before cleaning the grout lines, inspect the grout lines. Look for: Cracks Missing grout Loose tiles Water damage Before you power wash, fix any damage. Step 2: Dust and Dirt Loosely Be sure to dust or vacuum the tile well. Step 3: Apply a Cleaning Solution A grout-safe cleaner will help break down stains and contaminants. Allow the cleaner to dwell for a few minutes as per the product instructions. Step 4: Set the Correct Pressure For the majority of grout-cleaning jobs: 1200 to 2000 PSI is usually enough. Stay away from very high pressures if not guided by the experts. Beginning with a lower pressure reduces your risk of harm. Step 5: Select the Right Nozzle A wide spray nozzle is usually better for grout. Some common advice is: 25-degree nozzle 40-degree nozzle Keep away from small nozzles that focus too much power on one spot. Step 6: Keep Away Hold the spray wand a few inches away from the surface. “If you spin too close, you can damage the tile and grout.” Step 7: Clean Organized Work in small batches. Spray evenly along the lines of grout, but do not stay too long in one place. Step 8: Rinse Well After cleaning, wash away all remaining dirt and solution. Step 9: Machine Dry Let the surface dry for evaluation. The Best Way to Clean Tile Grout Many homeowners ask about how to clean grout in tile. There’s no question that pressure washing can work wonders, but what is the best method will vary with the circumstance. Indoor Tile Grout Cleansers For indoor use only: Steam Cleaning Grout brushes Mild cleaning solutions These treatments are generally very effective and will not make things too wet. Grout for Outdoor Tile In outdoor applications, tile grout is often subjected to pressure washing, which is among the most effective tile grout cleaning solutions, as it allows you to cover large areas and remove deeply ingrained grime. Combination Approach Many professionals recommend: Applying a cleaning solution. Let it dwell. Power washing the grout. Follow with the grout sealer. This method delivers deep cleaning and durable protection. Grout Cleaning Pressure Washer Tips This professional grout cleaning pressure washer advice can help you get better results. Learn more about our professional house washing Tracy ca services for a cleaner, better-looking property. 1. Start Low and Titrate Up Begin with low pressure and increase if needed. 2. Test a Small Area First Before cleaning the whole area, do a rinse test on a small, hidden area. 3. Keep a Consistent Motion Don’t Concentrate Water in One Place. 4. Clean Along the Lines Cleaning “with the grain” (following grout lines) is more effective too. It is cleaner! 5. Use the Right Cleaning Solutions Professional-grade grout cleaners will make a huge difference in the cleaning results. 6. Wear Protective Equipment Safety glasses, gloves, and rubber-soled shoes provide some protection against mishaps. Conclusion So can you pressure clean tile grout? Usually the answer is yes. Pressure washing can be used to clean grout lines (on any surface really, especially on outdoor tiled areas); it can be extremely useful for removing dirt, stains, mold, and grime from surfaces. How to Clean Grout With a Pressure Washer: Using the right pressure and technique can make dirty grout look like new. For safe, professional results, contact us today for expert grout and tile cleaning services. FAQs Can you pressure wash indoor tile grout? It is not recommended for most indoor surfaces. Indoor grout is usually thinner and more delicate. The water can seep under tiles and cause water damage to the subfloor. Stick to steam cleaning, grout brushes, or mild cleaning solutions for indoor tile grout. What PSI is safe for pressure washing grout? 1200 to 2000 PSI is safe for most grout-cleaning jobs. Starting at the lower end and increasing only if needed reduces the risk of damaging the grout. Avoid going above 2000
Can I Clean My Driveway With Bleach? 5 Things You Must Know First
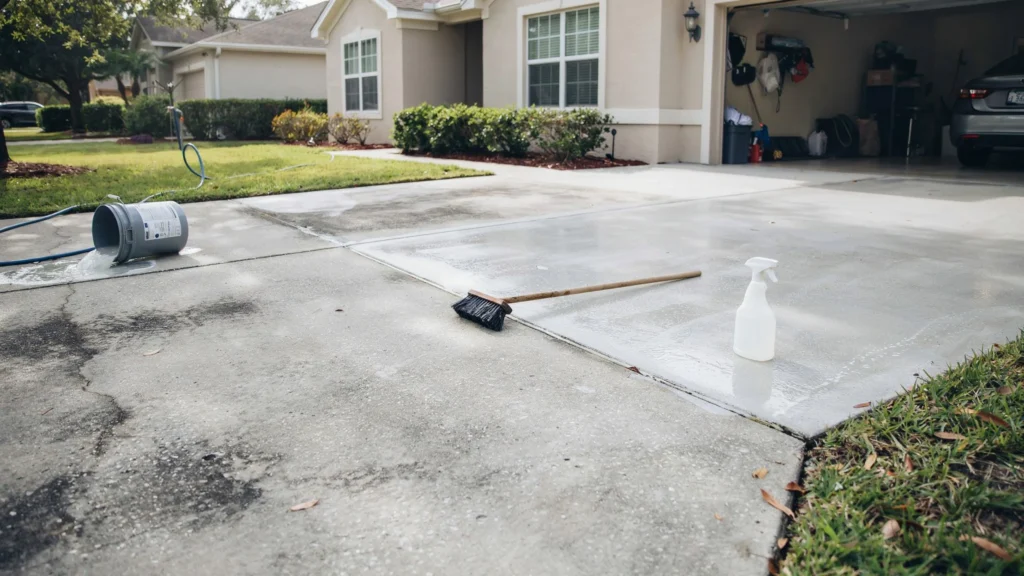
Your driveway collects dirt, mold, algae, and stains over time. It starts looking dull, green, or spotted. Many homeowners reach for bleach because it’s cheap, easy to find, and strong. And yes, it works on certain stains fast. So, can I clean my driveway with bleach? Yes, you can. But it’s not always the best choice. Bleach removes mold, mildew, and algae well. However, it can damage plants, harm pets, and even discolor some surfaces if used wrong. This guide covers everything you need to know before you grab that bottle. What Does Bleach Do on a Driveway? Bleach is a powerful disinfectant. The active ingredient is sodium hypochlorite. When you apply it to a driveway, it breaks down organic matter like mold, algae, and mildew at the root level. On concrete, bleach penetrates the pores. It kills the organisms causing those dark green or black stains. It also brightens the concrete surface and removes light discoloration. But bleach is a chemical. It reacts with different materials in different ways. On porous concrete, it can leave white residue if not rinsed well. On colored or stamped concrete, it may cause fading. On asphalt, bleach can break down the binder over time, leading to cracks. The bottom line: Bleach is effective on organic stains. It’s not a universal driveway cleaner. Benefits of Cleaning a Driveway With Bleach Here’s why many homeowners choose bleach for driveway cleaning: 1. It Kills Mold and Mildew Fast Bleach doesn’t just clean the surface. It kills the spores beneath. That means mold takes longer to return compared to just scrubbing with water. 2. It’s Affordable A bottle of household bleach costs under $5. You likely already have it at home. For concrete cleaning with bleach, the cost is much lower than hiring a service for minor organic staining. 3. It Brightens Concrete Bleach has mild whitening properties. It can restore the original color of concrete driveways that have gone dull from algae growth. 4. It Works Without a Pressure Washer You don’t need special equipment. A garden sprayer, stiff brush, and garden hose are enough for basic bleach driveway cleaning. 5. It Removes Algae in Shady Spots Shaded driveways grow algae fast. Bleach is one of the most effective ways to treat this without repeated scrubbing. Potential Risks of Using Bleach on a Driveway Bleach has real downsides. Before you start, understand these risks. 1. It Can Kill Your Plants Bleach runoff is toxic to grass, shrubs, and flowers. If your driveway is near a garden or lawn, the runoff can cause yellowing or plant death. 2. It Can Harm Pets and Children Bleach residue stays on surfaces. Pets that walk on it and then lick their paws can get sick. Always rinse the area well and keep kids and animals away until it’s dry. 3. It Can Damage Colored Concrete If your driveway is stamped or colored, bleach may strip the pigment. Always test a small, hidden area first. 4. It Creates Toxic Fumes When Mixed Never mix bleach with ammonia, vinegar, or other cleaners. The reaction creates chlorine gas, which is dangerous to breathe. 5. It’s Not Safe for Asphalt Driveways Bleach degrades asphalt. It breaks down the oils that hold asphalt together. For asphalt, skip bleach and use a dedicated asphalt cleaner instead. 6. It Doesn’t Remove Oil Stains Bleach is an oxidizer, not a degreaser. It won’t touch motor oil, grease, or fuel stains. You need a degreaser or poultice for those. How to Clean a Driveway With Bleach Safely Follow these steps to clean your driveway safely and effectively. What you’ll need: Household bleach (sodium hypochlorite, 5–6%) Water Garden sprayer or bucket Stiff-bristle brush Garden hose Rubber gloves and eye protection Old clothes (bleach stains fabric) Step 1: Clear the Area Remove cars, toys, potted plants, and anything else from the driveway. Rinse nearby plants with water first to protect them from runoff. Step 2: Mix the Bleach Solution For most driveway stains, mix one part bleach with three parts water. For heavy mold or mildew, you can use a stronger ratio of 1:1. Don’t use bleach undiluted. Step 3: Wet the Surface First Lightly rinse the driveway with water. This helps the bleach spread evenly and prevents it from soaking in too fast. Step 4: Apply the Solution Use a garden sprayer or pour from a bucket. Cover the stained areas. Let it sit for 10 to 15 minutes. Don’t let it dry on the surface. Step 5: Scrub With a Stiff Brush Work the solution into the concrete using a stiff-bristle brush. Focus on areas with visible mold, algae, or discoloration. Step 6: Rinse Thoroughly Rinse the entire driveway with a garden hose. Use plenty of water. Rinse toward a drain, not toward your lawn or garden. Step 7: Repeat if Needed For stubborn stains, let the driveway dry and repeat the process once more. Safety note: Always wear gloves and eye protection. Work in a well-ventilated area. Don’t spray on windy days. What Bleach Can and Cannot Remove Not every driveway stain responds to bleach. Here’s a quick breakdown. Stain Type Bleach Effective? Mold and mildew Yes Algae and green growth Yes Dirt and general grime Partially Oil and grease No Rust stains No Paint spills Partially Tire marks No Tree sap No For oil, grease, and tire marks, you need a degreaser or alkaline cleaner. For rust stains, use an oxalic acid-based product. Bleach alone won’t fix those. Alternatives to Bleach for Driveway Cleaning If bleach isn’t right for your situation, here are better options. 1. Oxygen Bleach (Sodium Percarbonate) This is a safer alternative to chlorine bleach. It’s gentler on plants and pets. It still removes mold and algae but breaks down into water and oxygen. Brands like OxiClean work well for concrete cleaning. 2. Baking Soda and Dish Soap For light stains, a paste of baking soda and dish soap scrubbed into the surface works without any harsh chemicals. 3. White Vinegar Vinegar is
How Do You Clean Concrete With Water? 7 Proven Steps That Actually Work
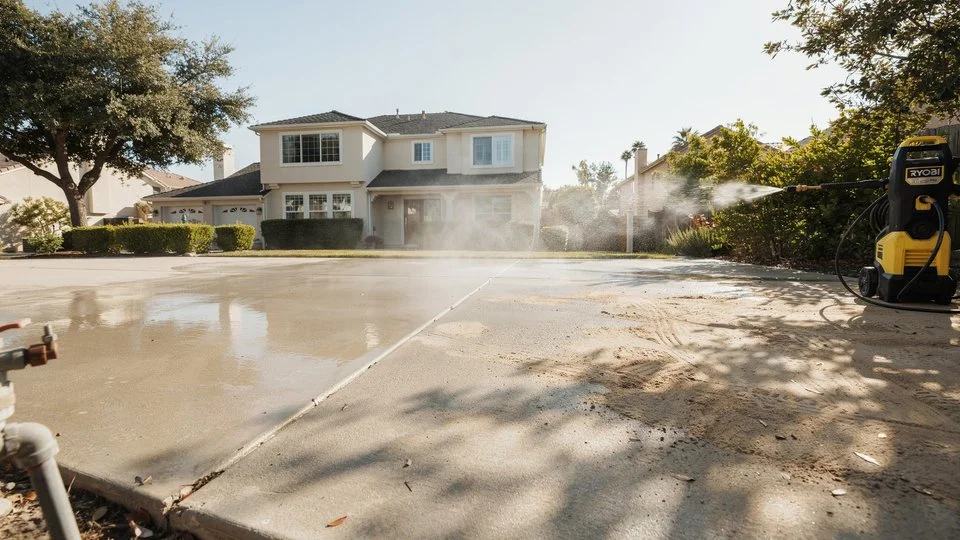
Dirty concrete is more than an eyesore. Oil stains, algae, and grime break down the surface over time and make it slippery. The good news? You don’t always need harsh chemicals to get it clean. So, how do you clean concrete with water? You use water pressure, the right tools, and a smart technique. A standard garden hose handles light dirt. A pressure washer handles the tough stuff. This guide walks you through everything, step by step. Why Concrete Needs Regular Cleaning Concrete looks tough, but it’s actually porous. That means it absorbs everything: oil, grease, mold spores, and mineral deposits. Here’s what happens when you skip cleaning: Stains set permanently. The longer oil or rust sits, the deeper it bonds. Mold and algae grow. They break down the surface and create slip hazards. Cracks form faster. Trapped debris holds moisture that freezes and expands. Curb appeal drops. A stained driveway lowers the first impression of your home. Regular cleaning protects your investment. It also keeps your surfaces safe for kids, pets, and guests. Can Water Alone Clean Concrete? Yes, water alone can clean concrete, but only for light surface dirt. Here’s the honest answer: plain water from a garden hose won’t remove oil stains, rust, or deep grime. You need pressure behind the water to lift embedded dirt from the pores. Cleaning Need Water Only? Light dust and debris Yes Mud and tracked-in dirt Yes, with pressure Oil and grease stains No, need degreaser Mold and mildew No, need cleaner + pressure Old rust stains No For most jobs, water-based concrete cleaning methods work best when you combine water with the right PSI (pounds per square inch) of pressure. Tools Needed to Clean Concrete With Water Before you start, gather the right tools. Using the wrong equipment wastes time and can damage the surface. Basic tools for light cleaning: Garden hose with a high-pressure nozzle Stiff-bristle push broom Bucket Tools for deep cleaning: Pressure washer (1,500–3,000 PSI for most residential concrete) Rotating surface cleaner attachment (great for driveways) Safety glasses and closed-toe shoes Concrete-safe degreaser (for oil stains only) A quick note on pressure washers: Concrete cleaning with a pressure washer gives you the best results. A 25-degree nozzle tip is ideal for general cleaning. A 0-degree tip concentrates pressure into a pinpoint stream and can etch or chip concrete if you’re not careful. Step-by-Step Guide to Cleaning Concrete With Water This is how you clean concrete properly. Follow each step and you’ll get a noticeably cleaner surface without causing damage. Step 1: Clear the Area Remove furniture, potted plants, cars, and anything else sitting on the concrete. You want a clean, open surface to work on. Sweep away loose debris first. Leaves, dirt, and pebbles will just clog your drain or turn into mud when wet. Step 2: Pre-Treat Stains If you have oil or grease spots, apply a concrete degreaser before washing. Let it sit for 5 to 10 minutes. For mold or mildew, a diluted mix of white vinegar and water works well on light growth. Pre-treating makes the water-based concrete cleaning method far more effective. Step 3: Wet the Entire Surface Use your garden hose to rinse the full concrete area. This loosens surface dirt and prevents it from spreading when you apply pressure. Work from the highest point toward the drain or edge. Water should flow away from your home’s foundation. Step 4: Set Up Your Pressure Washer Fill the pressure washer with water. Attach the 25-degree nozzle for broad surface cleaning. For a concrete driveway, use a surface cleaner attachment if you have one. It prevents the streaking that a single wand can leave behind. Start the pressure washer and test it on a small corner. Keep the nozzle 6 to 12 inches from the surface. Step 5: Wash in Overlapping Passes This is the key to knowing how to wash concrete surfaces without leaving streaks. Move the wand in slow, overlapping strokes. Think of it like mowing a lawn. Each pass should overlap the last by about 2 inches. Work in sections. Don’t jump around. Methodical cleaning gets the best results. Step 6: Rinse Thoroughly After washing each section, rinse with clean water. Push the dirty water away from the surface toward a drain. This step removes the loosened grime and any cleaning solution you applied earlier. Step 7: Let It Dry Completely Give the concrete at least 24 to 48 hours to dry before walking on it or parking a vehicle on it. Wet concrete stays slippery and can attract new dirt quickly. If you’re planning to seal the concrete, wait at least 72 hours. Best Practices for Cleaning Concrete With Water These habits separate a decent clean from a great one. Always work with the slope. Water should drain away from structures, not toward them. Don’t use too much pressure. High PSI can etch concrete, especially if it’s older or already cracked. For most driveways, 2,000 to 2,500 PSI is plenty. Use a surface cleaner for large areas. It’s faster and gives an even clean without the zebra-stripe marks a wand leaves. Wear protective gear. Safety glasses protect your eyes from debris. The water spray coming off concrete carries dirt, bacteria, and mold spores. Test before full application. If you’re using any cleaning product, test it on a hidden corner first. The best way to clean a concrete driveway combines the right PSI, a surface cleaner attachment, and a pre-treatment for any stains. It takes about 30 to 60 minutes for a standard two-car driveway. Common Mistakes to Avoid Even experienced homeowners make these errors. Avoid them and you’ll get better results every time. Using too high of a PSI. More pressure isn’t always better. It can damage the concrete surface, especially around cracks or older slabs. Skipping the pre-sweep. Wet leaves and debris turn into a paste that clogs drains and makes cleaning harder. Holding the nozzle too close. Staying at least 6 inches away keeps you from
How to Speed Up Pressure Washing?
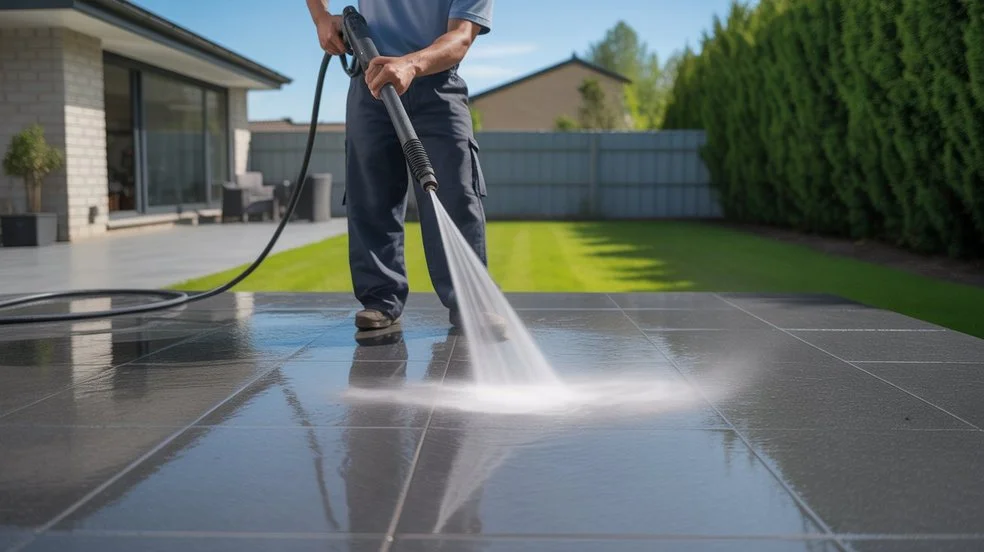
Pressure washing is among the fastest ways to clean outdoor areas. Driveway cleaning, patio cleaning, deck cleaning, sidewalk cleaning, fence cleaning and house exterior cleaning all benefit from enhanced cleaning speed, which can result in time savings, labour reduction and increased cleaning productivity. Rinse, and it is unlikely you’ll ever again hear the question “How do I make pressure washing go faster?” asked by a homeowner or a professional cleaner. And it’s not just about buying a bigger machine. Faster pressure washing is good preparation, good equipment, good technique and good workflow. Knowing tried-and-true Pressure Washing Efficiency Tips, How to Pressure Wash Faster, Professional Pressure Washing Techniques, and Time-Saving Pressure Washing Methods will allow you to finish Cleaning projects in less time and still have the best results. Understanding Pressure Washing Efficiency What is Pressure Washing Efficiency? Efficient cleaning is a combination of good cleaning technique and good ergonomics, resulting in less wastage of movement, and less water, fuel/electricity and time consumed, in addition to better productivity. Strong pressure does not necessarily mean faster cleaning; it is what many people think. However, experts are aware that efficiency is a matter of many factors, including choice of equipment, cleaning method, type of nozzle and planning. For homeowners looking for reliable results, trusted house pressure washing companies in Tracy, CA understand that a smarter approach with the right equipment, the right technique and the right preparation always delivers better outcomes than simply turning up the pressure. With effective pressure washing efficiency tips, you can clean more square feet in less time with no loss of quality. Why Efficiency Matters in Pressure Washing The following are the advantages of increasing productivity: Quicker Completion of Jobs Fatigue reduction in the workforce Cost savings on operations More consistent cleaning results Higher customer satisfaction Increased contractor profitability Efficient techniques, whether cleaning a small patio or an entire building, allow you to keep your energy for more important things. Pressure Washing Efficiency Tips for Better Results A vital Pressure Washing Efficiency Tip is you have to prepare. Too many wash jobs take longer simply because surfaces haven’t been properly prepared before washing. 1. First, Clean the Area Remove: Leaves Branches Outdoor furniture Toys Decorations Weeding around obstacles is slower and messier, with the possibility that you’ll have to make multiple passes over the same spot. 2. Keep Debris out of the Drain Sweeping dirt and debris ahead of pressure washing eliminates the need for excessive rinsing and allows the equipment to work on deeper cleaning. 3. Examine the Surface Check the following before you begin: inspect the site for: Cracks Loose materials Stubborn stains Mold expansion Knowing in advance where the trouble areas are going to be makes for a smoother process, and you’re not surprised as you’re cleaning. How to Pressure Wash Faster People often want to know how to Pressure Wash Faster without sacrificing the quality of pressure washing. One of the easiest answers is having the right tools or equipment. Select the Right Pressure Washer There are different models to suit different requirements. Light-duty machines: Designed for patios and garden furniture Medium-duty machines: Just the thing for cleaning at home. Heavy-duty machines: Perfect for large driveways and commercial projects The right tools for the job or tools suited to the task can also make you clean faster, and clean much more effectively, too! Focus on Water Flow PSI matters, but you also need to consider the water flow. Higher GPM allows: Faster rinsing Greater coverage More efficient cleaning A lot of professional cleaners put more emphasis on the water flow, as it can sometimes be the biggest difference in turnaround time. Professional Pressure Washing Techniques Special techniques are required for big cleaning jobs. At VJ Pressure Washing, we use proven professional methods to deliver faster, cleaner and more efficient results on every job. 1. Work from Top to Bottom Start cleaning at the top. Including the benefits of: Gravity helps clean Dirty water drains down Less need to re-clean the same area This technique is often employed for siding, walls, and exterior areas. 2. Keep the Motion Consistent Smooth editing motions will help avoid streaks and uneven cleaning. Stopping frequently: Wastes time Creates inconsistent results Is additional work Constant motion is the best Professional Pressure Washing Method to use to get even results. 3. Use Overlapping Passes Minimal overlap of your passes will ensure you get full coverage with very few missed spots. This decreases the number of re-visits to the already cleaned areas. 4. Use Surface Cleaners on Large Surfaces Among the greatest Time-Saving Pressure Washing Methods are using surface cleaner attachments. Surface Cleaners are round, spinning bars that have jet nozzles which spin underneath the surface cleaner. Advantages of this are: Cleaning is faster Even look Less operator fatigue Reduced streaking These accessories work particularly well on the following: Driveways Sidewalks Patios Garage Floors A surface cleaner can save you a lot of time when cleaning, when compared to a regular spray wand. Time-Saving Pressure Washing Methods House exteriors should be cleaned differently. 1. Use Soft Washing Soft washing can be faster for cleaning since the detergents do most of the work, rather than having to scrub. 2. Apply Soap with Dedicated Nozzles The detergent can be sprayed evenly on the wide areas by using soap nozzles. 3. Make Sure to Allow Enough Dwell Time You did the right thing by allowing the detergent and water to rest for a while to soften the dirt before you rinsed. This minimizes scrubbing. These are very effective Time-Saving Pressure Washing Techniques for siding and exterior walls. Conclusion If you are wondering how to make pressure washing faster, the response lies in having the proper equipment, doing some prep work and using some good cleaning methods. Achieve faster outcomes by working smarter, rather than harder. Employing practical pressure washing efficiency tips such as pre-soaking stains, making use of surface cleaners, picking the right nozzles and pressure washing tools and much more will allow you
Can You Pressure Wash Granite?
Granite is one of the toughest and most beautiful natural stones on the market that can be used for residential and commercial needs. It is also used for countertops, patios, walkways, outdoor kitchens, pool decks, monuments, and landscaping products. Because of its strength and durability, a lot of homeowners who own granite countertops are compelled to ask, Can You Pressure Wash Granite? “Can you pressure wash granite?” The short answer is yes, but granite cannot just be pressure washed. But you need to do it right, or you’re going to be harming the stone, the grout lines, the sealants, maybe even the surfaces around it. Although granite is far tougher than many other stones found in nature, you are going to have problems sooner or later if you clean it improperly. Can You Pressure Wash Granite Safely? A lot of homeowners ask, “Is it safe to pressure wash granite?” A general answer is yes. Pressure washing is not simply holding a spray gun that shoots water under high pressure. The goal is to clean the stone, and only the stone, on the stone and on any perimeter materials. For professional results, consider our house pressure washing service tracy ca. Factors That Affect Safety Condition of Surface Good quality granite generally withstands pressure washing better than broken or worn surfaces. Sealed vs. Unsealed Granite A sealed granite surface has an extra layer of protection from water and stains. Unsealed granite may absorb moisture, resulting in discoloration. Integrity of Joints and Grout Exterior granite installations typically involve joints or grout lines which may be forced apart by too much pressure. Equipment Settings Appropriate PSI levels minimize the cleaning hazards. Awareness of these variables does allow us, to a certain extent, to answer the question: Can you pressure wash granite safely? And in most cases, yes – you can, when using proper methods. Granite Cleaning Pressure Washer Tips Adhering to the correct granite cleaning pressure washer guidelines enables users to have a greater cleaning effect while maintaining the safety of the stone. Test a very small area first. Always start by testing on an inconspicuous area. This lets you assess: pressure effectiveness, surface response, and potential discoloration. Use a Wide-Angle Nozzle A wide-angle spray applies pressure more uniformly. Typical options are: 25-degree nozzle and 40-degree nozzle. The risk of focused damage is minimized with these options. Keep a Proper Distance: The nozzle is too close which the pressure impact is too strong. A distance of approximately 12 to 24 inches often gives safe cleaning performance. Use a consistent motion: Don’t drain the water in one spot. Keep the spray moving uniformly on the surface. Clean from Top to Bottom: For vertical granite walls: Start at the top. Work downward. This stops muddy water from running down and across windows you’ve already cleaned. Stay away from the damaged areas: Fissured granite can permit water penetration. Examine surfaces before starting cleaning. Use appropriate cleaning supplies: For stubborn stains, granite-safe cleaners may help you achieve better results without the need to press harder. Following these suggestions to clean granite with a pressure washer, you will be able to take care of your granite safely and effectively. Best PSI for Cleaning Granite Surfaces Everything about the care for granite is related to deciding what the best PSI is for cleaning granite. PSI is an acronym for pounds per square inch, and it is a measure of water pressure. The right PSI level lets you clean effectively without the risk of damage. Suggested PSI Range For the majority of outdoor granite: 1,200–2,000 PSI is the minimum for most jobs. This level is risky, but so is lower. Light Cleaning (Soft Wash) For regular maintenance cleaning: 1,200–1,500 PSI The pressure removes dirt and light stains without causing damage. Moderate Cleaning For algae, mildew, and heavier deposits: 1,500–2,000 PSI It is not uncommon to see power levels that provide better cleaning results without too much power. Avoid Too Much Pressure Extreme PSI levels can: hurt the grout, strip sealant, push water into cracks, and speed up the wear. So, you should know what the best pressure to clean granite (PSI) is for safe results. How to Clean Granite Without Damage There are several things homeowners should know about how to clean granite without damage. Pressure washing is just one of the things that needs to be done to take proper care of granite. At VJ Pressure Washing, we help you do it right.. Use Gentle Cleaners Strong chemicals may impact: sealants, surface finishes, and uniformity of color. Granite cleaners are usually the safest option. Avoid acidic products Do not use: vinegar, lemon cleansers, or strong solutions of acids. Acids can etch the finish of the stone. Rinse well. Residual film may streak and catch dirt. Fermentables and cleaners should be rinsed well, always. Re-apply sealant as necessary / when advised Outdoor granite is often treated to periodic sealing. Sealing serves to: inhibit moisture absorption, resist staining, and prolong the life of the surface. Cut Down on Debris Regularly A little maintenance can go a long way in lessening the demands for heavy cleanings. Take out regularly: leaf litter, dirt, and organic matter. This is important when you’re learning how to clean granite without breaking it. Conclusion So, is it possible to pressure wash granite? Can you pressure wash granite? In most cases, yes. Since granite is a very hard natural stone, it will generally take some pressure. Appropriate technique, though, is necessary. Can you pressure wash granite? When used with the appropriate PSI levels, nozzles, and cleaning procedures, the response is used for many types of stones, including offers clean answer to the question: Can you safely pressure wash granite? If You Know The Proper PSI to Clean Granites Surfaces, It Will Well Protect Your Granites from You’re Over Cleaning While Still Doing Great Job in Cleaning! Adhering to the tried and tested granite cleaning pressure washer advice of working in small sections, using wide-angle tips, keeping the right
What Is the Black Stuff on My Roof? 7 Causes Homeowners Miss
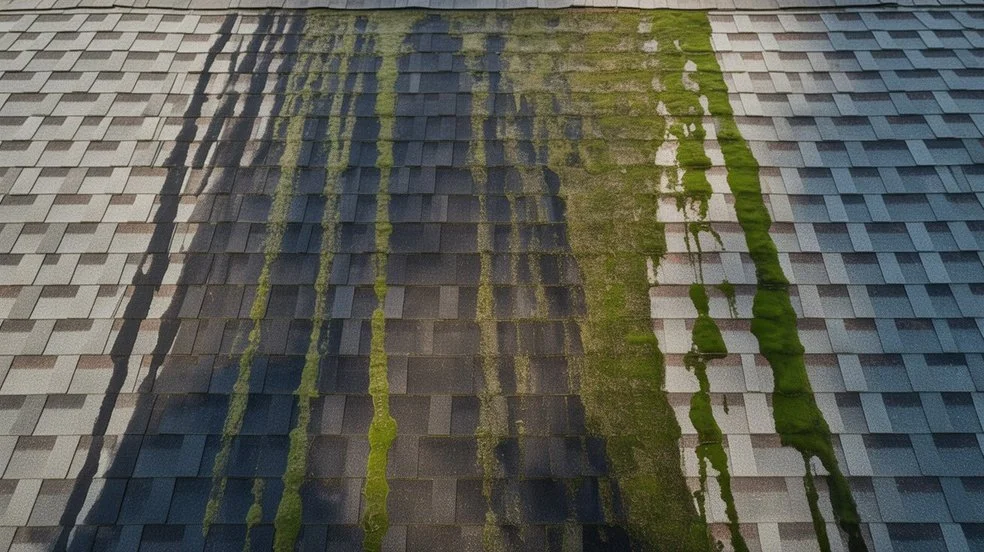
You walk outside one morning and notice dark stains creeping across your shingles. It looks dirty, maybe even a little alarming. You might think it is mold, mildew, or just built-up grime from years of rain. So what is the black stuff on my roof? In most cases, it is a living organism called Gloeocapsa Magma, a type of blue-green algae that feeds on your roofing materials. It spreads fast, looks bad, and can cause real damage if left alone. What Is the Black Stuff on a Roof? Those dark streaks are not just cosmetic. They are alive. Gloeocapsa Magma is a cyanobacteria, meaning it is part algae and part bacteria. It forms a dark, protective coating around its cells, and that coating is exactly what you see on your shingles. It typically shows up as: Dark gray or black streaks running down the slope of your roof Patches of discoloration that spread over time A dirty appearance that looks like the roof needs replacing But it is not always algae. Here is a quick breakdown of what else can cause that dark look: What You See What It Likely Is Long dark streaks Gloeocapsa Magma (algae) Fuzzy black or green patches Moss or lichen Uniform dark coating Mold or mildew Granule loss with dark areas Aging shingles Soot-like stains near edges Air pollution or debris Understanding what you are dealing with is step one. Treating the wrong problem can waste money and even damage your roof more. What Causes Black Streaks on Roofs? Roof discoloration does not happen randomly. Several factors speed it up. 1. Humidity and Moisture Algae loves moisture. If your area gets regular rainfall or morning dew, your roof stays damp long enough for algae to thrive. 2. Tree Shade Trees block sunlight. Sunlight dries out moisture. Less sun means a wetter, darker roof environment where black streaks on roof surfaces grow faster. 3. Limestone Filler in Shingles Modern asphalt shingles contain crushed limestone. It adds weight and durability, but Gloeocapsa Magma feeds on it like food. This is why newer roofs are not immune. 4. Poor Roof Ventilation When air does not circulate well under your roof, heat and moisture build up. That trapped moisture encourages algae and mold growth from the inside out. 5. Nearby Vegetation Leaves, branches, and organic debris land on your roof and decompose. That organic matter feeds algae and accelerates staining. 6. North-Facing Slopes The north side of a roof gets the least sunlight. It stays damp longer. That is why most homeowners notice roof discoloration causes are worse on one side than the other. 7. Existing Algae Spores in the Neighborhood Algae spores travel by wind. If your neighbor has it, chances are your roof will develop it too, especially if you share similar tree cover or shade patterns. Is the Black Stuff on My Roof Harmful? Yes, and in more ways than one. To Your Roof Gloeocapsa Magma eats into the limestone granules on your asphalt shingles. Over time, this degrades the shingle’s surface, reduces its UV protection, and shortens its lifespan. What looks like a cosmetic issue can become a structural one. Moss and lichen are even more aggressive. They grow roots that physically lift and crack shingles, letting water get underneath. To Your Home Damaged shingles mean less protection against rain and leaks. A roof that looks stained today could be leaking in a few years if the algae is left untreated. To Your Wallet Roof algae removal done early is far cheaper than replacing shingles or fixing water damage inside your home. Average roof replacement costs thousands. A cleaning costs a fraction of that. To Your Home’s Value Buyers notice roof stains. Real estate agents report that visible roof discoloration can reduce a home’s perceived value and make it harder to sell. How to Identify Roof Algae vs. Other Roof Problems Not every dark spot is algae. Here is how to tell the difference: Algae (Gloeocapsa Magma) Appears as long, dark streaks Usually starts near the top and runs down Color is black, dark gray, or dark green No texture when viewed up close Spreads slowly over months or years Moss Looks green and fuzzy Clumps in shaded areas Has visible plant-like structure Holds water against the shingle surface Lichen Flat, crusty patches Often gray-green or orange Harder to remove because it bonds to the shingle A mix of algae and fungus Mold or Mildew Often appears in low-ventilation zones Can spread under shingles May smell musty if you are in the attic Typically requires professional treatment Aging Shingles Granule loss creates uneven dark patches No streaking pattern Often paired with curling or cracking shingles If you are unsure, get a professional to take a look. Misidentifying the problem leads to the wrong treatment, which wastes time and money. Why DIY Roof Cleaning Can Be Risky Many homeowners see the black streaks and grab a pressure washer. That is one of the worst things you can do. High-Pressure Water Strips Shingle Granules Those granules protect your shingles from UV rays and rain. Blast them off and you shorten your roof’s life significantly. Ladders and Steep Roofs Are Dangerous Falls from roofs are among the leading causes of home accident injuries. Wet surfaces make it worse. Wrong Chemicals Cause More Damage Bleach-based products used at wrong concentrations can kill nearby plants, corrode metal flashing, and stain siding. Using too little means the algae comes back fast. DIY Methods Can Void Your Roof Warranty Many manufacturers have specific cleaning guidelines. DIY methods that go outside those guidelines can void your warranty. The smarter move is to understand what you are dealing with, then decide if it is something you can safely handle or if a professional is the right call. The Best Way to Remove Black Roof Stains The industry-recommended method is soft washing. Soft washing uses low-pressure water combined with a biodegradable cleaning solution. The solution does the heavy lifting, breaking down and killing algae,
Can a Soft Wash Damage a Roof?
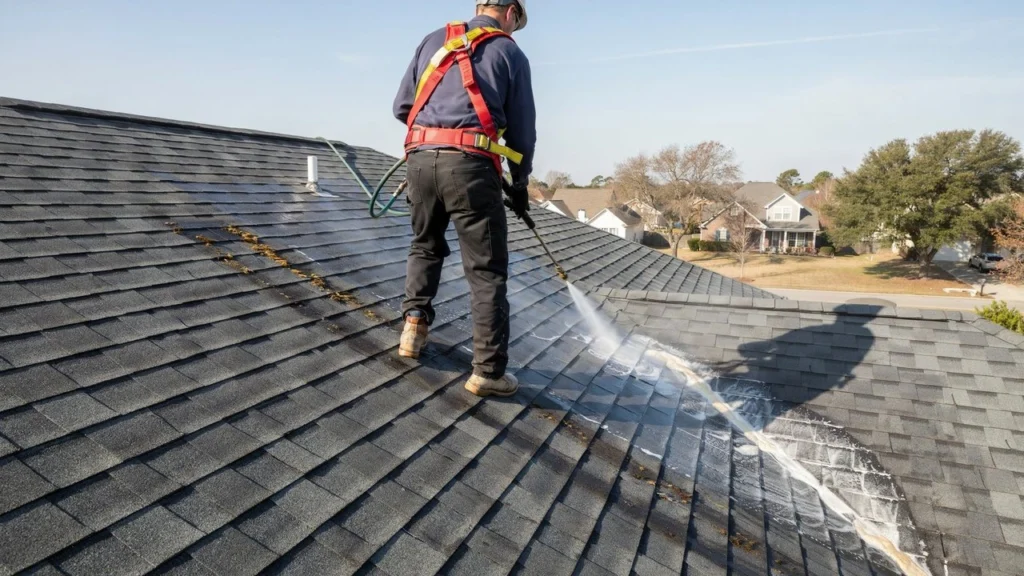
Roof cleaning is a key aspect of home upkeep. Algae, moss, lichen, and mold are just some of the contaminants that will build up on your roof and, over time, will cause degradation to the structure, around the gutters, and internally. Soft washing has gained popularity as one of the best roof cleaning methods in recent years because it is more gentle than traditional pressure washing. Still, many homebuyers face this important question: Can a soft wash damage a roof? The bottom line is soft washing is likely the safest way to clean your roof, but only if it’s done correctly. But as with any cleaning procedure, excessive application of chemicals or improper technique could cause damage. If you are interested in roof soft washing safety as well as in whether soft washing harms shingles, then you will want to familiarize yourself with safe roof cleaning tips and the risk of low-pressure roof cleaning before you decide to maintain your roof, before it maintains you. Understanding Roof Soft Washing Safety Safe roof soft washing has become a hot topic lately, but before we go there, we need to first understand why soft washing became popular to begin with. Conventional power washing may push water under shingles or shakes, and can loosen roofing materials, as well as wash off the protective granules. Such problems are avoided by cleaning at a much lower pressure with soft washing, however. Key Roof Soft Washing Safety Advantages 1. Reduced Water Pressure Soft washing normally uses water pressure that’s about the same as a garden hose. This lower pressure reduces the probability of: shingles cracking; distortion of the surface; ingress of water; damage to the building structure. 2:Effective removal of organic growth on surfaces. Cleaning solutions kill the organisms rather than blasting the algae off the surface. This helps stop rapid regrowth. 3:Longer Roof Life: Eliminating harmful pollutants can contribute to a longer life for roofing materials, especially when using a trusted roof cleaning service Tracy CA. 4:Less Physical Stress: The roof is subjected to less forceful contact than with conventional pressure washing. Soft wash advocates are a common sight in the roofing community, who argue that it is the best way to maintain a roof without causing damage. Does Soft Washing Harm Shingles? There are two things I hear homeowners worrying about all the time: Is soft washing going to damage my shingles? In general, no. Soft washing is safe for asphalt shingles when done properly. In fact, most roofing professionals would tell you it’s the safest way to remove algae and stains. Soft washing maintains the integrity of the following: Protective granules Integrity of shingles Roof appearance Water-shedding ability Because the pressure remains low, the high impact of pressure washing is not inflicted on the shingles. Situations Where Problems May Occur While soft washing is generally safe, there are situations when shingles can be damaged. 1:Too Potent Chemicals Incorrectly prepared cleaning products may also: 2:Fade shingles Impact sealants and protective coatings Speed up the deterioration of materials. 3:Old or Fragile Roofs A dying roof may have compromised shingles to begin with. In such situations, even mild cleaning should be done with caution. 4:Poor Application Techniques: Beginner users can: Oversaturate the roofing material Treat chemicals unevenly Rinse incorrectly Safe Roof Cleaning Methods Before beginning a roof cleaning project, homeowners may be concerned about safe cleaning methods and whether their roof is at risk of damage from high-pressure washing techniques. At VJ Pressure Washing, we use proven soft washing methods that effectively remove dirt, algae, and stains while protecting roofing materials from unnecessary wear and damage. 1:Soft Washing Soft washing is a low-risk method of roof cleaning that uses a combination of low-pressure water and unique detergents and cleaning additives to do the job safely. Pros Include: Fewer Physical insults Better Algae Removal Longer-lasting effects. The Benefits Manual cleaning is cleaning with a brush or hand tool to physically remove the dust or debrisAdvantages: precise cleaningwater savingless waste Disadvantage: Labor consumption can destroy the shingles if brushed too hard. 2:Air Blowing Leaf blowers are also capable of removing loose leaves and debris. Advantages: No water exposure Applies the entire treatment quickly. Removes debris quickly. Negative aspects: Limited effectiveness against algae and mold 3:Chemical Treatments A few roof care regimens employ treatments for prevention of algae growth. Advantages: Prevention in the long run Disadvantages: Needs to be administered by a professional Soft washing is a gentle and effective way to clean your roof and kill algae, amongst other things. But when considering all these safe roof cleaning methods, soft washing has got to be the most effective and most recommended. Low Pressure Roof Cleaning Risks Soft washing is safe, but there are some risks when it comes to low-pressure roof cleaning that every homeowner should know of. Knowledge of these dangers enables one to take proper precautions. 1:Chemical Exposure: Very low-pressure wash solution products can affect: Plants Landscaping Grass Flowers Plants close by. With Adequate Rinsing and Protection of the Plants, the risk can be minimized. Roof saturation Overwatering can also lead to moisture problems. Professional technicians prevent over-saturation by applying products in a controlled manner. Incomplete Rinsing Detergents can cause discoloration and staining if left on the surface for too long. So rinse the surface properly. Risk of Falling Professional roof cleaners will usually use safety equipment to reduce accidents.So, here are a few of the biggest low-pressure roof cleaning risks that homeowners should be aware of. Conclusion So, Can the Soft Wash Damage Roofs? Typically, the answer is no. When done properly, soft washing is one of the safest and most effective roof cleaning methods available. Good roof soft washing safety awareness will help homeowners keep their roofs clean without putting shingles through the perils of power washing. For the record, does soft washing damage shingles, or is it double roof washing? Soft washing is a significant viable option in today’s methods of safe roof cleaning for removing algae, mold, and stains without causing
What Are the Three Methods of Washing? A Complete Guide
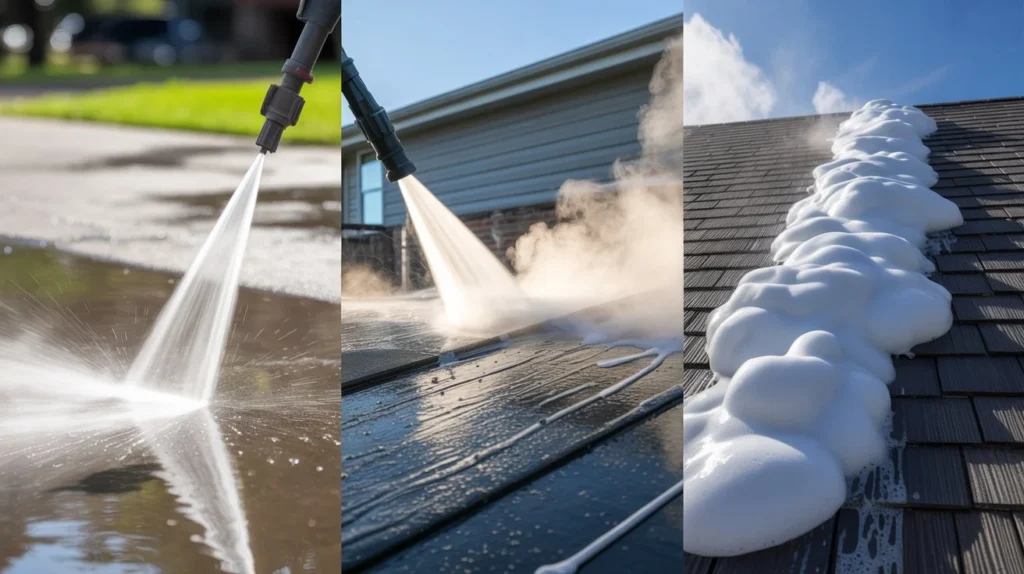
When it comes to cleaning the outside of your home, not all washing methods work the same way. Some surfaces need gentle care. Others need serious force. Picking the wrong method can damage your property or waste your money. That’s why knowing your options matters before you start. So, what are the three methods of washing? They are pressure washing, power washing, and soft washing. Each one works differently and suits different surfaces. This guide breaks all three down in simple terms so you can make the right call. Understanding Different Washing Methods Most homeowners don’t think much about exterior cleaning until things look bad. By then, dirt, mold, and algae have already done damage beneath the surface. Exterior washing isn’t just about looks. It protects your siding, driveway, roof, and deck from long-term wear. Moisture, organic growth, and grime all break down surfaces over time. Regular cleaning stops that from happening. If you live in the Tracy area, house washing Tracy CA is something many locals are now taking seriously. VJ Pressure Washing works with homeowners across the region to find the right washing method for every surface type and condition. Understanding washing ingress is also important here. Washing ingress refers to how water penetrates surfaces during cleaning. The wrong pressure or angle can push water into walls, windows, or gaps, causing moisture damage inside your home. Knowing this helps you avoid costly mistakes. Method #1 – Pressure Washing What Is Pressure Washing? Pressure washing uses cold water at very high pressure to blast away dirt and grime. The machine forces water through a narrow nozzle at high speed. That force does all the heavy lifting. Pressure levels are measured in PSI (pounds per square inch). Most pressure washers used for home cleaning run between 1,500 and 3,000 PSI. What Surfaces Work Best? Pressure washing works great on hard, durable surfaces like: Concrete driveways Brick walls Stone pathways Wooden decks (with care) Fences When Should You Use It? Use pressure washing when you are dealing with heavy buildup. Tire marks on concrete, mud on brick, or years of grime on a patio all respond well to high-pressure cold water. It is also the go-to method for driveways and sidewalks that take a beating from daily traffic and weather. What to Watch Out For Cold water pressure washing does not kill mold or bacteria. It removes visible dirt, but organic growth can return fast if not treated. Also, using too much pressure on softer surfaces like wood siding can strip paint or cause cracks. Method #2 – Power Washing What Is Power Washing? Power washing works just like pressure washing with one key difference. It uses heated water. That heat makes a big difference when dealing with grease, oil, mold, and tough biological stains. Think of it like washing dishes. Hot water cuts through grease faster than cold. The same idea applies to your driveway or exterior walls. What Surfaces Work Best? Power washing is ideal for: Driveways with oil stains Commercial parking lots Industrial equipment Heavily soiled concrete Surfaces with mold or mildew buildup When Should You Use It? Use power washing when regular pressure washing isn’t enough. If you have grease stains from vehicles, stubborn mold, or thick grime that has built up over years, heated water will break it down more effectively. This is also where code 3 power washing comes into play. Code 3 power washing refers to high-intensity cleaning jobs that require maximum heat, pressure, and sometimes chemical treatments together. It’s reserved for the toughest cleaning situations, often in commercial or industrial settings where standard methods just won’t cut it. What to Watch Out For The heat from power washing can damage certain surfaces. Soft wood, older paint, and some types of siding can warp or peel if exposed to high-temperature water. Always check whether your surface can handle heat before choosing this method. Method #3 – Soft Washing What Is Soft Washing? Soft washing uses low pressure and cleaning solutions to remove dirt, algae, mold, and mildew. The pressure is low enough that it won’t damage delicate surfaces. The cleaning agents do the real work instead of force. Soft washing solutions typically contain biodegradable chemicals that kill organic growth at the root. This means results last much longer than pressure or power washing alone. What Surfaces Work Best? Soft washing is the right choice for: Roof shingles Vinyl siding Stucco Wood siding Painted surfaces Gutters Screened enclosures When Should You Use It? Use soft washing when the surface is delicate or when you want longer-lasting results. Roofs, for example, should never be pressure washed. The force can lift shingles and void your warranty. Soft washing cleans the surface and kills the organisms causing the staining without causing damage. What to Watch Out For The cleaning solutions need time to work. Soft washing is not instant. You also need to make sure the chemicals used are safe for your plants and landscaping. A professional will rinse surrounding areas and use plant-safe solutions to avoid damage. Comparing the Three Washing Methods Here’s a quick side-by-side look: Feature Pressure Washing Power Washing Soft Washing Water Temperature Cold Hot Cold Pressure Level High High Low Uses Chemicals Sometimes Sometimes Yes Best For Hard surfaces Grease & heavy grime Delicate surfaces Kills Mold at Root No Partially Yes Risk of Damage Medium Medium-High Low How to Choose the Right Washing Method Choosing the right method comes down to three things: surface type, level of dirt, and what results you want. Choose pressure washing if: You have a concrete driveway, brick patio, or stone path The dirt is heavy but not greasy You want a fast, effective clean Choose power washing if: You have oil or grease stains The buildup is extreme and long-standing You are cleaning a commercial or industrial surface Choose soft washing if: You are cleaning a roof, siding, or painted surface You want results that last longer You want to kill mold and algae at
What Is the Difference Between Washing and Cleaning? A Complete Guide
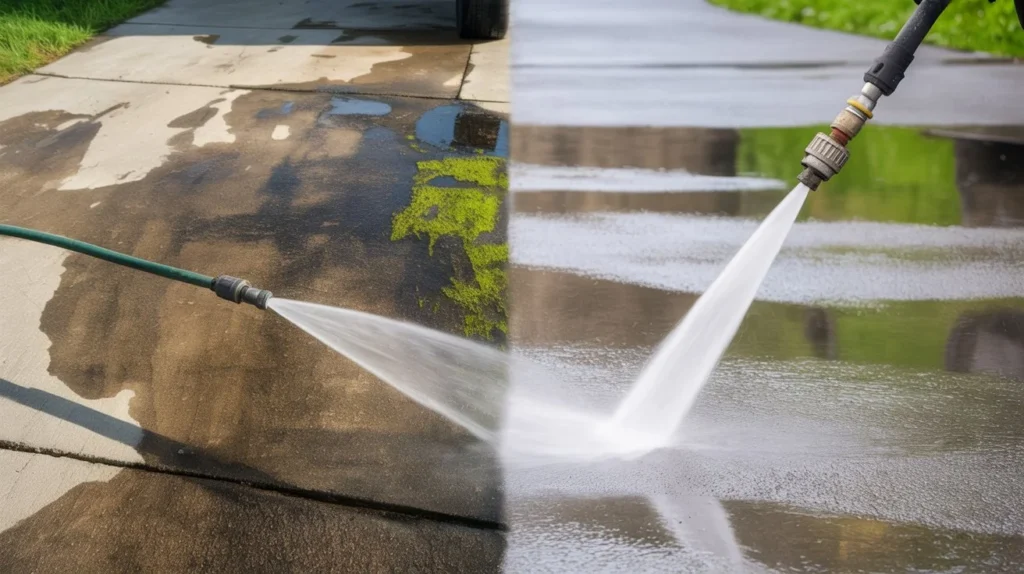
You rinse your hands and call it done. But is that washing or cleaning? Most people use these words like they mean the same thing. They don’t. Washing removes visible dirt using water. Cleaning goes further. It removes bacteria, allergens, stains, and buildup that water alone can’t touch. Think of washing as step one and cleaning as the full job. So, what is the difference between washing and cleaning? Washing is about rinsing and removing loose debris. Cleaning restores a surface to a safe, healthy, and fully treated state. Both matter, but they serve different purposes. Knowing which one you need can save you time, money, and real headaches. What Does Washing Mean? Washing means using water, sometimes with a mild soap, to remove dirt from a surface. It is a physical process. You are pushing grime away, not destroying it. When you hose down your driveway, you are washing it. When you rinse mud off your boots, that is washing too. Water does the heavy lifting here. Washing works well for light surface dirt. But it has real limits. It does not kill germs. It does not remove embedded stains or grease that has soaked into a surface. It leaves behind biofilm, mold spores, and microscopic buildup that water simply cannot touch. Common examples of washing include: Rinsing a plate under the faucet Spraying down a car before a proper wash Hosing mud off a patio or walkway Rinsing a surface before applying a cleaning product Washing is often just prep work. A surface that has been washed is ready to be cleaned properly. What Does Cleaning Mean? Cleaning means removing contaminants that affect health, appearance, and surface integrity. It goes beyond water and loose dirt. Cleaning uses detergents, degreasers, or pressure to break down and remove what washing leaves behind. When you clean a bathroom sink, you remove soap scum, bacteria, hard water deposits, and germs. When a pressure washing company cleans a driveway, they remove oil stains, mold, algae, and deep grime that has bonded to the concrete. Cleaning is a complete process. It makes a surface safe, hygienic, and visually restored. Key goals of cleaning include: Removing bacteria and allergens Breaking down grease, oil, and organic buildup Eliminating mold, mildew, and algae Restoring a surface to its original condition Preventing long-term damage from embedded debris Key Differences Between Washing and Cleaning Here is where it gets practical. What is the difference between washing and cleaning in everyday use? Let’s break it down clearly. 1. Depth of Action Washing removes what sits on top. Cleaning removes what has bonded to the surface. A washed patio still has algae in the pores. A cleaned patio has had the algae treated and fully removed. 2. Products Used Washing uses water and maybe a light soap. Cleaning uses specialized products. Degreasers, disinfectants, surfactants, and pressure washing detergents are all chosen based on the contaminant, not just the surface. 3. Time and Effort Washing is fast. You run water over something, and you are done. Cleaning takes time. You apply the right product, let it dwell, agitate it, then rinse. Skipping any step means the surface is still not clean. 4. Results and Longevity A washed surface gets dirty again quickly. A cleaned surface stays cleaner longer because the source of the problem has been removed, not just disturbed. Proper cleaning also protects materials and extends surface life. 5. Health and Safety Impact Washing may not remove pathogens at all. Cleaning, with the right products and technique, actively reduces health risks. This matters most for kitchens, bathrooms, children’s play areas, and high-traffic outdoor surfaces. Is Washing the Same as Deep Cleaning? No. Not even close. Deep cleaning goes beyond both regular washing and standard cleaning. It addresses what neither can reach. Deep cleaning means getting into cracks, removing buildup that has formed over months or years, and treating surfaces at the pore level using professional-grade equipment or products. A regular cleaning might handle visible dirt on your deck. Deep cleaning removes years of embedded mold, weathered stain, and structural grime. It restores the surface to near-original condition. Here is a simple breakdown of the three levels: Washing: removes loose surface debris using water Cleaning: removes contaminants using products and technique Deep Cleaning: removes embedded buildup and restores surfaces to baseline condition Most exterior surfaces need deep cleaning at least once per year. Driveways, siding, and roofs accumulate damage faster than most homeowners realize. Washing vs. Cleaning for Exterior Surfaces Outdoor surfaces face a different level of exposure. Rain, sun, traffic, organic growth, and pollution all take a toll. This is where the difference between washing and cleaning becomes most visible. Driveways and Concrete A garden hose washes mud and dust from a driveway. But concrete is porous. Oil, fertilizer runoff, mold spores, and algae sink into those pores. Surface washing does not reach them. Pressure washing with the right detergent breaks down and lifts those contaminants out. Home Siding Vinyl and painted siding collect chalking, mildew, and spider webs. Rinsing with water moves some of it around. Proper soft washing applies a low-pressure detergent solution that kills mold and lifts grime without damaging the surface. Decks and Wood Surfaces Wood is vulnerable to mold, rot, and UV damage. Washing a deck with a hose does nothing for the gray, oxidized layer or the mildew growing in the grain. A proper cleaning with a deck brightener and controlled pressure restores color and prevents further decay. Roofs High-pressure washing can damage shingles and void warranties. Proper roof cleaning uses low-pressure soft washing with algaecide solutions. This kills the organism causing those black streaks and removes it safely. Why Professional Pressure Washing Companies Focus on Cleaning Most homeowners think pressure washing is just washing with more force. It is not. VJ Pressure Washing is in the business of cleaning, not rinsing. Pressure alone moves debris. It does not kill mold, treat algae, or remove oily film. That is why professionals use the right